Unison:Installation Instructions
Jump to navigation
Jump to search
This document will guide you through the process of installing Unison on an Ubuntu server.
Minimum System Requirements
- Ubuntu 20.04
- 32GB RAM
- 2TB disk space
- 16 CPU Cores
- User with Root or Sudo permissions
Pre-Install
Melissa will provide clients with a downloadable zip file that contains all of the files needed to install Unison. It is recommended to have a method of extracting the zip file’s contents. In this example, we will use the “unzip” utility. You can install this by running “sudo apt-get install unzip”.
System Access Requirements
In order for the install to perform its activities it will need internet access and connections to various servers. Along with the standard apt repository it also needs access to:
- http://ppa.launchpad.net/ansible/ansible/ubuntu (to install Ansible)
- https://baltocdn.com/helm/stable/debian/ (to install Helm)
- ucr.melissadata.net (to install Melissa Software)
- docker.io (to install various supporting packages needed)
- ghcr.io (to install Keda autoscaling)
- docker.elastic.co (to install Docker)
- k8s.gcr.io (for NFS mounts)
- public.ecr.aws (to install Redis)
- quay.io (for Argo administration)
- pkgs.k8s.io (for Kubernetes install)
- download.opensuse.org (for older CRIO builds)
Installation Steps
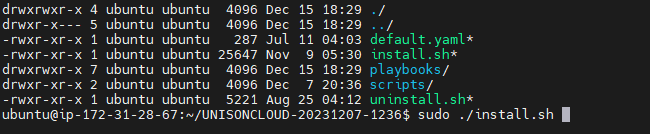
- Copy the Unison zip file to somewhere convenient on your server. I am using the home directory for the currently logged in user.
- Unzip the Unison zip File.
- Ex:
unzip UNISONCLOUD-20231207-1236.zip
- Ex:
- Navigate to the extracted directory.
- Ex:
cd UNISONCLOUD-20231207-1236
- Ex:
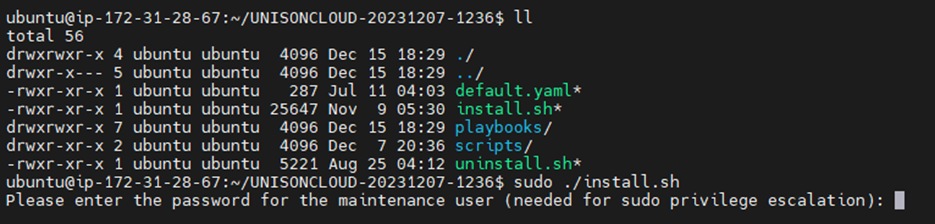
- Run the install.sh script with sudo permissions.
- Ex:
sudo ./install.sh
- Ex:
- Enter the password for the current user with sudo permissions.
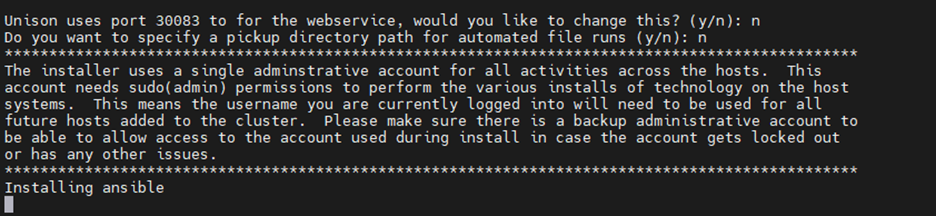
- (Optional) By default Unison uses port 38083, if you wish you can change it now by typing
yand hitting enter. Otherwise typento keep the default value. - Wait for Installation of Ansible to complete.
- (Optional) You can specify a pickup directory for automated file runs by typing
yand hitting enter. Otherwise typenif you are not planning on using automated runs. - (Optional) You can add additional machines to the cluster if you wish by typing
yand hitting enter. Otherwise typenif you are only using one machine. - The installation is complete when you see the instructions to head to the browser.
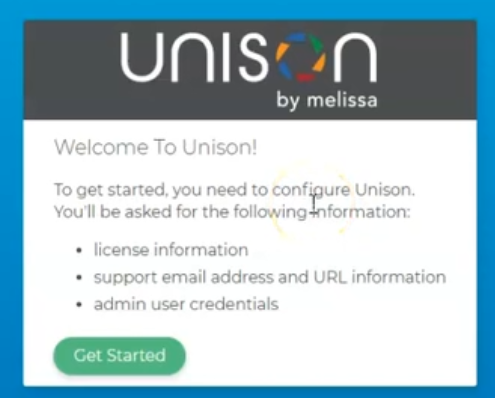
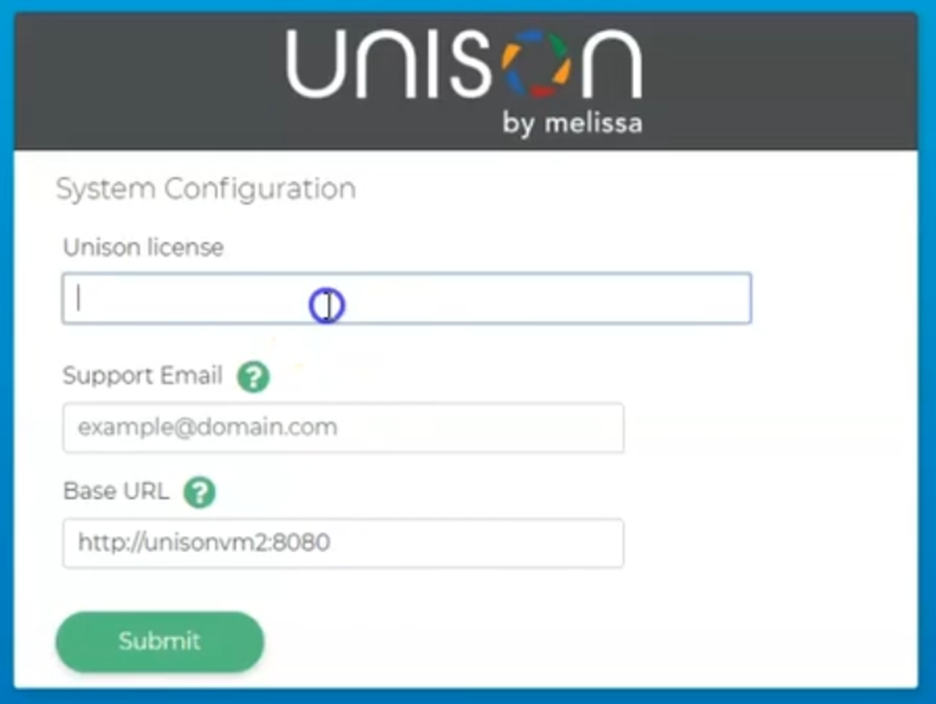
- Navigate to the link provided in step #10 and click the “Get Started” button to complete the setup.
- Enter a License Key (This key is provided after the Unison Service is purchased.)
- Enter a support email.
- Enter a new Base URL if needed.
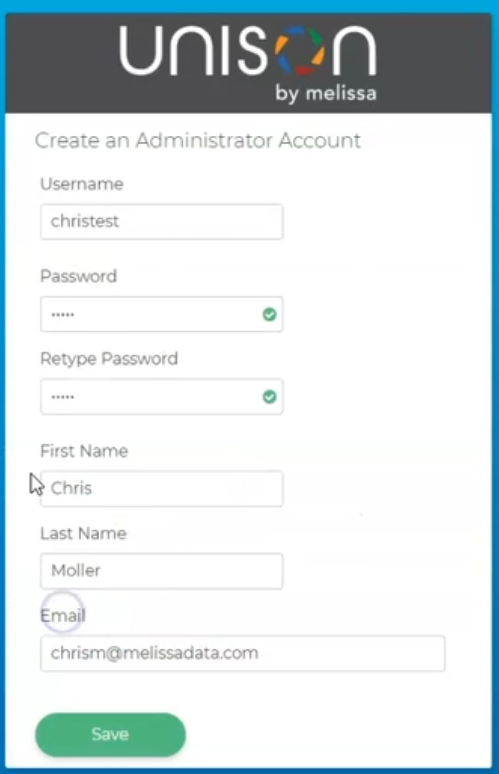
- Next, Setup an Admin Account.
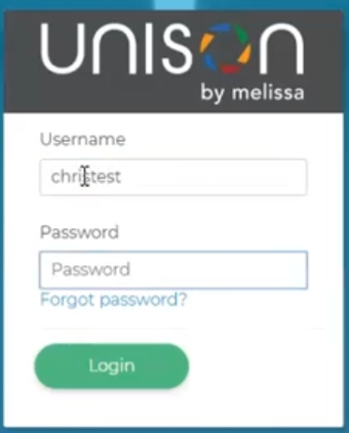
- Login with the account created.
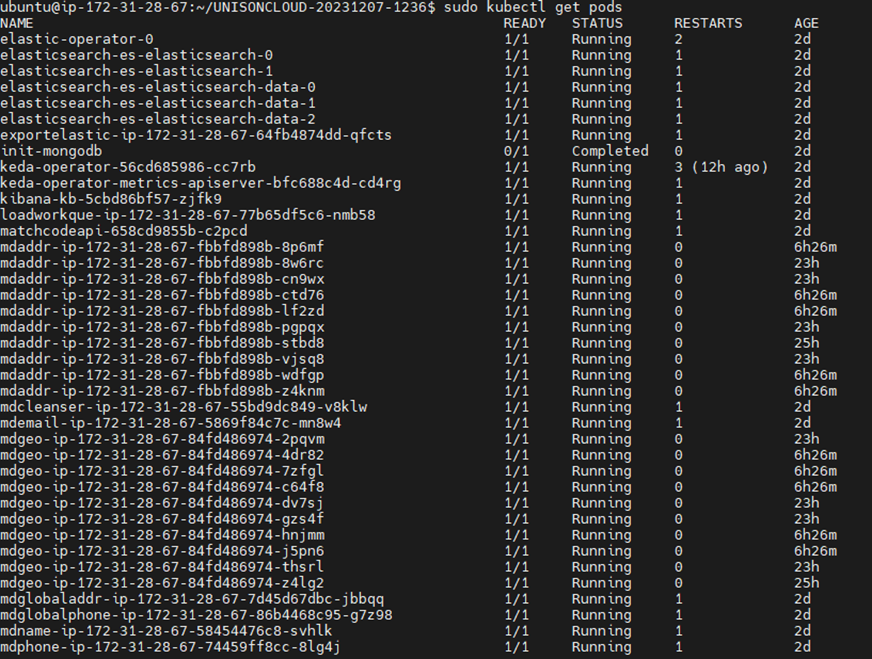
- Check all services are up with kubectl get pods.
sudo kubectl get pods