This wiki is no longer being updated as of December 10, 2025.
|
Magento Plugin:Installation: Difference between revisions
No edit summary |
No edit summary |
||
| Line 8: | Line 8: | ||
==Sign Up== | ==Sign Up== | ||
First, you need to sign up for the plugin. Go to http://www.melissadata.com/dqt/magento.htm and choose "Try It" or "Buy It", depending on what you want. | 1. First, you need to sign up for the plugin. Go to http://www.melissadata.com/dqt/magento.htm and choose "Try It" or "Buy It", depending on what you want. | ||
A Melissa Data account is required at this point. You will be prompted to log in or create a Melissa Data account if you don’t already have one. You will receive an email with your license string and instructions on how to download the plugin from Melissa Data’s FTP site. | A Melissa Data account is required at this point. You will be prompted to log in or create a Melissa Data account if you don’t already have one. You will receive an email with your license string and instructions on how to download the plugin from Melissa Data’s FTP site. | ||
| Line 14: | Line 14: | ||
==Download== | ==Download== | ||
Download the plugin by clicking the link sent to you in your email. Save the plugin to a folder of your choice. | 2. Download the plugin by clicking the link sent to you in your email. Save the plugin to a folder of your choice. | ||
==Login== | ==Login== | ||
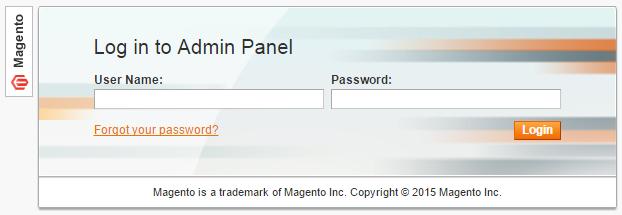
Login to the Magento Admin Panel with the name "admin" and your administrator password. | 3. Login to the Magento Admin Panel with the name "admin" and your administrator password. | ||
[[File:Magento_LoginAdmin.png|link=]] | [[File:Magento_LoginAdmin.png|link=]] | ||
| Line 24: | Line 24: | ||
==Magento Connect Manager== | ==Magento Connect Manager== | ||
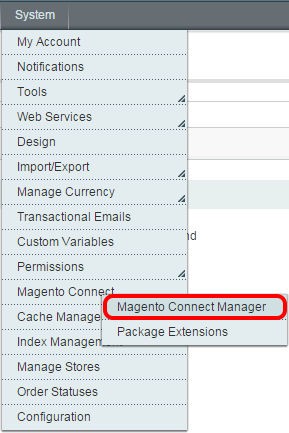
Once logged in, navigate to the Magento Connect Manager. This is located under '''System''' | '''Magento Connect''' | '''Magento Connect Manager'''. | 4. Once logged in, navigate to the Magento Connect Manager. This is located under '''System''' | '''Magento Connect''' | '''Magento Connect Manager'''. | ||
[[File:Magento_ConnectionManager_Menu.png|link=]] | [[File:Magento_ConnectionManager_Menu.png|link=]] | ||
| Line 33: | Line 33: | ||
==Upload== | ==Upload== | ||
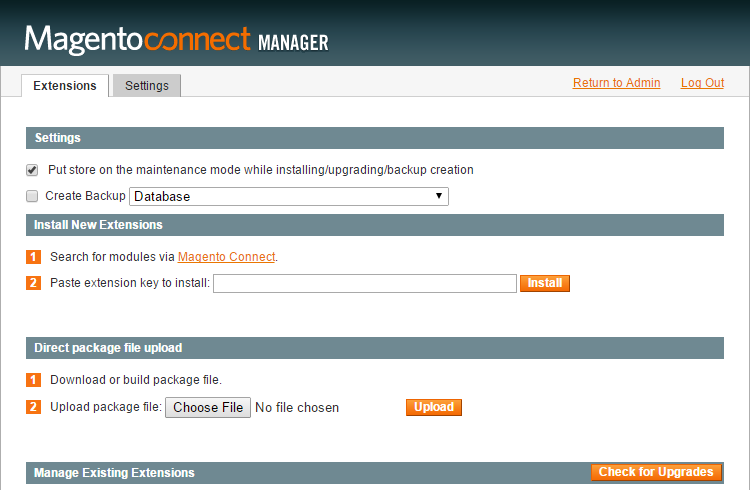
Under the heading '''Direct package file upload''', click the '''Choose File''' button and navigate to the location where you saved the plugin from [[#Download|Download]]. | 5. Under the heading '''Direct package file upload''', click the '''Choose File''' button and navigate to the location where you saved the plugin from [[#Download|Download]]. | ||
Then click the '''Upload''' button. | Then click the '''Upload''' button. | ||
| Line 41: | Line 41: | ||
==Verfiy== | ==Verfiy== | ||
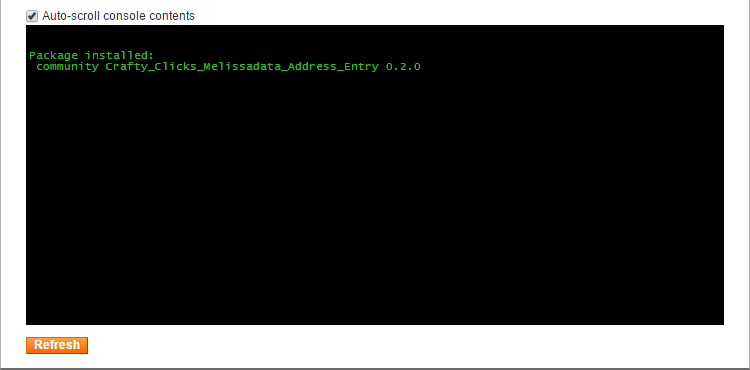
Once the file is done uploading, the page should scroll to the bottom and a console will indicate that the package is installed: | 6. Once the file is done uploading, the page should scroll to the bottom and a console will indicate that the package is installed: | ||
[[File:Magento_Verify.png|link=]] | [[File:Magento_Verify.png|link=]] | ||
Revision as of 23:23, 30 March 2015
| Magento Plugin Navigation | ||||
|---|---|---|---|---|
| ||||
| Tutorial |
Follow the steps below to install the Magento plugin.
Sign Up
1. First, you need to sign up for the plugin. Go to http://www.melissadata.com/dqt/magento.htm and choose "Try It" or "Buy It", depending on what you want.
A Melissa Data account is required at this point. You will be prompted to log in or create a Melissa Data account if you don’t already have one. You will receive an email with your license string and instructions on how to download the plugin from Melissa Data’s FTP site.
Download
2. Download the plugin by clicking the link sent to you in your email. Save the plugin to a folder of your choice.
Login
3. Login to the Magento Admin Panel with the name "admin" and your administrator password.

Magento Connect Manager
4. Once logged in, navigate to the Magento Connect Manager. This is located under System | Magento Connect | Magento Connect Manager.


Upload
5. Under the heading Direct package file upload, click the Choose File button and navigate to the location where you saved the plugin from Download.
Then click the Upload button.

Verfiy
6. Once the file is done uploading, the page should scroll to the bottom and a console will indicate that the package is installed:

You should now be ready to set up your plugin by following the steps in Configuration.