This wiki is no longer being updated as of December 10, 2025.
|
Pentaho:Hadoop Tutorial: Difference between revisions
No edit summary |
No edit summary |
||
| Line 10: | Line 10: | ||
==Setup== | ==Setup== | ||
Set up your hadoop distribution for Pentaho. For all major Hadoop distributions in Pentaho/Hadoop see: https://help.pentaho.com/Documentation/6.1/0H0/070/030 | |||
===Configuration Files=== | ===Configuration Files=== | ||
Copy all the configuration files from the cluster and place it in the appropriate Pentaho Hadoop shims folder under <code>C:\Pentaho\design-tools\data-integration\plugins\pentaho-big-data-plugin\hadoop-configurations</code> in windows. | Copy all the configuration files from the cluster and place it in the appropriate Pentaho Hadoop shims folder under <code>C:\Pentaho\design-tools\data-integration\plugins\pentaho-big-data-plugin\hadoop-configurations</code> in windows. | ||
| Line 31: | Line 33: | ||
===Login=== | ===Login=== | ||
Login to Hue as <code> | Login to Hue as <code>hdfs</code>. You may need to create the user <code>hdfs</code> and add it to the superuser group. | ||
[[File:PENT_Hadoop_02.png|link=]] | [[File:PENT_Hadoop_02.png|link=]] | ||
| Line 56: | Line 58: | ||
===Copy=== | ===Copy=== | ||
The full Melissa Data plugin needs to be copied to <code>HDFS</code>. It will located under <code>opt/pentao/mapreduce/{pentaho-shim name 6.1hdp22}/plugins/steps</code>. | The full Melissa Data plugin needs to be copied to <code>HDFS</code>. It will be located under <code>opt/pentao/mapreduce/{pentaho-shim name 6.1hdp22}/plugins/steps</code>. | ||
In the <code>C:\Pentaho\design-tools\data-integration\plugins\pentaho-big-data-plugin</code> there is file called <code>plugin</code>. Open that file and make sure the property <code>pmr.kettle.dfs.install.dir=/opt/pentaho/mapreduce</code> is there or uncommented. | In the <code>C:\Pentaho\design-tools\data-integration\plugins\pentaho-big-data-plugin</code> there is file called <code>plugin</code>. Open that file and make sure the property <code>pmr.kettle.dfs.install.dir=/opt/pentaho/mapreduce</code> is there or uncommented. | ||
| Line 78: | Line 80: | ||
===Create Transformation=== | ===Create Transformation=== | ||
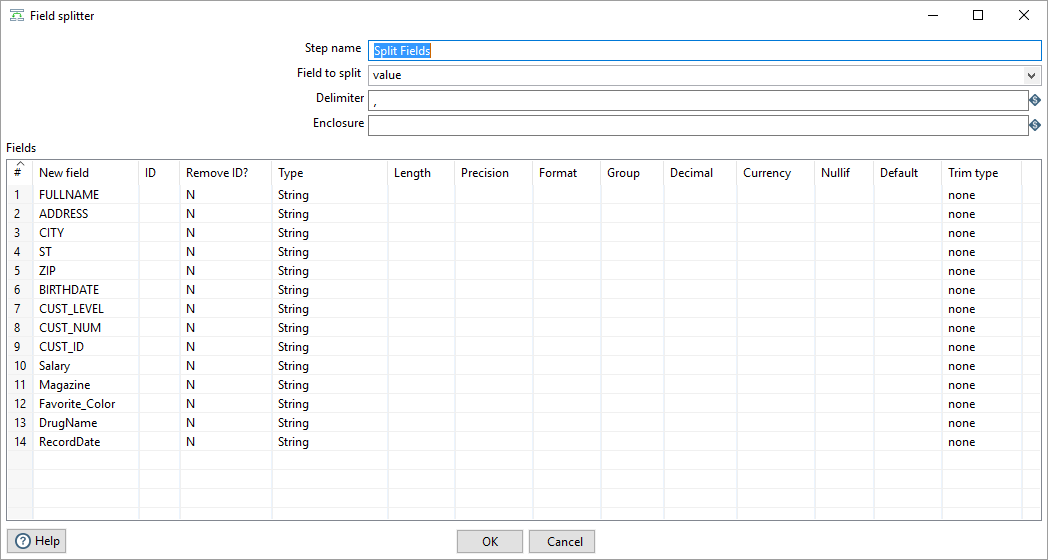
In Pentaho create a new transformation for a job you’re trying to run. Here is an example of Match Up transformation for Hadoop. You must define in the field splitter the '''Field Names'''. They must be the same as the | In Pentaho create a new transformation for a job you’re trying to run. Here is an example of Match Up transformation for Hadoop. You must define in the field splitter the '''Field Names'''. They must be the same as the column names from the CSV file or database. | ||
[[File:PENT_Hadoop_08.png|link=]] | [[File:PENT_Hadoop_08.png|link=]] | ||
Revision as of 00:10, 19 January 2017
← Data Quality Components for Pentaho
Overview
The following steps will guide you in a basic Hadoop distribution for Pentaho.
For more details on a Pentaho/Hadoop setup for all major Hadoop distributions, please see the following link: https://help.pentaho.com/Documentation/6.1/0H0/070/030.
Setup
Set up your hadoop distribution for Pentaho. For all major Hadoop distributions in Pentaho/Hadoop see: https://help.pentaho.com/Documentation/6.1/0H0/070/030
Configuration Files
Copy all the configuration files from the cluster and place it in the appropriate Pentaho Hadoop shims folder under C:\Pentaho\design-tools\data-integration\plugins\pentaho-big-data-plugin\hadoop-configurations in windows.
It’s important during the setup that you change the mapredsite.xml file in both the cluster and local to add the property mapreduce.app-submission.cross-platform to true.
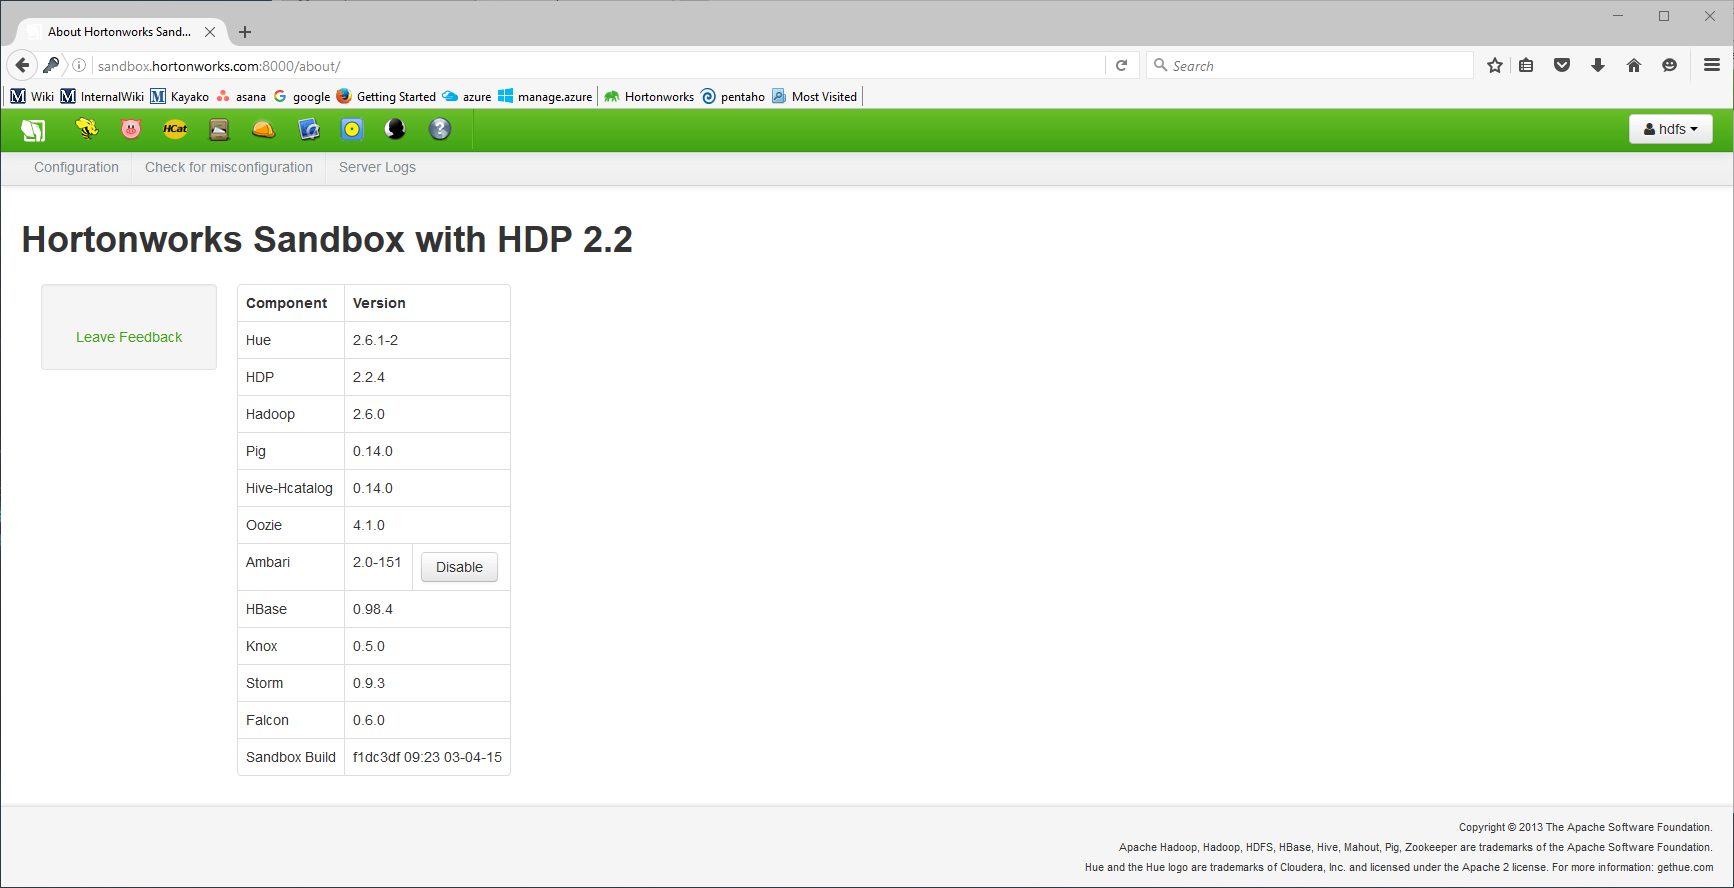
We are using a HDP22 HortonWorks distribution but it should be similar for others.
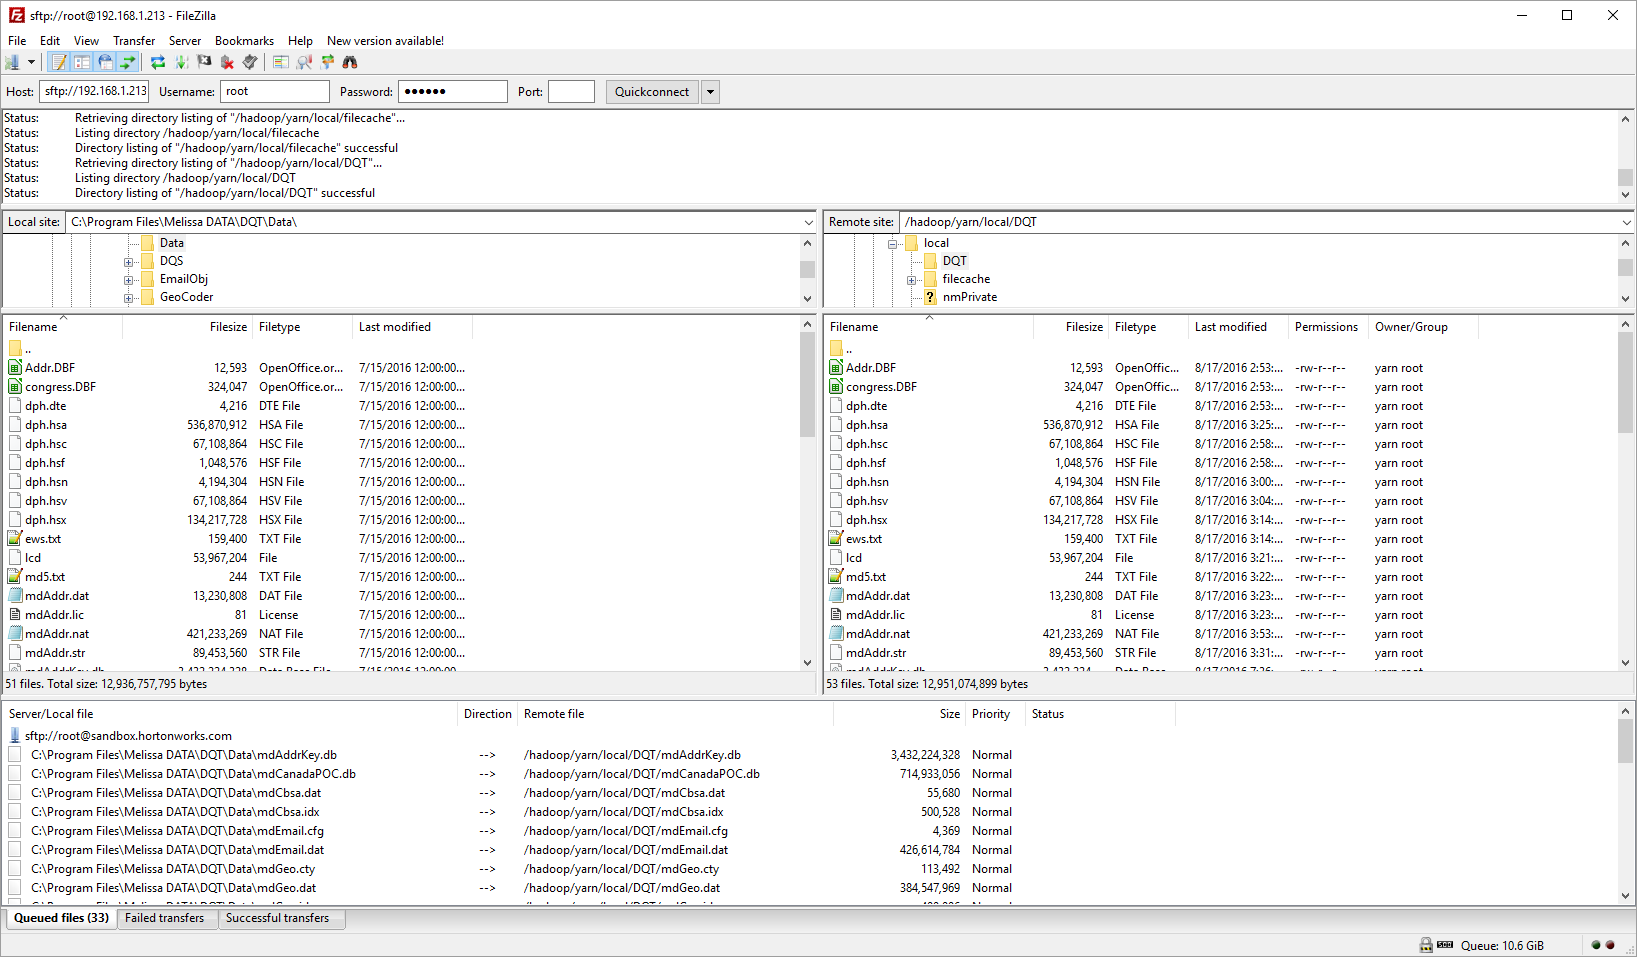
Data Copy
On each node there needs to be a copy of the data. Login using ssh and create a directory /hadoop/yarn/local/DQT/data. /hadoop/yarn/local/usercache/<user>/... is the location that Hadoop copies the jar and other files to run the jobs, so /hadoop/yarn/local/DQT/data should be accessible by all users.
Creating Directories
We will create directories in HDFS using HUE(GUI) but you can create directories and push files to HDFS from the command line if you choose to do so using the bin/hadoop fs or the bin/hdfs dfs command. Visit Hadoop’s website for the command line guide.
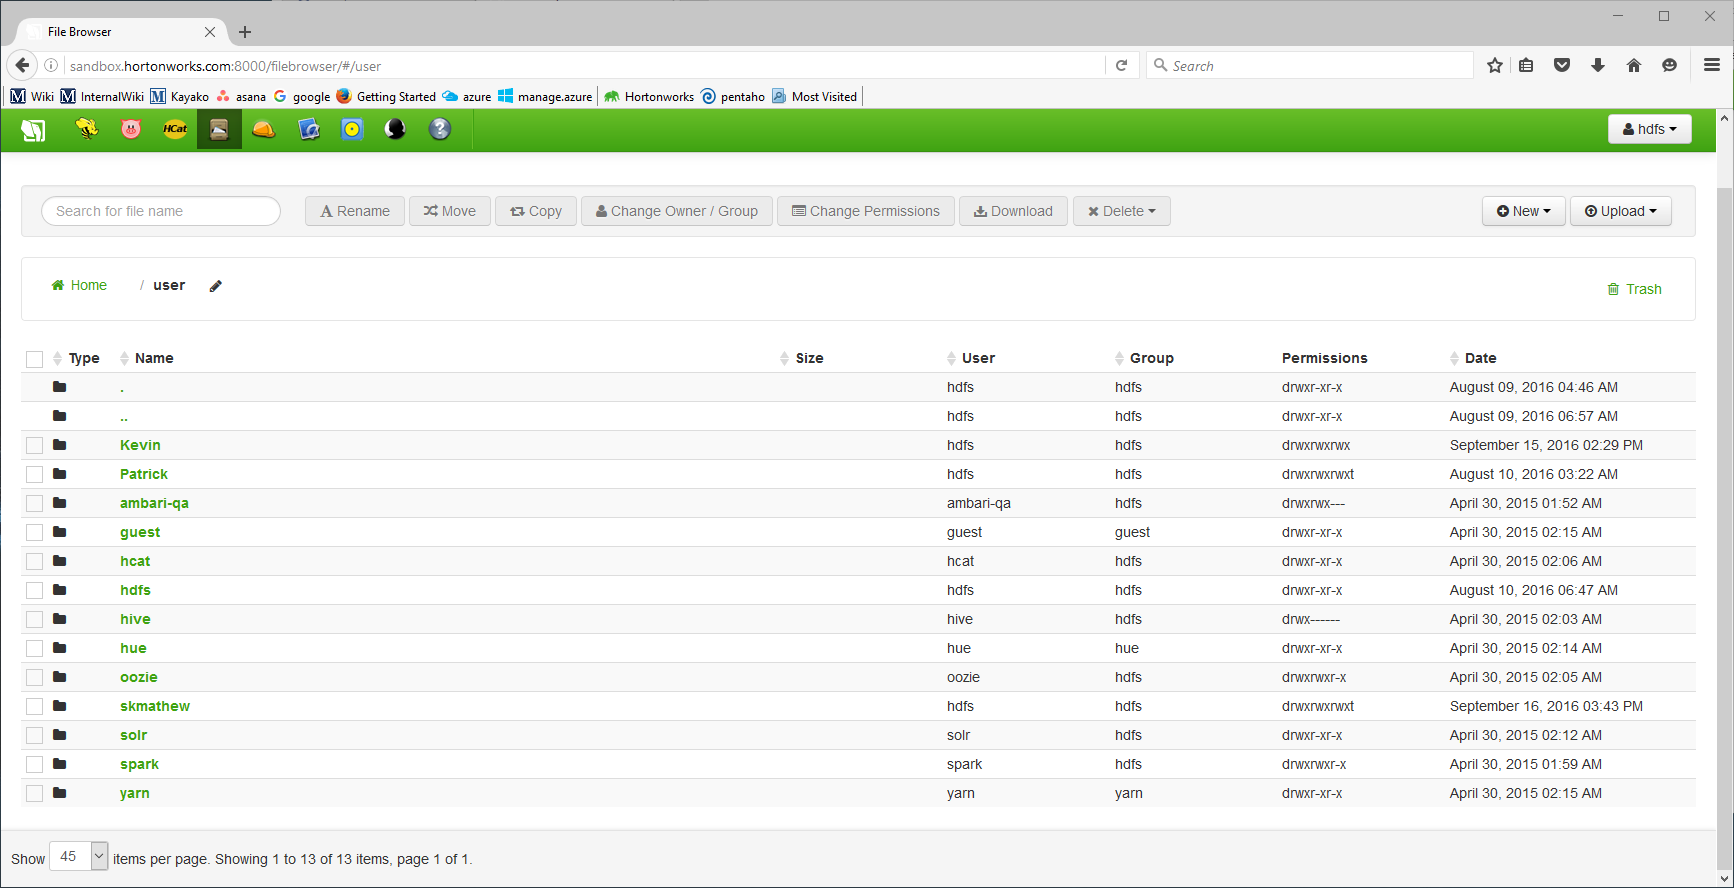
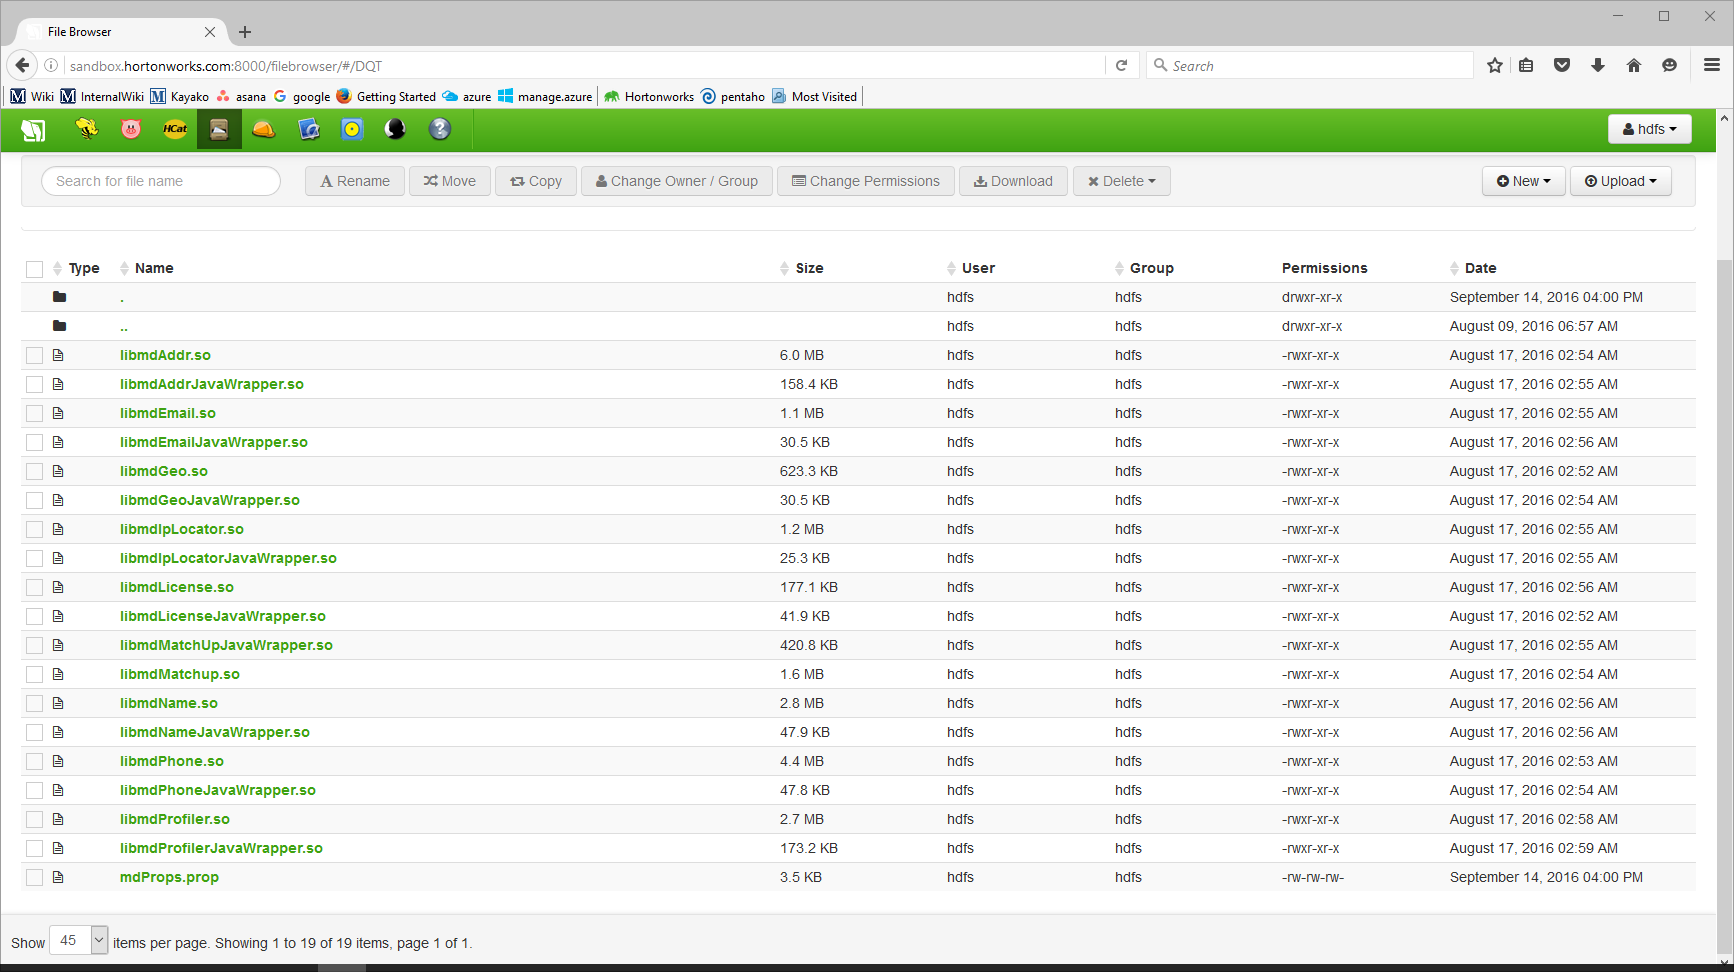
Login
Login to Hue as hdfs. You may need to create the user hdfs and add it to the superuser group.
Create Folders
In the user directory in HDFS create a folder with the same name as the username for the computer.
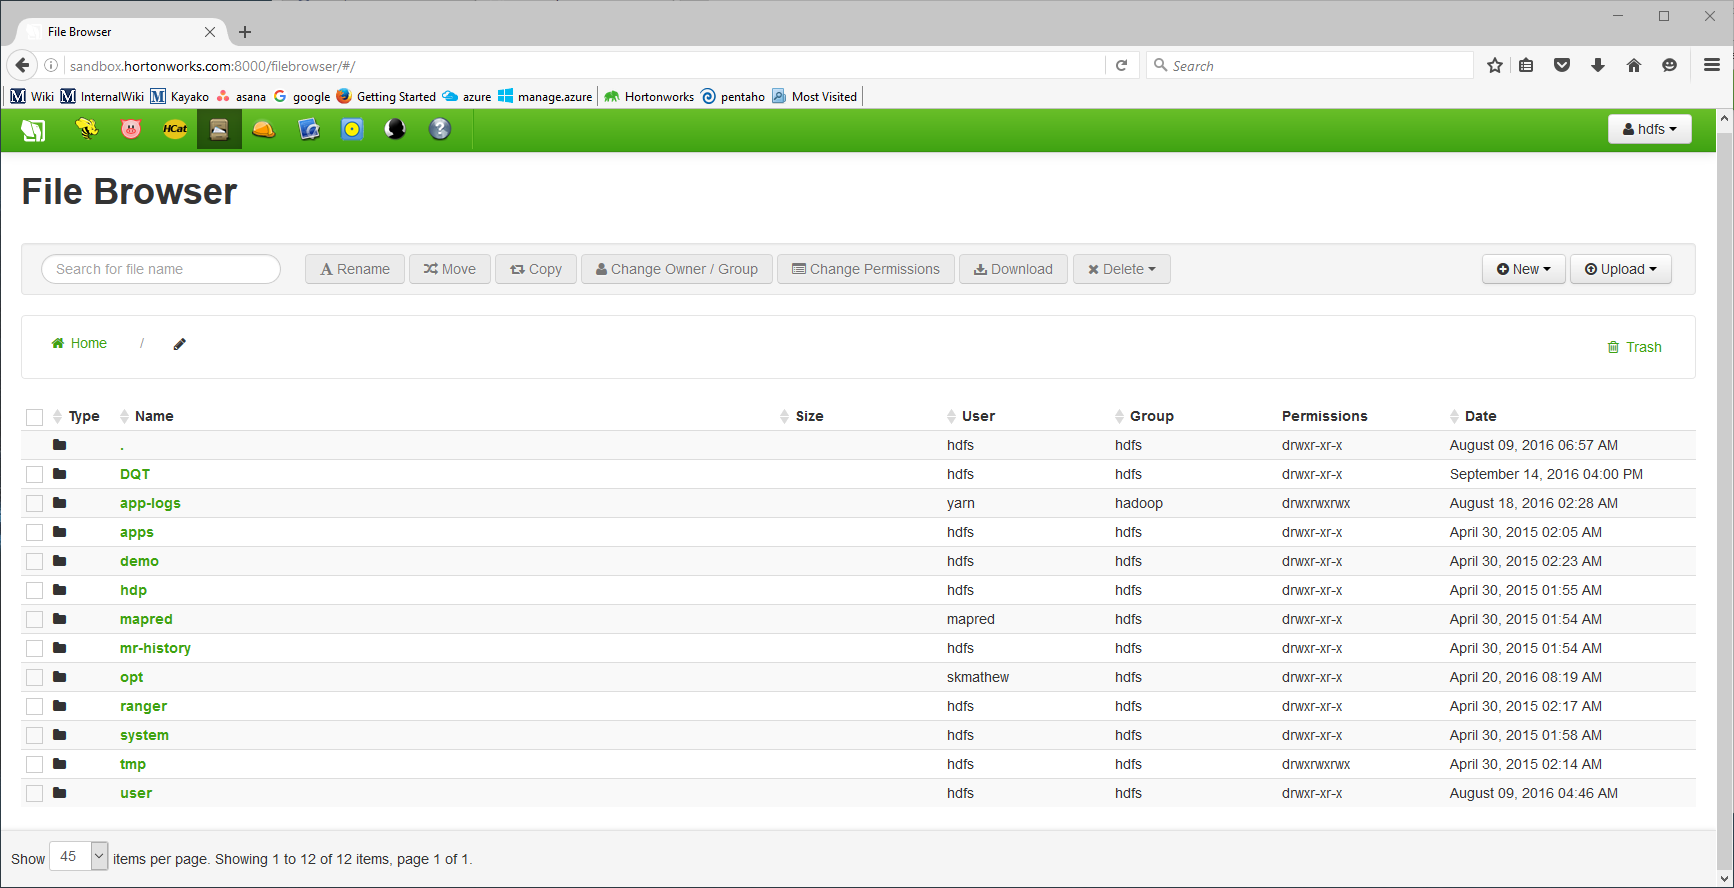
Create a folder named opt in the main directory of HDFS. Create a new dir to hold native objects on the HDFS. The location and name we use here is /DQT.
Upload
Upload the appropriate object files (64 or 32 bit - .so for linux and .dll windows) to the newly created location.
Upload a copy of your mdProps.prop file to the newly created location. This copy of the props file will need to be edited so that data_path=<cluster data location>.
Copy
The full Melissa Data plugin needs to be copied to HDFS. It will be located under opt/pentao/mapreduce/{pentaho-shim name 6.1hdp22}/plugins/steps.
In the C:\Pentaho\design-tools\data-integration\plugins\pentaho-big-data-plugin there is file called plugin. Open that file and make sure the property pmr.kettle.dfs.install.dir=/opt/pentaho/mapreduce is there or uncommented.
Add the property pmr.kettle.additional.plugins=steps. This will copy the steps folder with all the Melissa Data plugs-in to HDFS. This will only copy if the steps folders do not exist in HDFS. So, if you want to update the plugins in HDFS make sure to delete the steps directory in HDFS and it will copy the new plugins when Pentaho runs a MapReduce job.
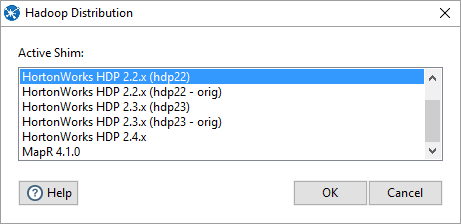
Under tools Hadoop distribution, pick the appropriate shim distribution.
Pentaho
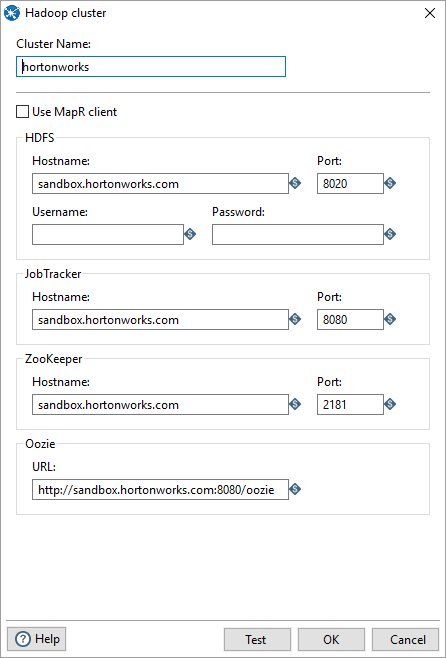
Create Cluster
In Pentaho under Hadoop clusters create a new cluster and add the properties. You might want to change the host file on your computer with the IP address and name of the cluster. Here is an example of the configuration in Pentaho.
Click Test to test you cluster.
Create Transformation
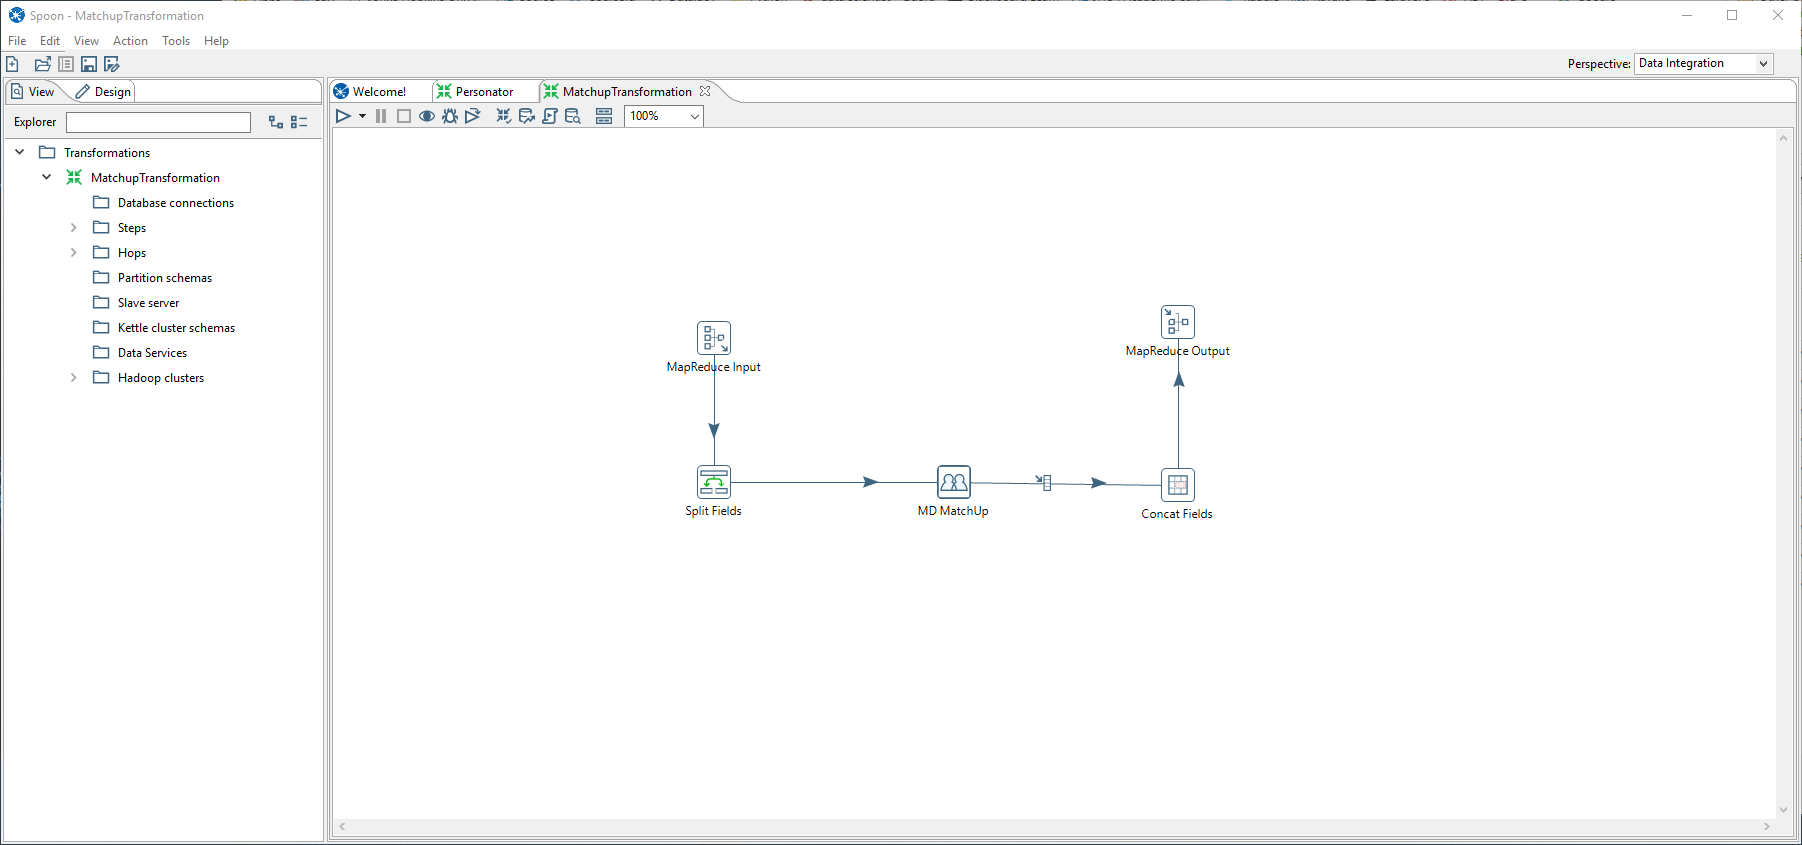
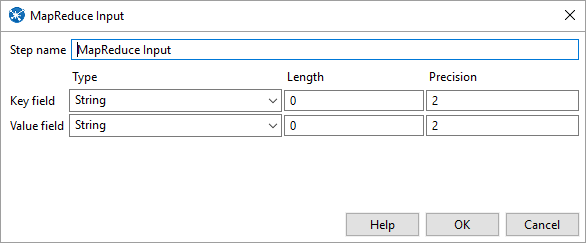
In Pentaho create a new transformation for a job you’re trying to run. Here is an example of Match Up transformation for Hadoop. You must define in the field splitter the Field Names. They must be the same as the column names from the CSV file or database.
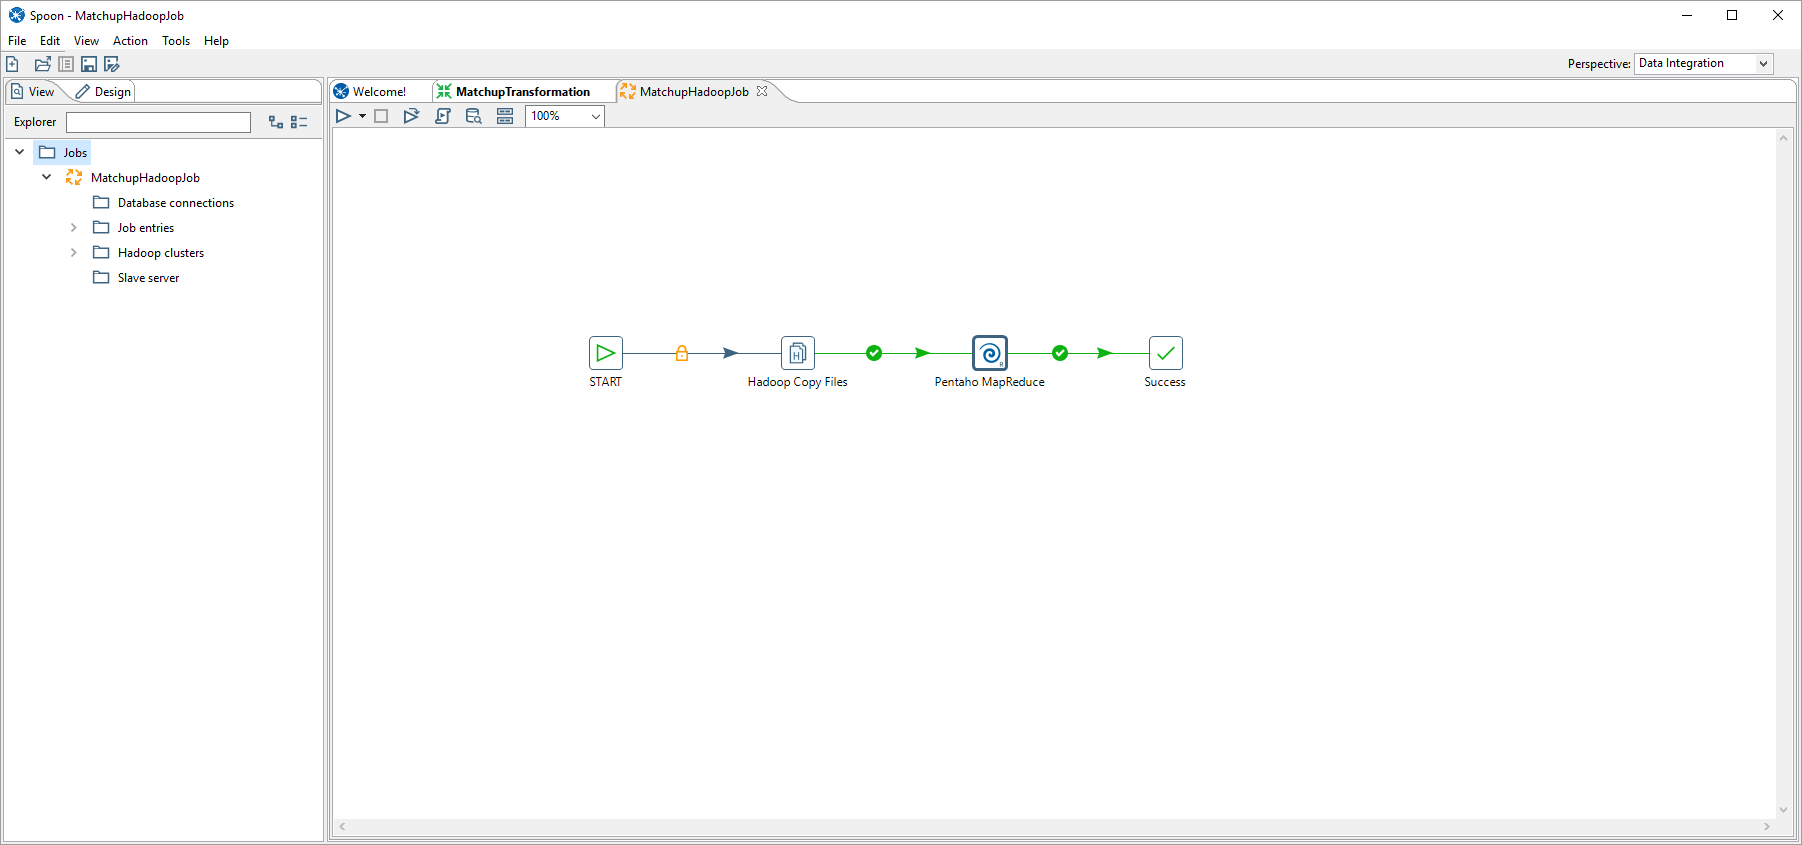
Create New Job
Close the transformation and create new Job.
You can use a Hadoop file copy if you want to copy files from the local disk to HDFS. Below is a setup with a Hadoop File copy and the Pentaho MapReduce Tool in Pentaho.
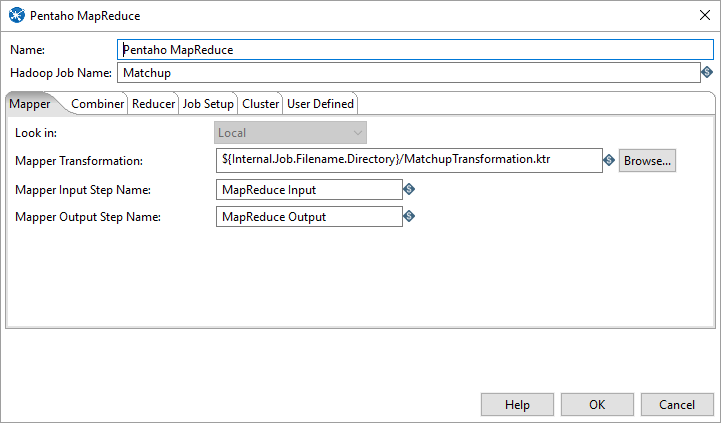
Mapper Tab
Under Pentaho MapReduce Mapper select Mapper Input Step Name and the Mapper Output Step Name from the transformation. Be sure to include the location of the transformation.
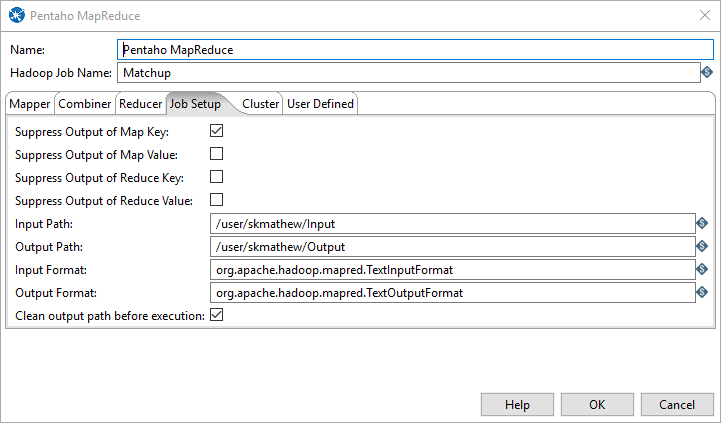
Job Setup Tab
Under the job setup include the input and output path in HDFS.
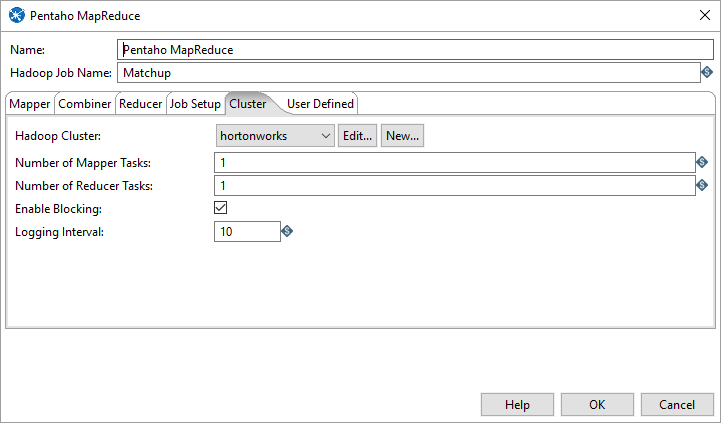
Cluster Tab
Select the cluster information from the Cluster tab.
User Defined Tab
In order for the files to be picked up and added to the correct paths you will need to add some setting in the User Defined tab of the MapReduce job entry.
-------------------------------------------------------------------------------------------------------------------------
Name 							Value

mapred.cache.files				<full path to file>#<File Name>, add the rest seperated by ","...

EXAMPLE:/DQT/libmdLicense.so#libmdLicense.so,/DQT/libmdLicenseJavaWrapper.so#libmdLicenseJavaWrapper.so,/DQT/libmdName.so#libmdName.so,/DQT/libmdNameJavaWrapper.so#libmdNameJavaWrapper.so,/DQT/libmdAddr.so#libmdAddr.so,/DQT/libmdAddrJavaWrapper.so#libmdAddrJavaWrapper.so,/DQT/libmdEmail.so#libmdEmail.so,/DQT/libmdEmailJavaWrapper.so#libmdEmailJavaWrapper.so,/DQT/libmdPhone.so#libmdPhone.so,/DQT/libmdPhoneJavaWrapper.so#libmdPhoneJavaWrapper.so,/DQT/libmdGeo.so#libmdGeo.so,/DQT/libmdGeoJavaWrapper.so#libmdGeoJavaWrapper.so

Note: Any files added to here are copied to the local cache folder for the given job.  The first part is the actual file location and name the part after the #  is the link name that will be created by hadoop.
-------------------------------------------------------------------------------------------------------------------------
Name 							Value

mapred.job.classpath.files      <full path to file>,<full path to file>.. and so on

EXAMPLE :/DQT/libmdLicense.so,/DQT/libmdLicenseJavaWrapper.so,/DQT/libmdName.so,/DQT/libmdNameJavaWrapper.so,/DQT/libmdAddr.so,/DQT/libmdAddrJavaWrapper.so,/DQT/libmdEmail.so,/DQT/libmdEmailJavaWrapper.so,/DQT/libmdGeo.so,/DQT/libmdGeoJavaWrapper.so,/DQT/libmdPhone.so,/DQT/libmdPhoneJavaWrapper.so
Note: This is the setting that adds it to the LD_LIBRARY_PATH.

Run
Run the job. The output should be in the output folder in HDFS with the name part-00000.
