This wiki is no longer being updated as of December 10, 2025.
|
SSIS:Profiler:Input Field: Difference between revisions
No edit summary |
No edit summary |
||
| Line 39: | Line 39: | ||
The input field tab maps the input columns to be profiled. Each column can be passed through and/or column-specific results can be output. Not all columns are required. | The input field tab maps the input columns to be profiled. Each column can be passed through and/or column-specific results can be output. Not all columns are required. | ||
[[file:SSIS_PF_InputField.png|link=]] | |||
Advanced profiling options can be modified for any field by clicking the "..." button to the right of any row. See [[#Advanced Settings|Advanced Settings]] for more information. | Advanced profiling options can be modified for any field by clicking the "..." button to the right of any row. See [[#Advanced Settings|Advanced Settings]] for more information. | ||
;Profile | ;Profile | ||
| Line 75: | Line 75: | ||
==Advanced Settings== | ==Advanced Settings== | ||
Double-clicking select fields or the "..." button to the right of the rows will bring up the Advanced Settings dialogue. Check the box next to any option to enable it's modification. | Double-clicking select fields or the "..." button to the right of the rows will bring up the Advanced Settings dialogue. Check the box next to any option to enable it's modification. These settings allow for validating your data. Records that do not meet the specified validation rules in the Advanced Options will be given a result code indicating failure. | ||
[[file:SSIS_PF_AdvancedSetting.png|link=]] | |||
;Scale | ;Scale | ||
Revision as of 20:00, 9 February 2015
| Profiler Navigation | ||||
|---|---|---|---|---|
| Overview | ||||
| Tutorial | ||||
| Advanced Configuration | ||||
| ||||
|
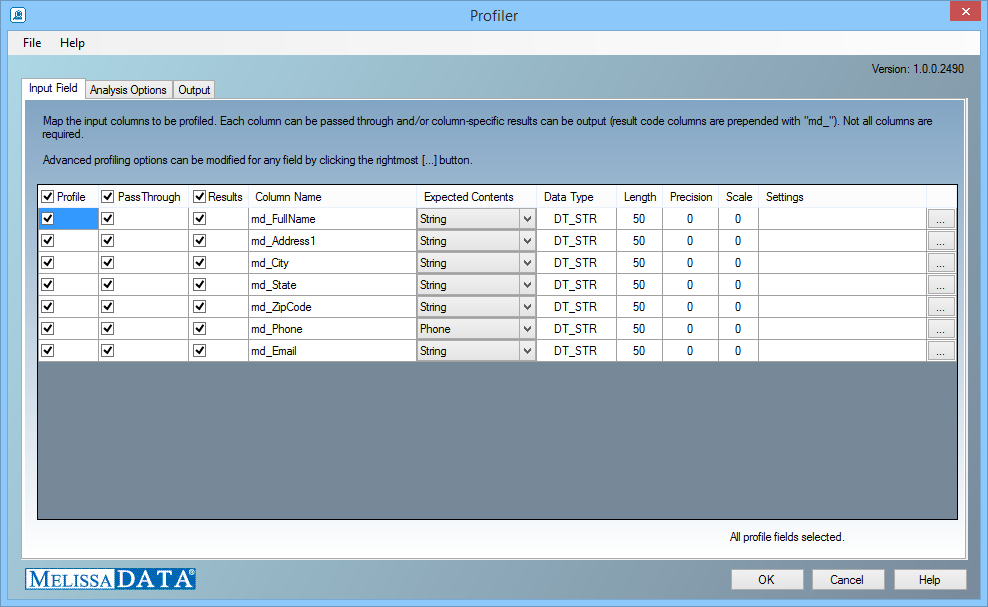
The input field tab maps the input columns to be profiled. Each column can be passed through and/or column-specific results can be output. Not all columns are required.

Advanced profiling options can be modified for any field by clicking the "..." button to the right of any row. See Advanced Settings for more information.
- Profile
- Designates the selected field to be profiled.
- PassThrough
- Designate the selected field as a pass-through column. The data will be passed through to the output.
- Results
- Designates the selected field
- Column Name
- The name of the column from the source file.
- Expected Contents
- Use the drop-down menu to select the expected contents of the input column.
- Data Type
- Displays the data type of the column.
- Length
- Displays the maximum length of the column. Double-clicking this field will bring up the Advanced Settings dialogue where you can changed this value.
- Precision
- Displays the precision of the column. Double-clicking this field will bring up the Advanced Settings dialogue where you can changed this value.
- Scale
- Displays the scale of the column. Double-clicking this field will bring up the Advanced Settings dialogue where you can changed this value.
- Settings
- Displays any special settings for the column. Double-clicking this field will bring up the Advanced Settings dialogue where you can changed this value.
Advanced Settings
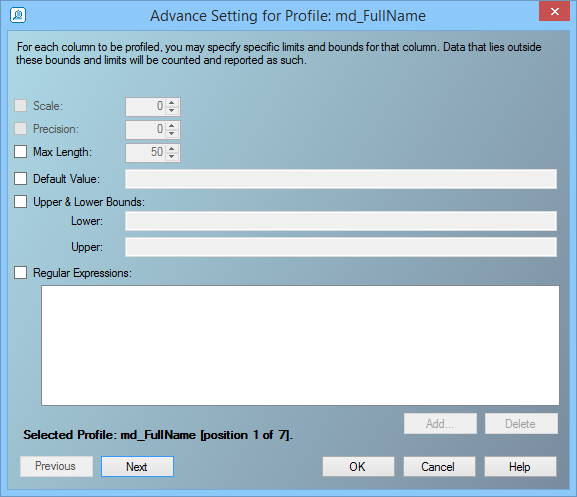
Double-clicking select fields or the "..." button to the right of the rows will bring up the Advanced Settings dialogue. Check the box next to any option to enable it's modification. These settings allow for validating your data. Records that do not meet the specified validation rules in the Advanced Options will be given a result code indicating failure.

- Scale
- Set the scale of the column.
- Precision
- Set the precision of the column.
- Max Length
- Set the maximum length of the column.
- Default Value
- Set the default value.
- Upper & Lower Bounds
- Set the Upper and Lower bounds values.
- Regular Expressions
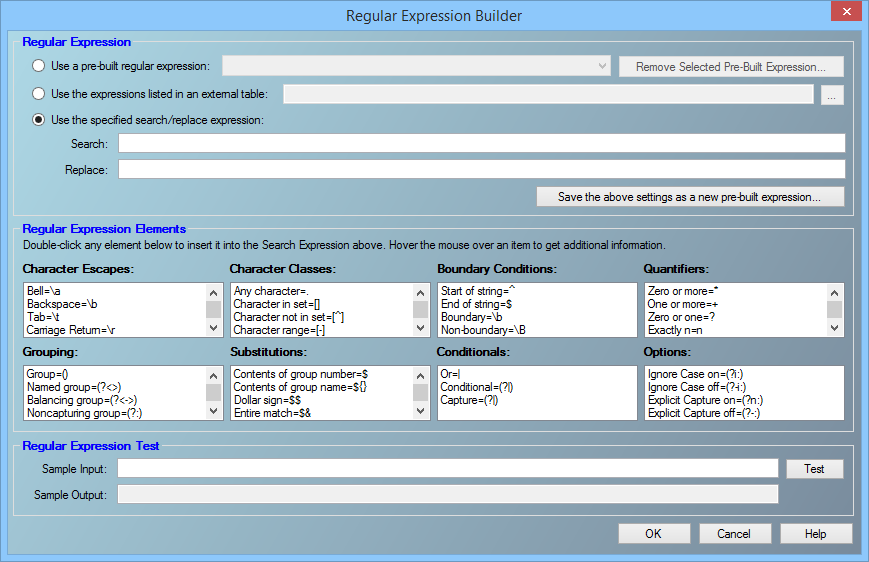
- Set a list of regular expressions. See Regular Expression Builder for more information.
Regular Expression Builder
Checking the box next to Regular Expressions and then selecting the "Add..." button will bring up the Regular Expression Builder.
