This wiki is no longer being updated as of December 10, 2025.
|
SSIS:MatchUp:Survivorship Pass-Through
← SSIS:Data Quality Components
Select ‘Use Simple Pass-Through’ if you would like the contents of the checked field names to be passed to the Source output stream without modification, in addition to the Output Columns specified in Options.
Select ‘Use Advanced Survivorship’ if you would like to gather data from other matching records to pass into a single output stream record.
Source Pass-Through Columns
This tab allows you to add specific fields from the input Source file to the output file.
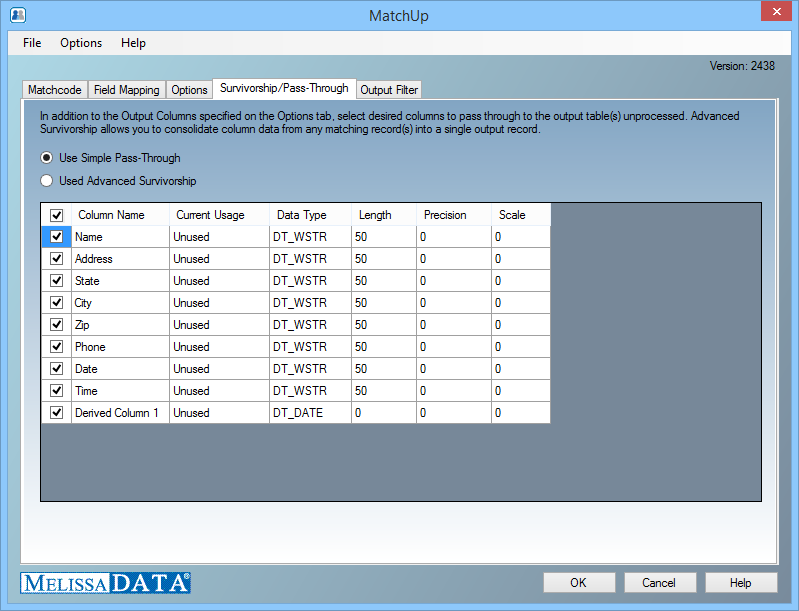
- Pass Through
- Check this box if you would like the contents of the checked field name to be passed to the Source output stream without modification, in addition to the Output Columns specified in Options.
- Column Name
- The column names from the original input table.
- Current Usage
- Where the field is currently being used as input.
- Data Type
- The data type of each column.
- Length
- Maximum number of bytes returned.
- Precision
- Maximum number of digits.
- Scale
- Maximum number of digits to the right of the decimal point.
Advanced Survivorship
Survivorship can merge data from matching record(s) into a single output record. This allows you to establish criteria for each data column individually instead of using the default method of writing full record content to output.
For example, consider the following matching records:
| Name | Address | Last Update | Amount |
|---|---|---|---|
| John Doe | 123 Main St | 10/25/2003 | 420 |
| John Doe | 123 Main St | 4/16/2012 | 100 |
| Mr John Doe | 123 Main St | 8/6/2008 | 56 |
Using the Golden Record selection by latest update, the selected remaining record would be:
| Name | Address | Last Update | Amount |
|---|---|---|---|
| John Doe | 123 Main St | 4/16/2012 | 100 |
But if we set survivorship for longest name and greatest amount, we can populate our remaining record with values from other matching records.
| Name | Address | Last Update | Amount |
|---|---|---|---|
| Mr John Doe | 123 Main St | 4/16/2012 | 420 |
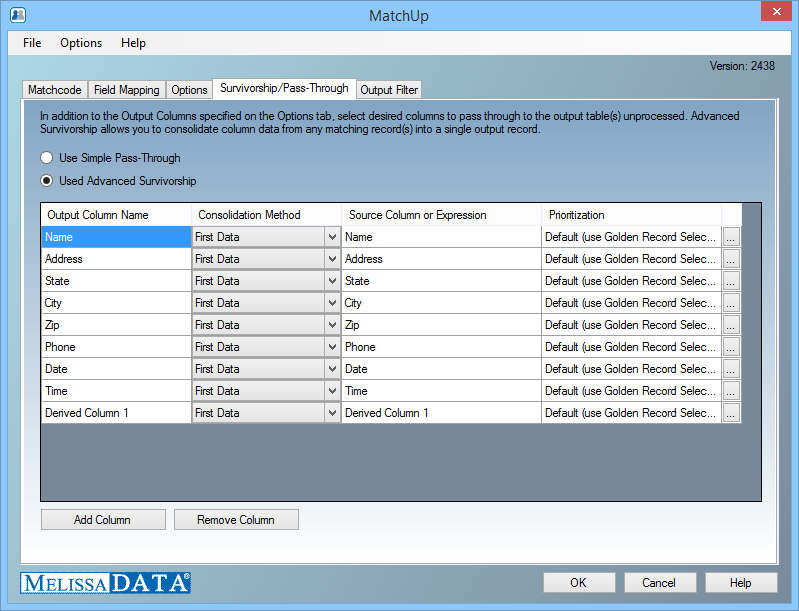
- Output Column Name
- The output column name. You choose this name when you add a column through the "Add Column" button. Double-click an existing column name to change its name.
Consolidation Method
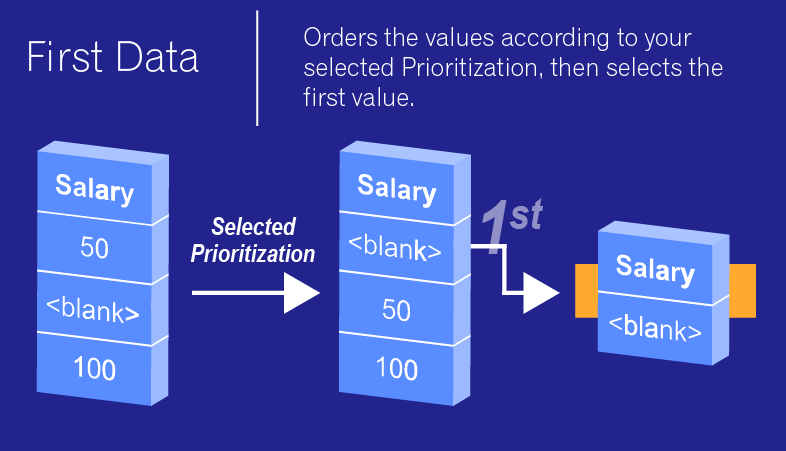
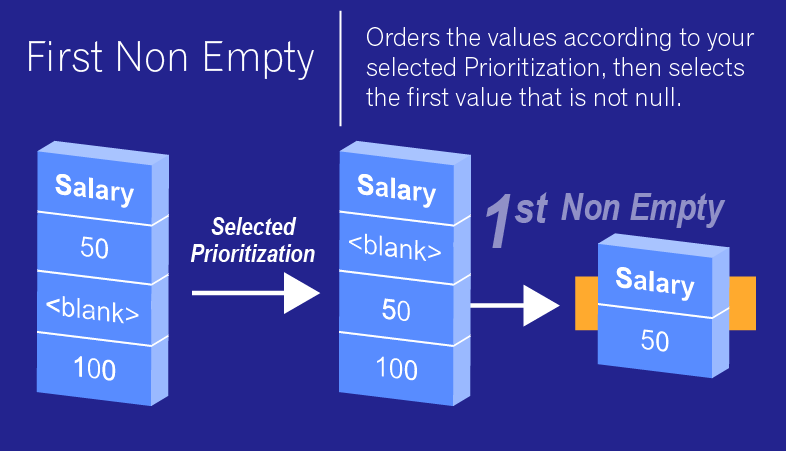
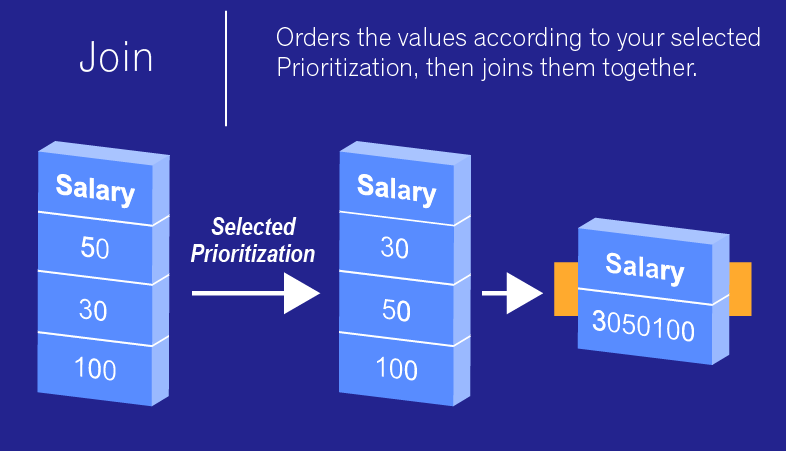
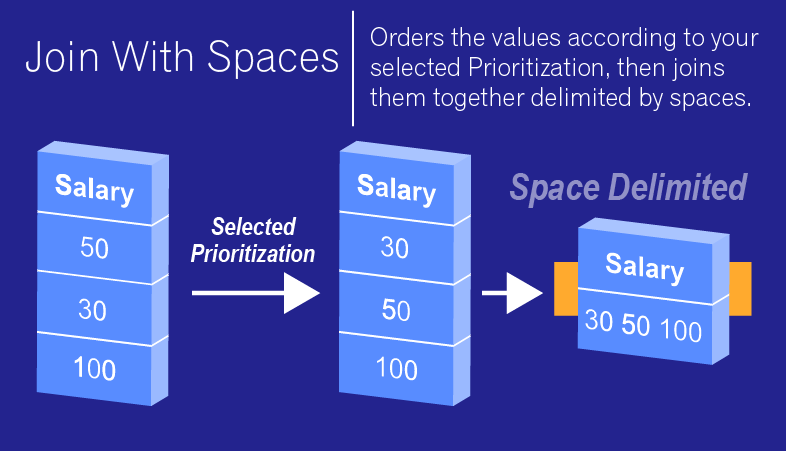
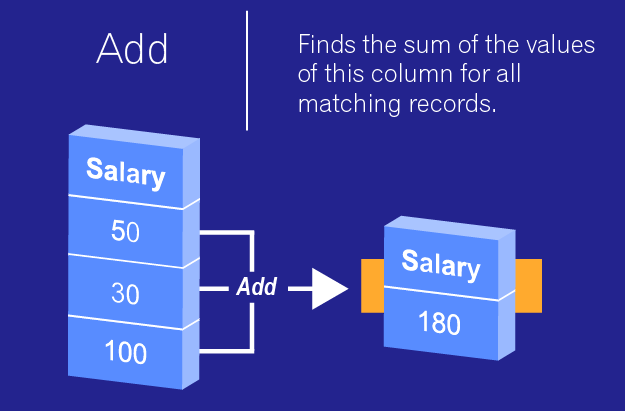
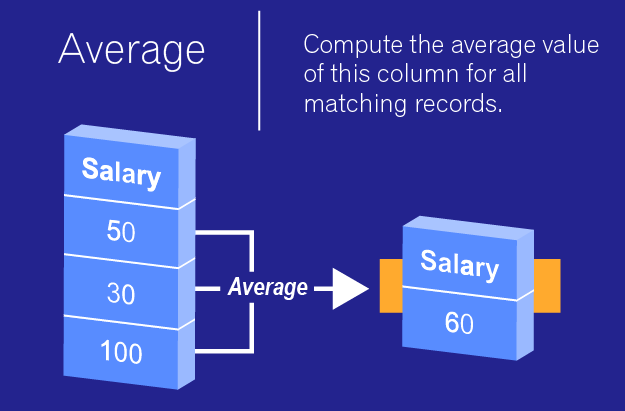
This method determines how matching data is merged. Specify the consolidation method to be used on the selected output column. The following examples that have Prioritization use the Lowest Salary Prioritization.
First Data
First Non-Empty
Join
Join With Spaces
Add
Average
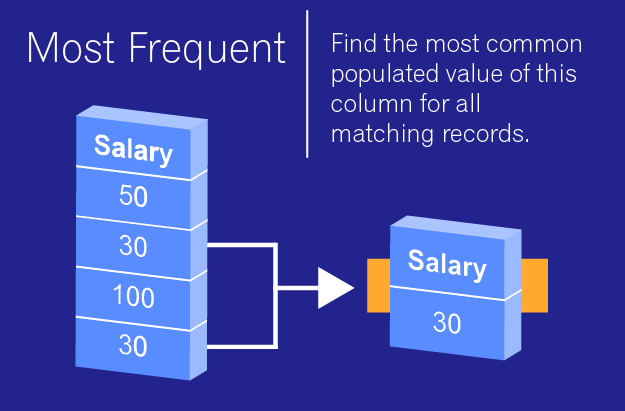
Most Frequent
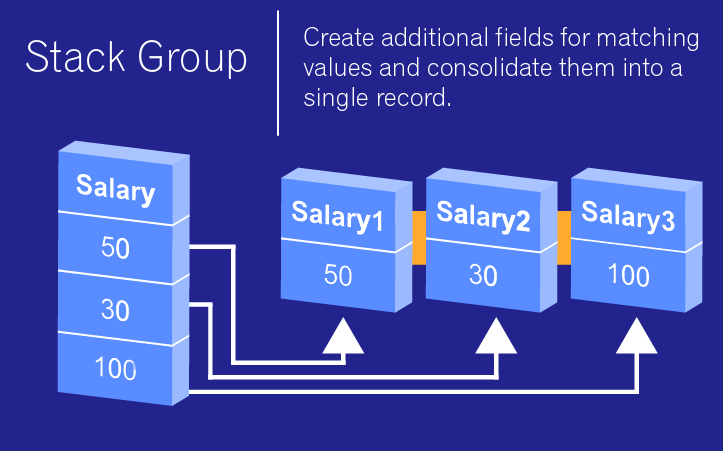
Stack Group
Source Column or Expression
This is where you specify the source of the data which will populate the output column. As with Simple Pass-through, the most common usage is to use the contents of a Source Column, although you can also use a custom expression which may concatenate two fields for example.
Ex. An custom expression like column ZIP + “ “ + CUST_ID could be used to populate a new column with a proprietary account number.
To bring up the Survivorship Expression editor, double-click the respective cell.
Prioritization
When MatchUp identifies a group of duplicates, configuring Prioritization allows you to order the column values, enabling you to select the lowest or highest value (left to right for strings) to output. For more information, see Prioritization.
Click the "..." button under the prioritization column to open the prioritization window for the selected row.
Prioritization
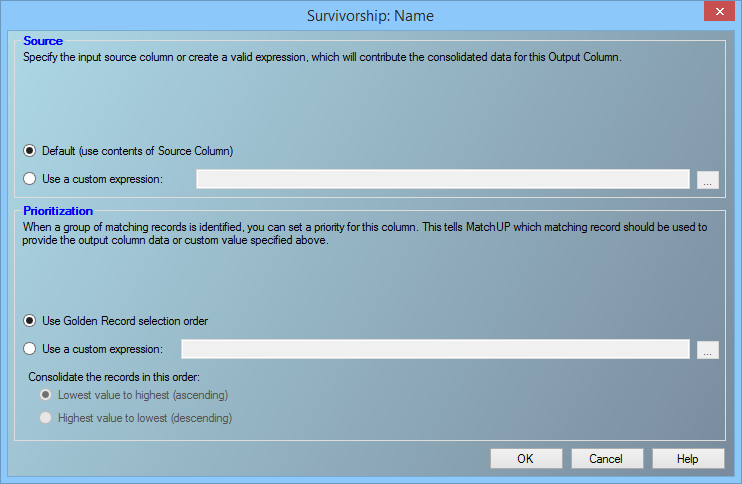
When MatchUp identifies a group of duplicates, configuring Prioritization allows you to order the column values, enabling you to select the lowest or highest value (left to right for strings) to output.
Source
Specify the source of the data which will populate the output column. As with Simple Pass-through, the most common usage is to use the contents of a Source Column, although you can also use a custom expression which may concatenate two fields for example.
For Example: A custom expression like column ZIP + “ “ + CUST_ID could be used to populate a new column with a proprietary account number.
- Default
- By default, the output column will be populated with contents from source column contents. This option will be greyed out if the output column is a newly created column, which does not exist in the source table.
- Use a Custom Expression
- You can have the output column populated with data other than the contents of the source column by creating a custom expression. A valid expression may be the contents of a different field, data concatenated from multiple fields, or custom values created with any valid expression. Select the button to the right to access the expression builder to help you select any of the available valid options. For more information, see Expression Builder.
Prioritization
To bring up the Survivorship Expression editor, double-click the respective cell or select the Expression Builder button to the right.
- No Prioritization
- The Golden record, the record selected for output by the criteria you specified on the Options tab, will contribute the data for this column to be written to the output record.
- Use a Custom Expression
- This allows you to create a custom expression which will be evaluated for each record in the matching group. If this option is chosen, you also specify Lowest or Highest value of that expression to order the return values of those matching records. The record whose value is at the top of that order will have its data contribute to the output record. With use of different custom expressions, it is possible to have output records with data from many different matching records. For more information, see Expression Builder below.
Expression Builder
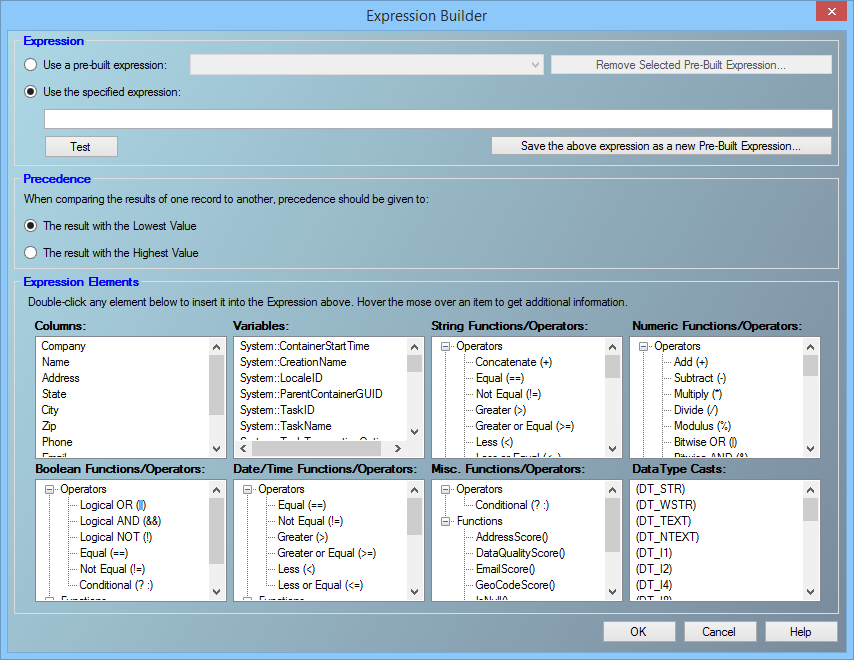
The Expression Builder allows for creating custom expressions for Survivorship. The expression editor includes Industry Standard Functions and Operators for building custom rules. Also included are Melissa Data proprietary functions for prioritization according to the quality of data. The Expression Builder also allows for selecting which set of data will be outputted as the surviving data.
Expression
Specify the expression to be used.
- Use a pre-built expression
- Select a pre-built expression from the drop down menu.
- Use the specified expression
- You can choose to make your own custom expression. Use the Expression Elements (see below) section for lists of the various elements you can use in your custom expression.
Expression Elements
Contains categorized lists of the possible elements you can use in a custom expression. Double-click an element to have it inserted into the "Use the specified expression:" text field.
See Custom Expression for a detailed explanation of the Expression Builder.