Difference between revisions of "Dynamics:Global Verify:Installation"
Jump to navigation
Jump to search

| Line 5: | Line 5: | ||
==Installing Global Verify== | ==Installing Global Verify== | ||
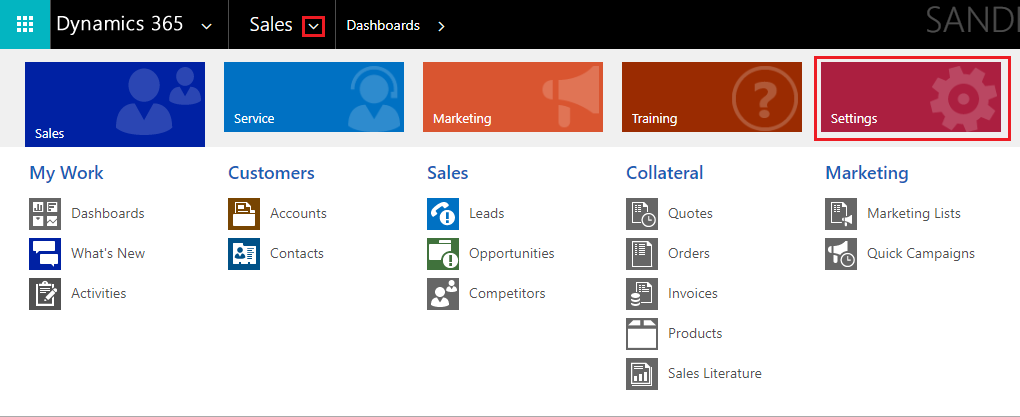
1. Begin by navigating to | 1. Begin by navigating to '''Settings'''. To do this, click the down arrow next to '''Sales''', then click '''Settings''' in the menu that drops down. | ||
[[File: | [[File:Dynamics_GlobalVerify_Installation_01_Settings.png|frame|none|Click '''Settings''']] | ||
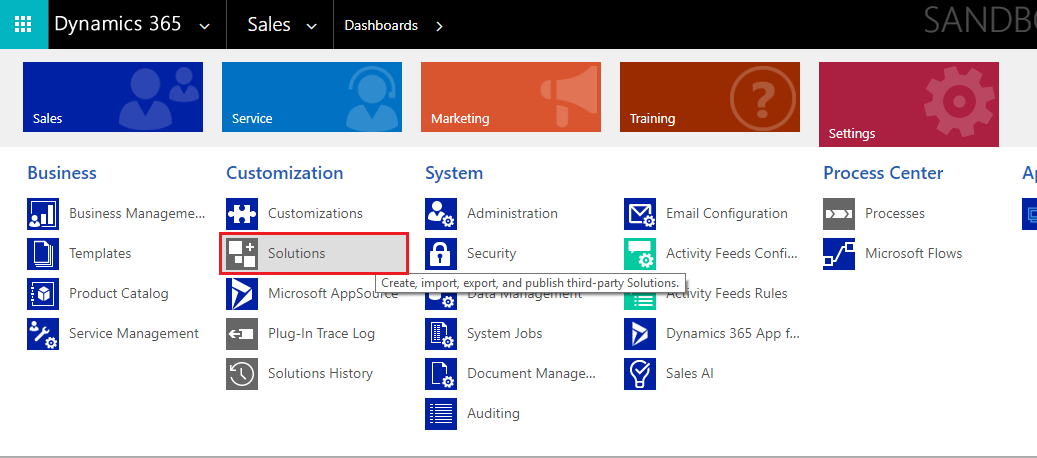
2. | 2. Click '''Solutions''' in the '''Customization''' category. | ||
[[File: | [[File:Dynamics_GlobalVerify_Installation_02_Solutions.png|frame|none|Click '''Solutions''']] | ||
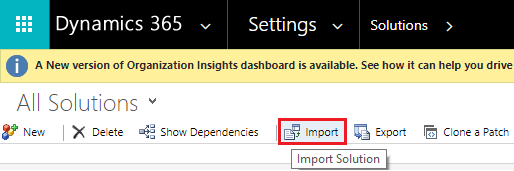
3. Click the '''Import''' button. | 3. Click the '''Import''' button. | ||
[[File: | [[File:Dynamics_GlobalVerify_Installation_03_Import.png|frame|none|Click '''Import''']] | ||
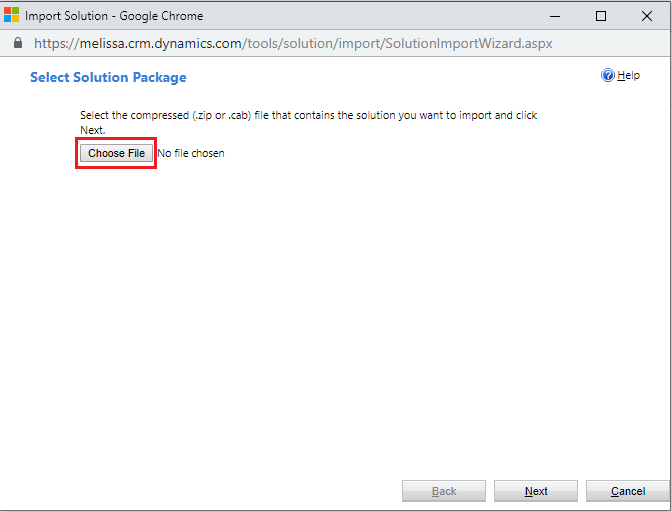
4. A window will pop-up. Click the '''Choose File''' button. | 4. A window will pop-up. Click the '''Choose File''' button. | ||
[[File: | [[File:Dynamics_GlobalVerify_Installation_04_ChooseFile.png|frame|none|Click '''Choose File''']] | ||
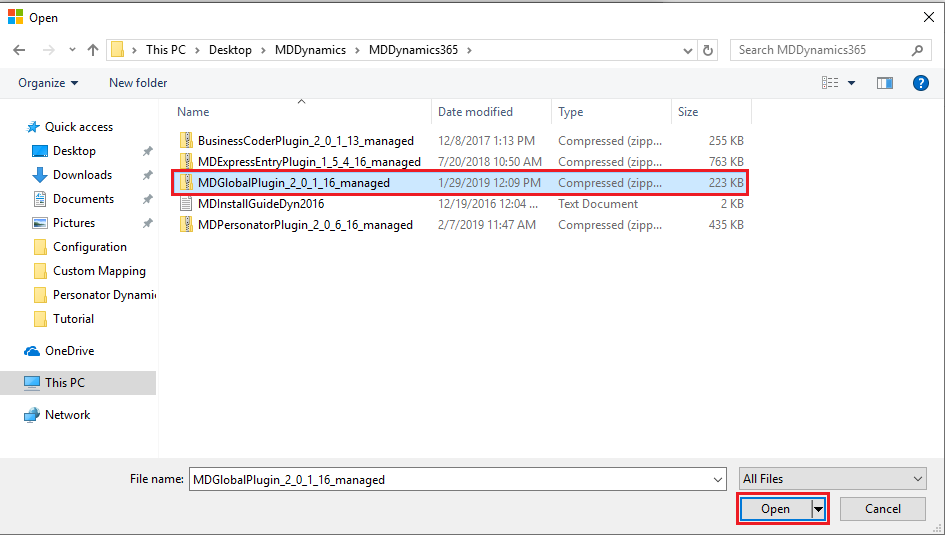
5. A file explorer window will pop-up. | 5. A file explorer window will pop-up. Locate the plugin .zip file that contains the Global Verify solution. Click '''Open'''. | ||
[[File: | [[File:Dynamics_GlobalVerify_Installation_05_Locate.png|frame|none|Click '''Open''']] | ||
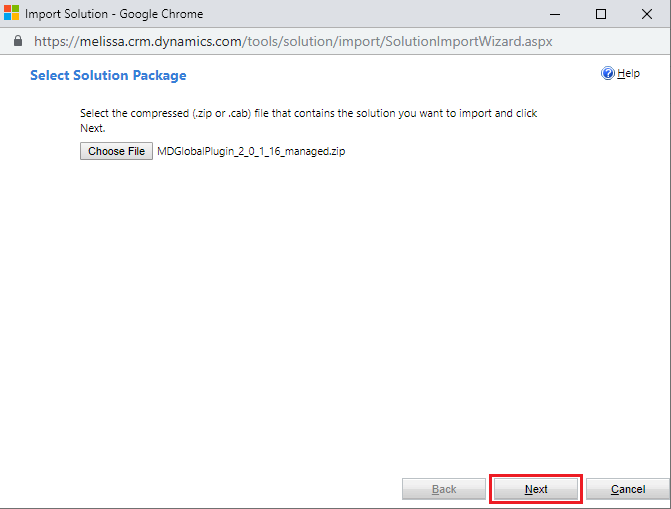
: Then click '''Next'''. | |||
[[File:Dynamics_GlobalVerify_Installation_05a_Next.png|frame|none|Click '''Next''']] | |||
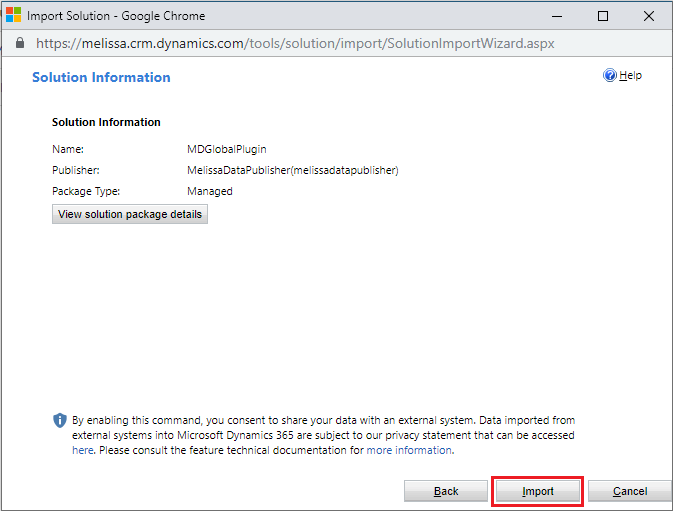
6. The window will show the '''Solution Information'''. Click '''Import'''. | |||
[[File:Dynamics_GlobalVerify_Installation_06_Import.png|frame|none|Click '''Import''']] | |||
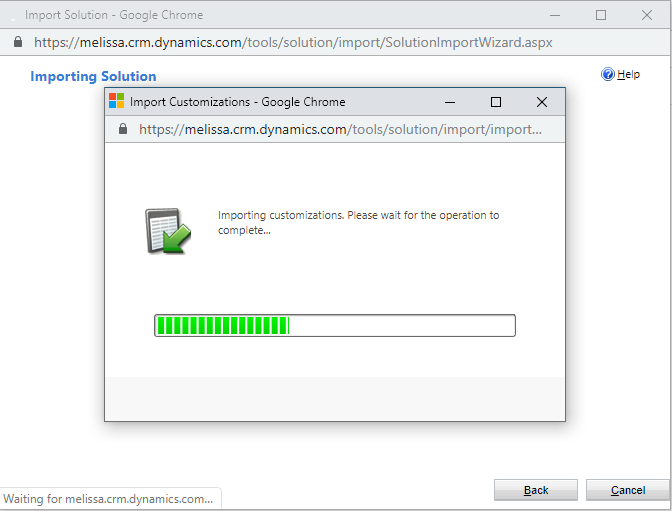
7. Wait for the solution to finish importing. | |||
[[File:Dynamics_GlobalVerify_Installation_07_Wait.png|frame|none|Wait for importing to finish]] | |||
8. The installation is now complete. Click '''Close'''. | |||
[[File:Dynamics_GlobalVerify_Installation_08_Close.png|frame|none|Installation complete]] | |||
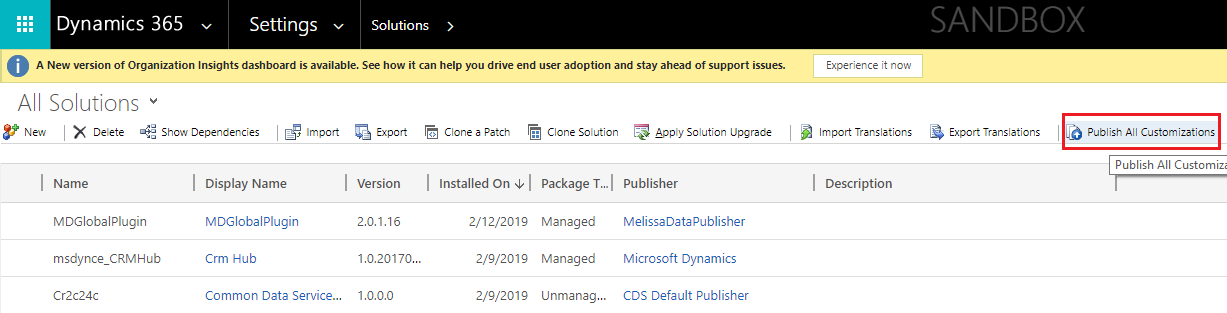
9. Click '''Publish All Customizations''' to ensure all changes are applied to your default solution. | |||
[[File:Dynamics_GlobalVerify_Installation_09_Publish.png|frame|none|Click '''Publish All Customizations''']] | |||
[[File: | |||
Latest revision as of 23:03, 21 March 2019
← Clean Suite for CRM:Dynamics
| Global Verify Navigation | ||
|---|---|---|
| Overview | ||
| Installation | ||
| Configuration | ||
| Custom Mapping | ||
| Tutorial | ||
| Fields | ||
|
Installing Global Verify
1. Begin by navigating to Settings. To do this, click the down arrow next to Sales, then click Settings in the menu that drops down.

Click Settings
2. Click Solutions in the Customization category.

Click Solutions
3. Click the Import button.

Click Import
4. A window will pop-up. Click the Choose File button.

Click Choose File
5. A file explorer window will pop-up. Locate the plugin .zip file that contains the Global Verify solution. Click Open.

Click Open
- Then click Next.

Click Next
6. The window will show the Solution Information. Click Import.

Click Import
7. Wait for the solution to finish importing.

Wait for importing to finish
8. The installation is now complete. Click Close.

Installation complete
9. Click Publish All Customizations to ensure all changes are applied to your default solution.

Click Publish All Customizations
To configure Global Verify, see Configuration.