This wiki is no longer being updated as of December 10, 2025.
|
Legacy:Dynamics:Global Verify:Custom Mapping
← Legacy Clean Suite for CRM:Dynamics
| Global Verify Navigation | ||
|---|---|---|
| Overview | ||
| Installation | ||
| Configuration | ||
| Custom Mapping | ||
| Tutorial | ||
| Fields | ||
|
Global Verify Custom Mapping
1 Begin by navigating to the Configuration screen. If you need more details on locating the Configuration screen, see the Configuration Tutorial.
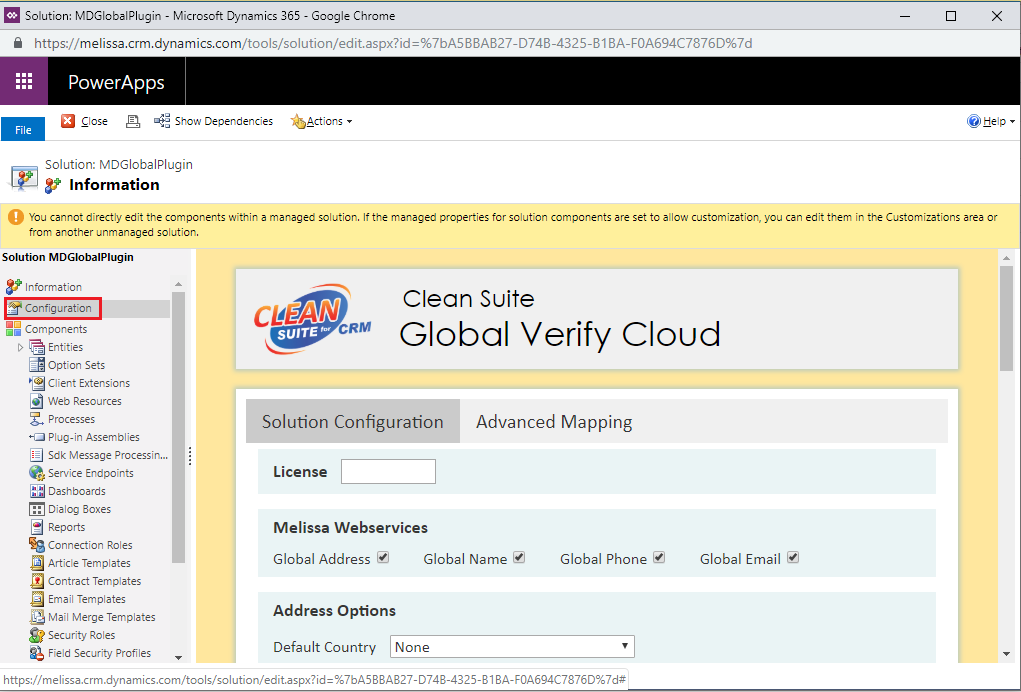
2. Click the Advanced Mapping tab.
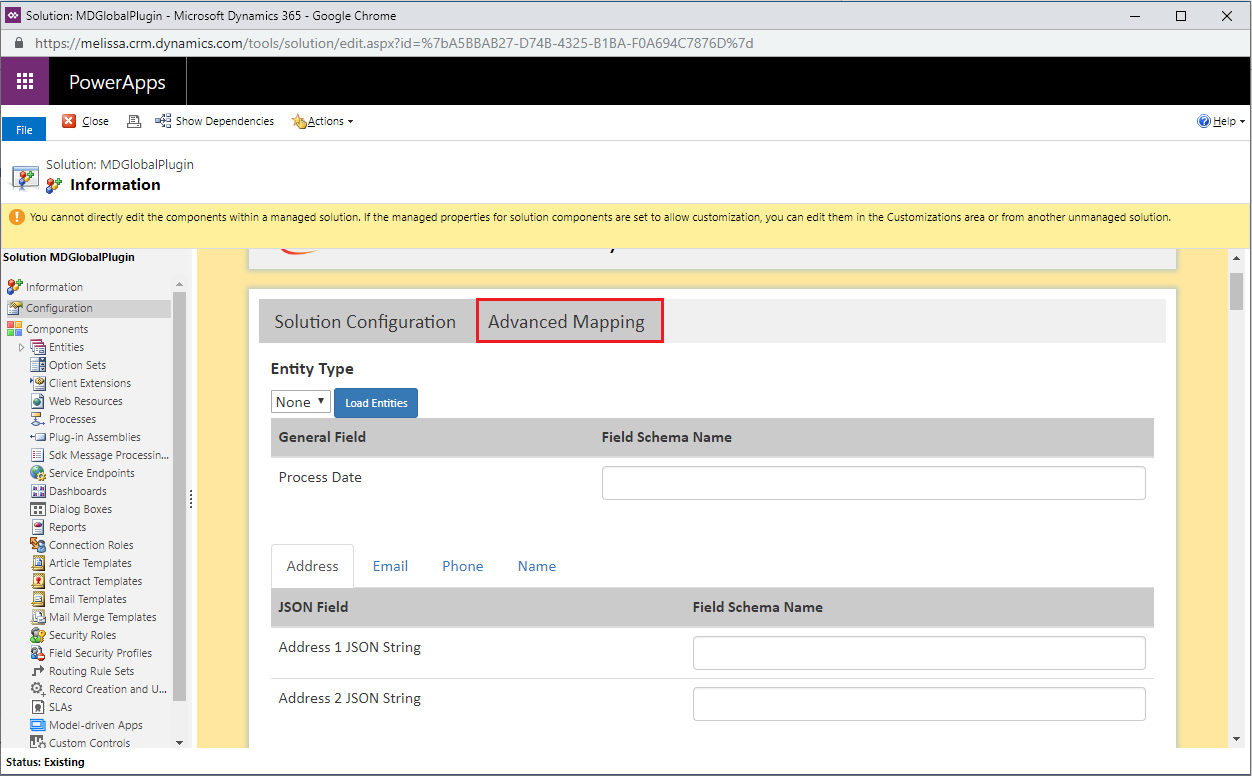
3. Click the Load Entities button. This queries the Dynamics organization for a full list of the entities that exist within your system and populates the list of attributes that are associated with the entity.
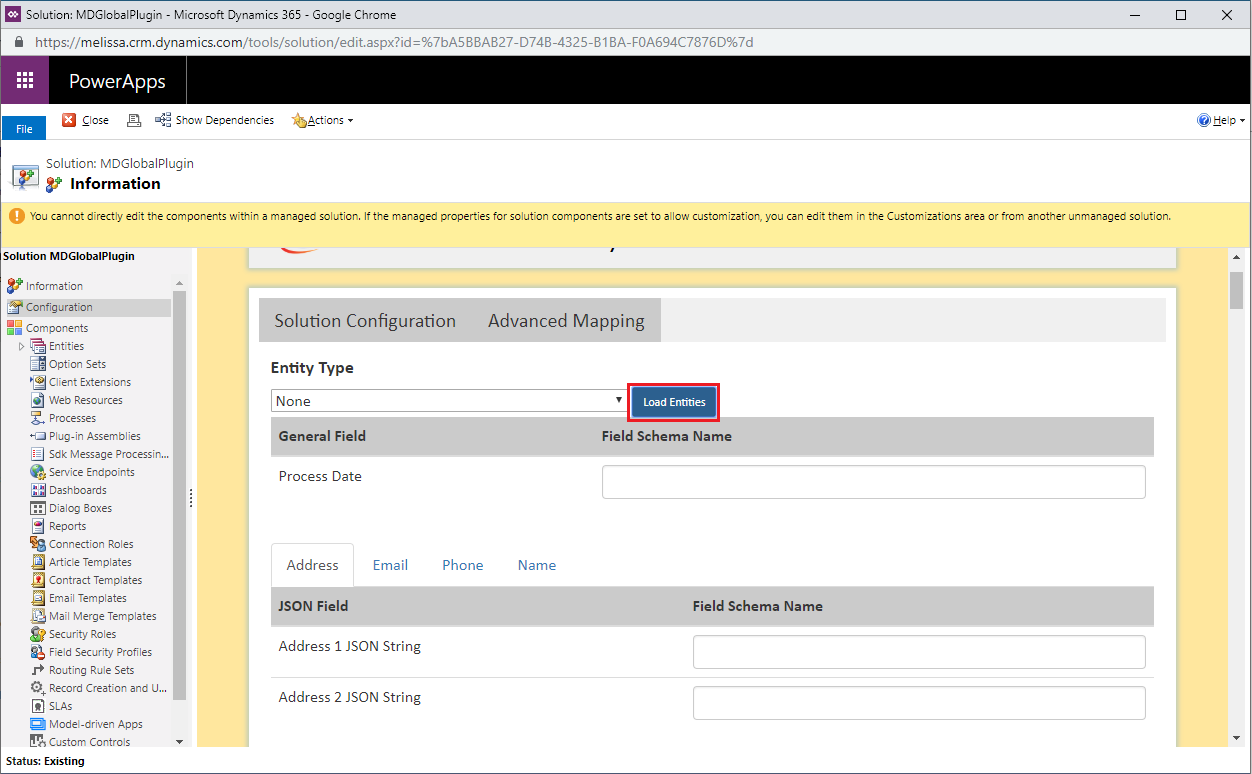
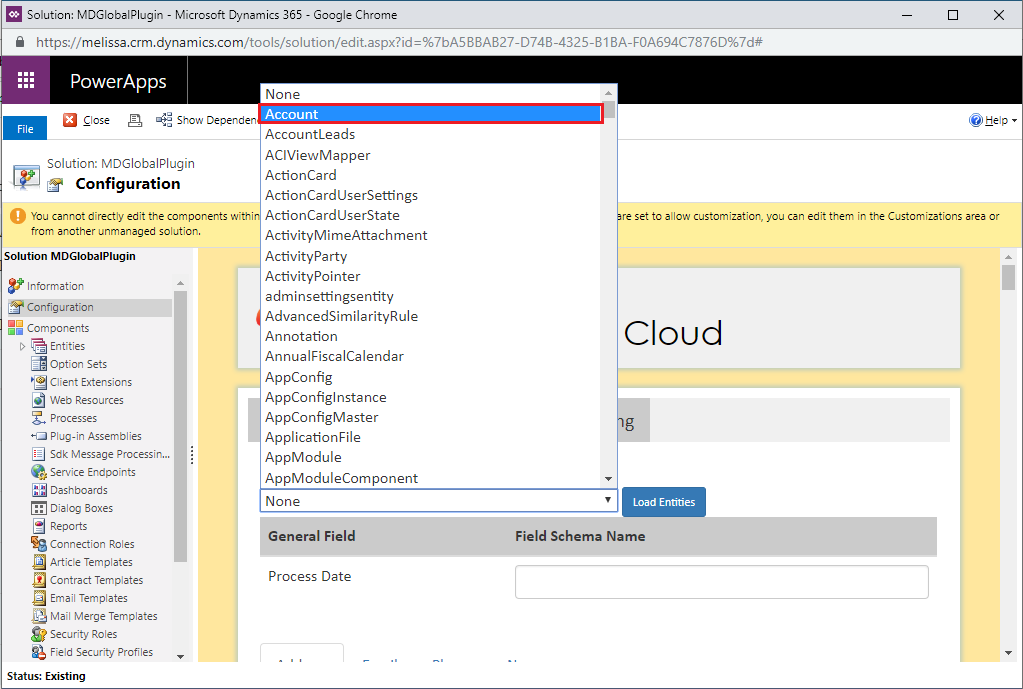
4. Select the desired entity from the drop down list. If a mapping has already been established for the selected entity, the fields should automatically be populated with the previous values.
5. Type the name of the desired custom or out of the box field. In order to assist the field entry process, the field names should be auto-completed with only the correct field names for the selected entity.
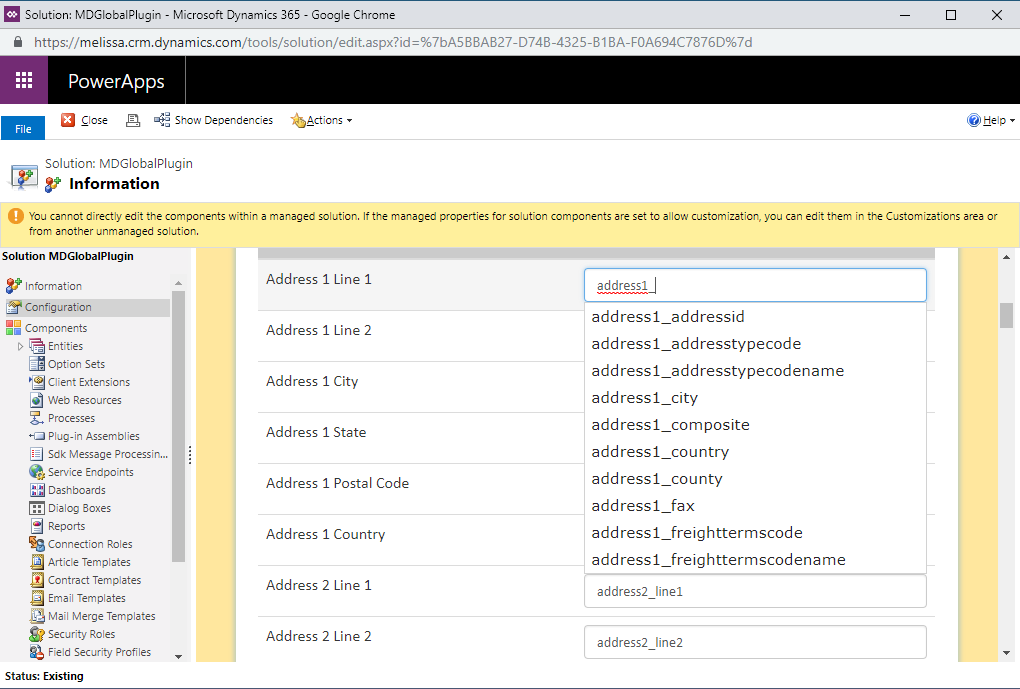
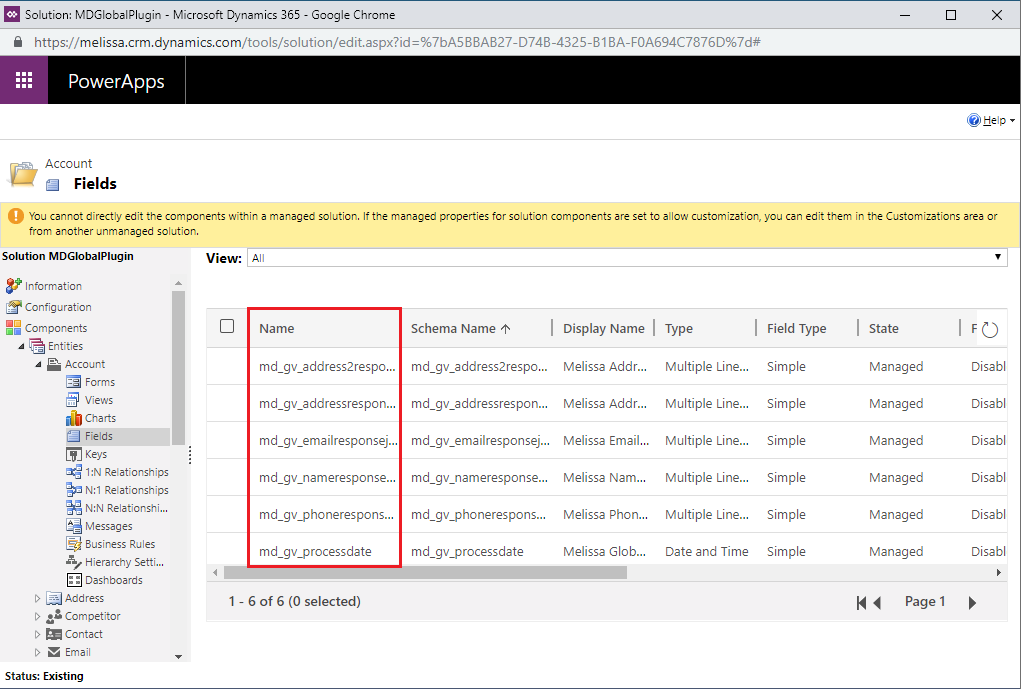
- The names should be the exact names that are assigned in Dynamics. These names can be viewed in the Fields section for that particular entity in the default solution.
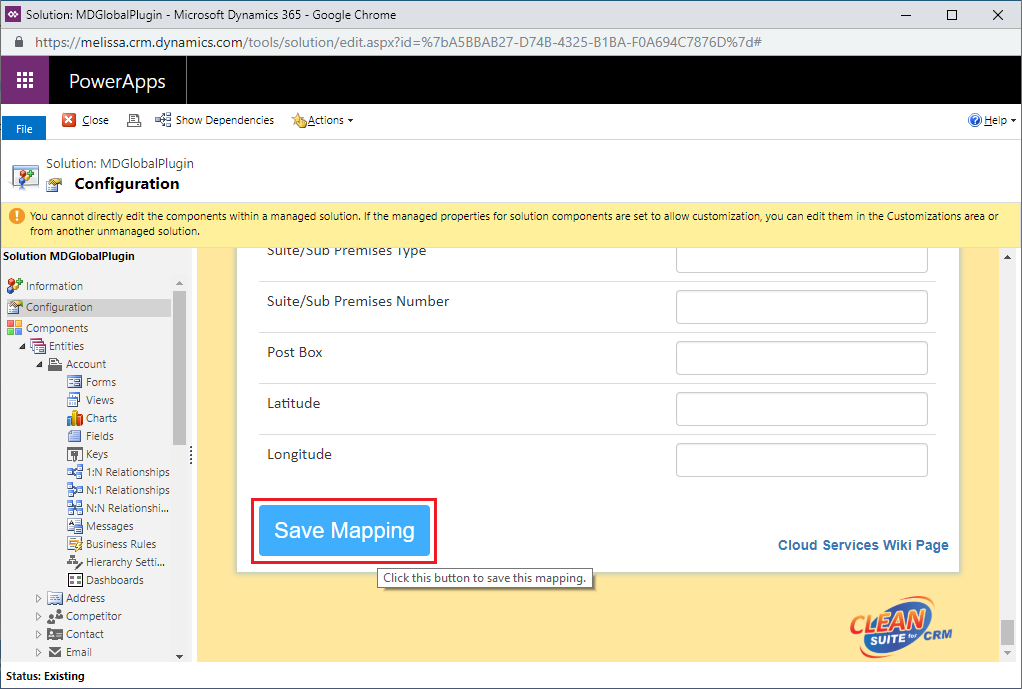
6. Once the fields have been filled in click the Save Mapping button.
Custom Entity
These steps will walk you through how to add Global Verify to custom entities.
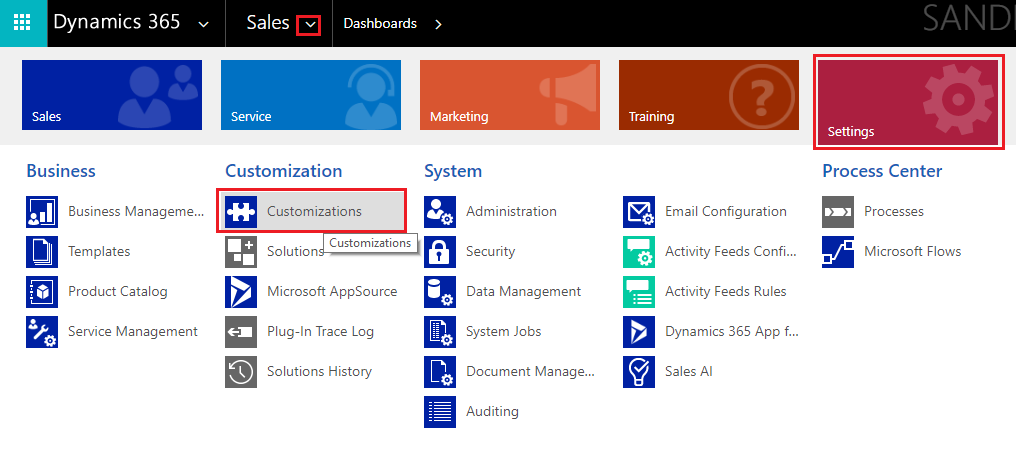
7. Click the down arrow next to Sales, click Settings, then click Customizations under the Customization category.
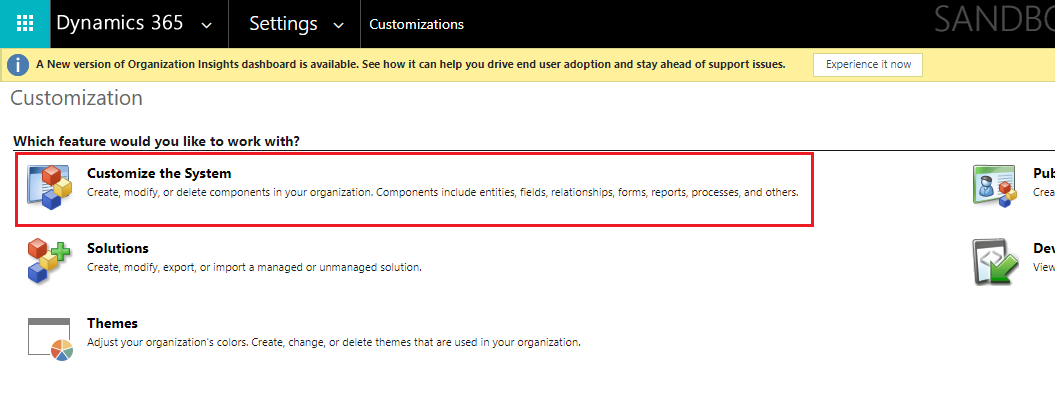
8. Click Customize the System.
9. On the left side of the new window that popped up, expand the Entities section to find the entity you want to add Global Verify to.
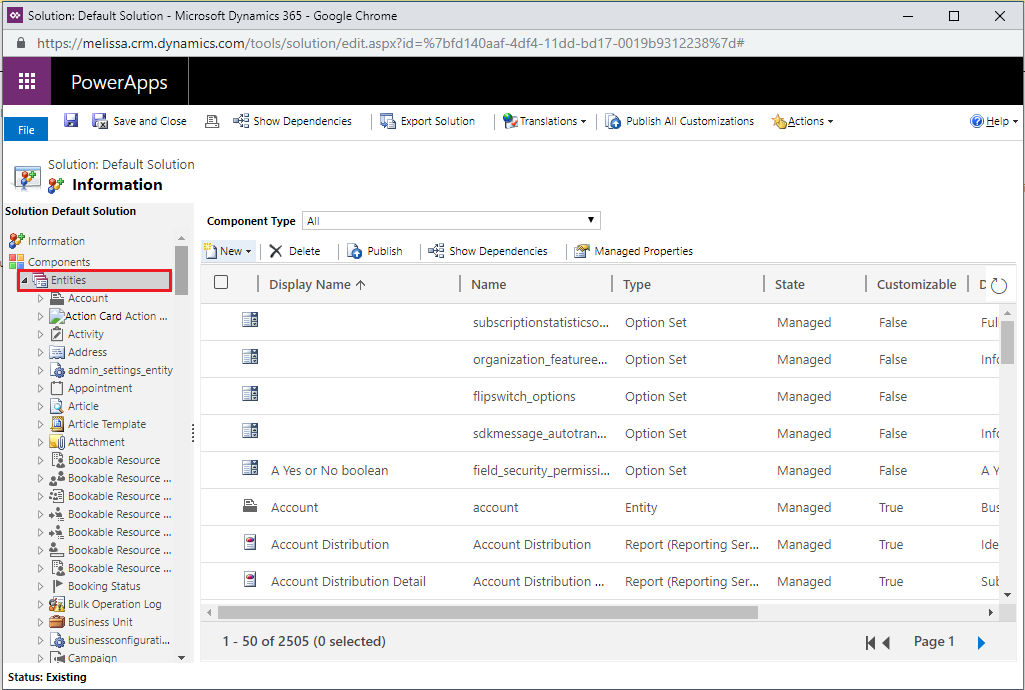
- In this case the test entity I am going to add it to is called md_testEntity.
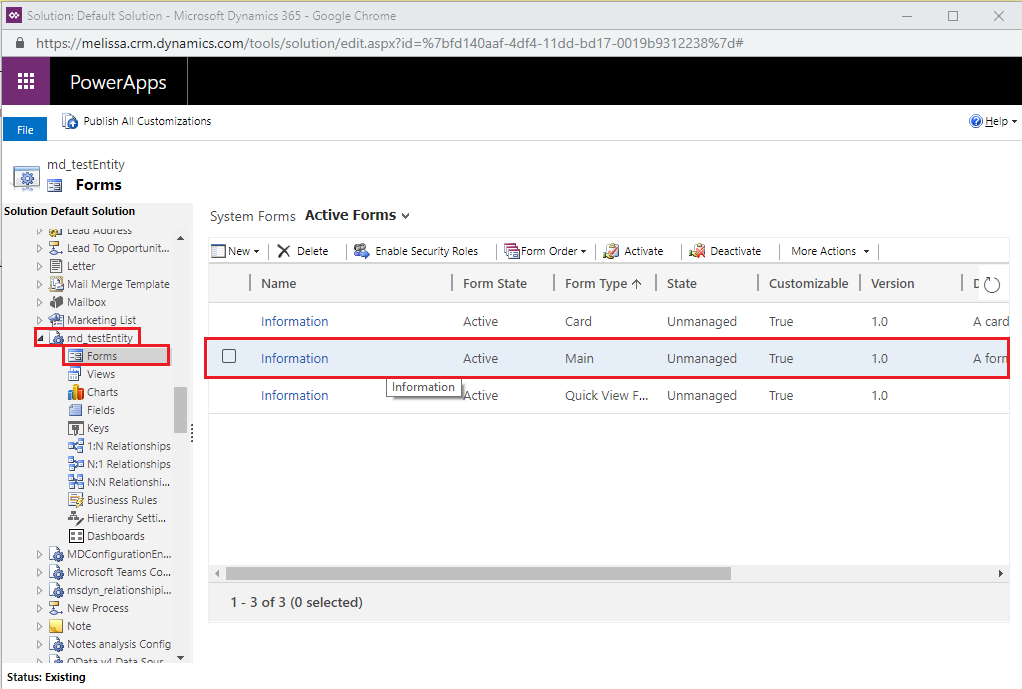
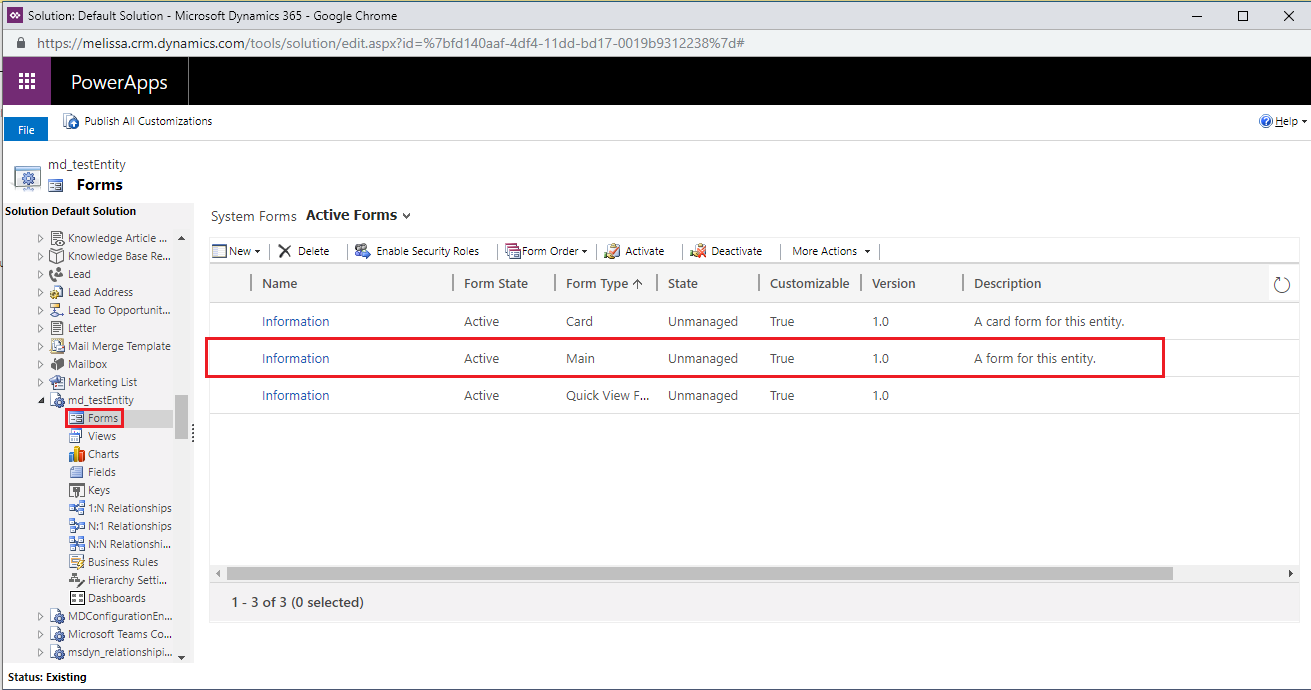
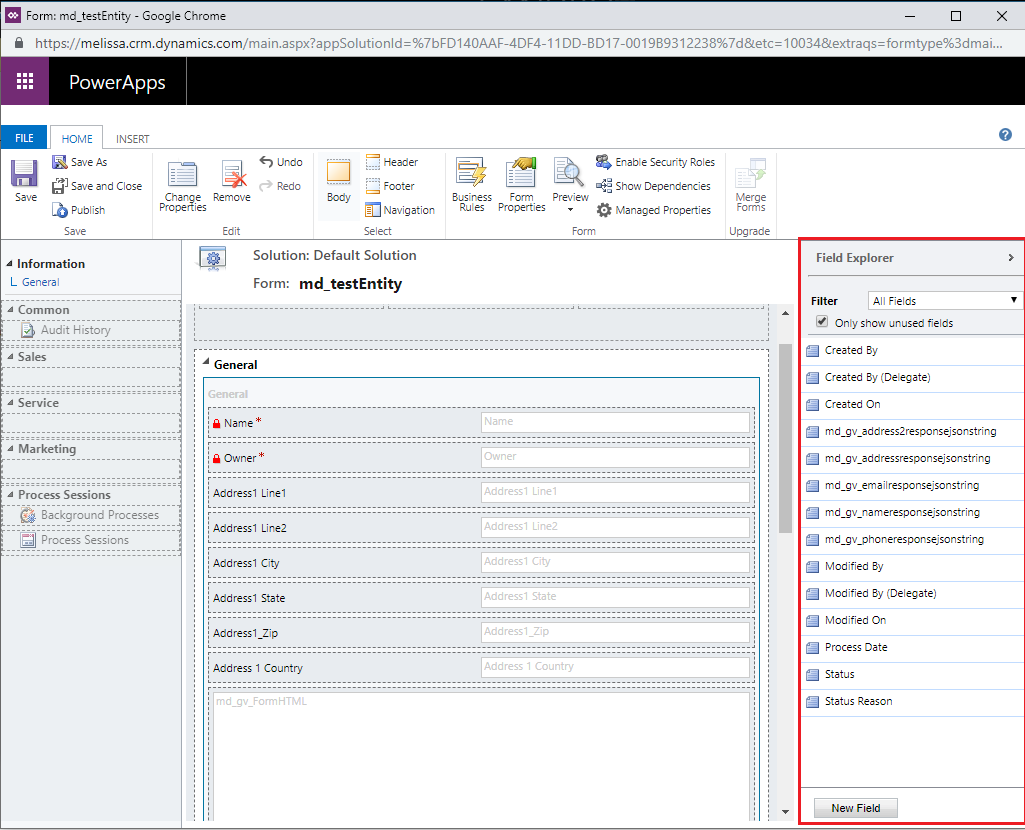
10. Once you expand the entity, click the Forms tab then click on the Main form type.
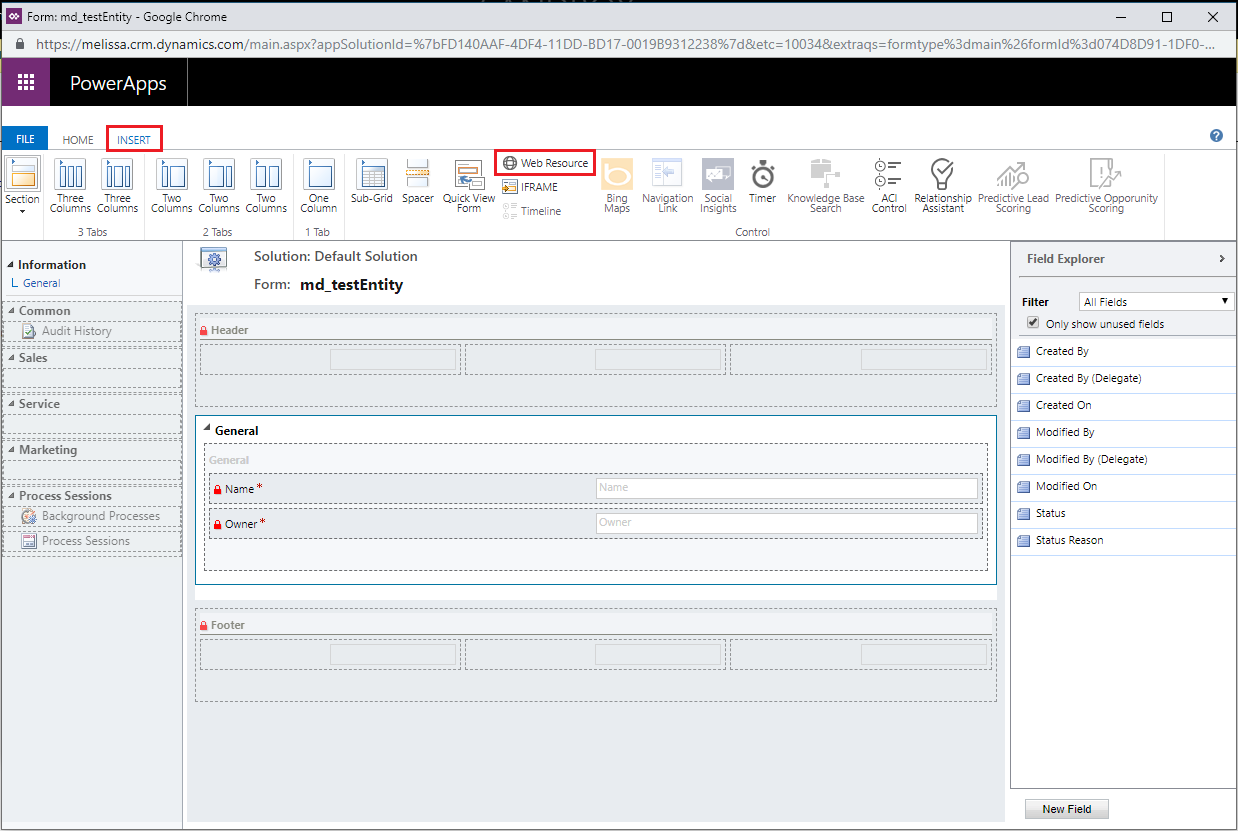
11. Click the Insert tab, and then click the Web Resource button. This button is small and easy to miss, so reference the screenshot below.
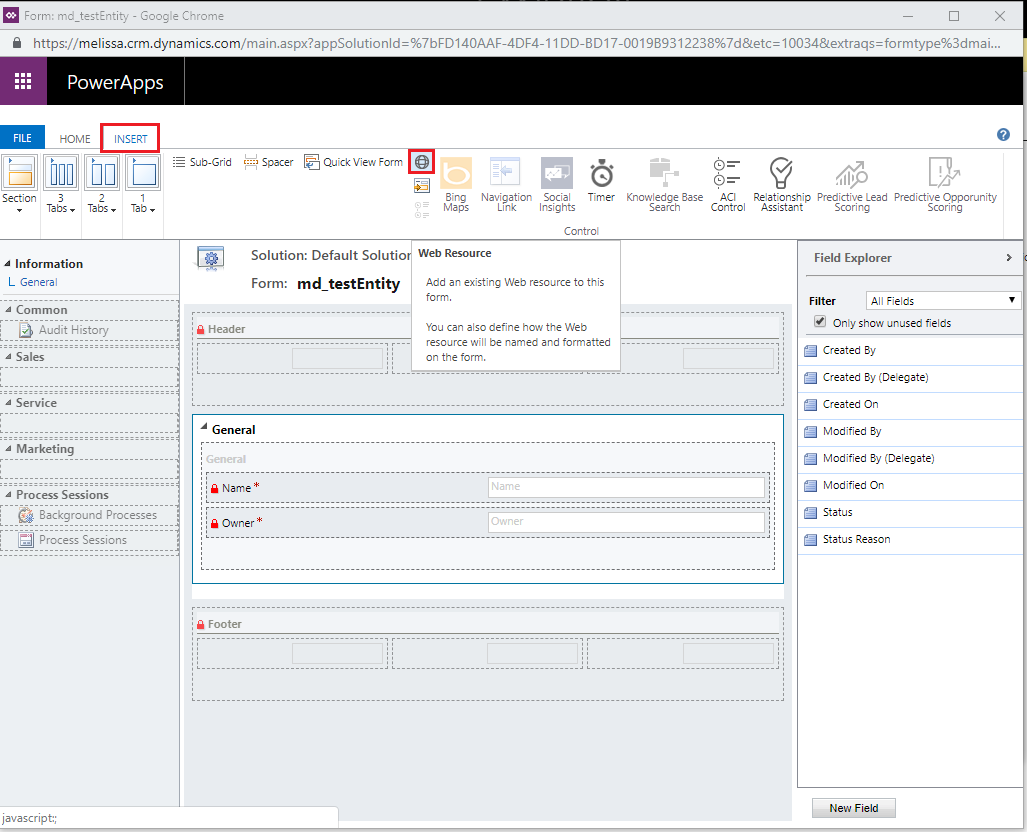
- You can expand the popup window to see it easier.
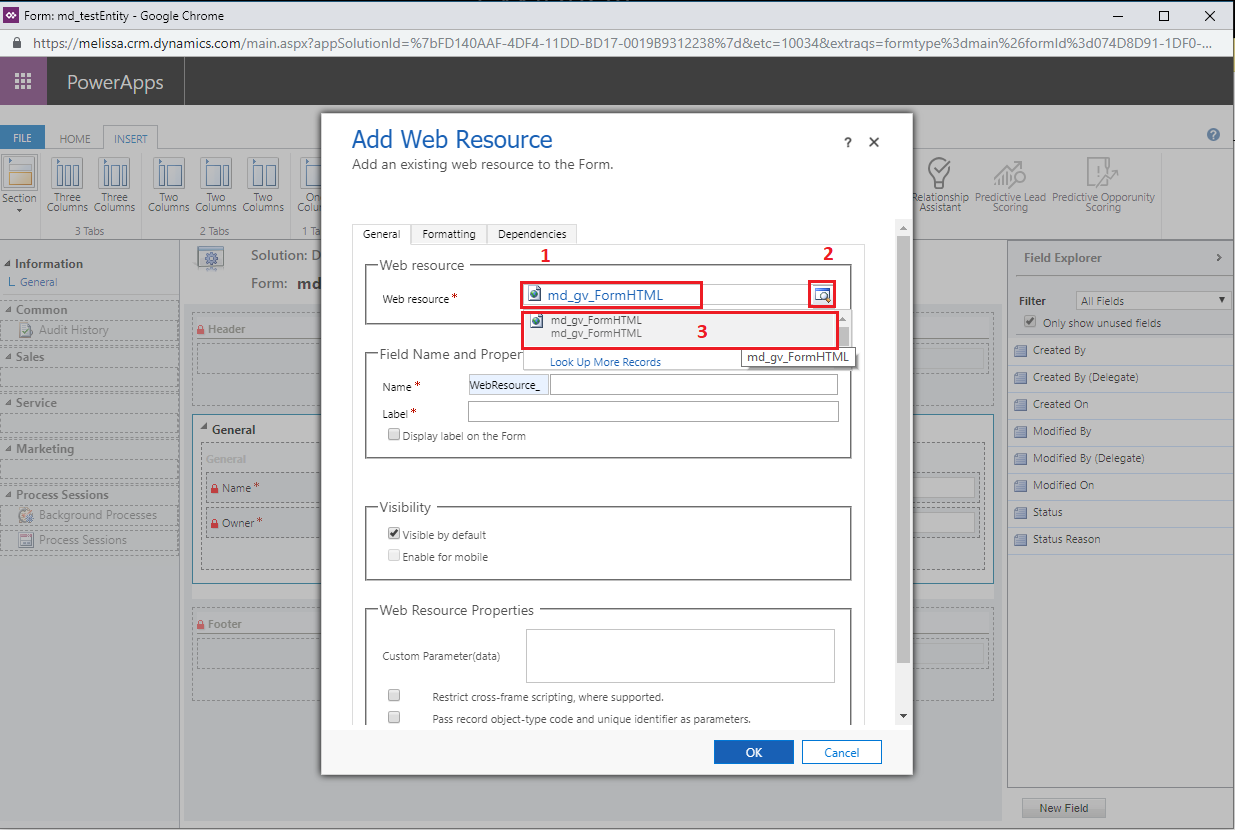
12. Type md_gv_FormHTML into the Web Resource field. Then click the search button to populate a drop down menu. Select the corresponding item in that menu.
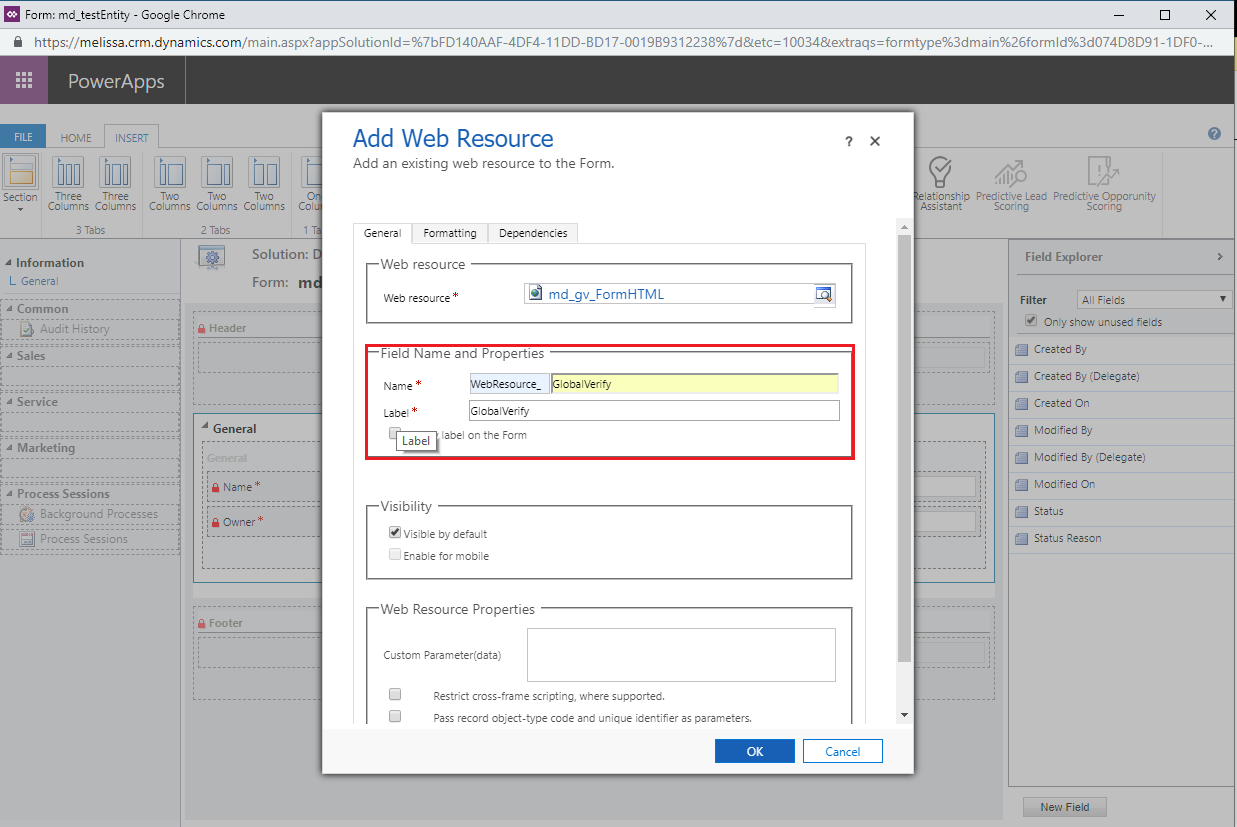
13. Name the Web Resource Global Verify. The Label field should auto-fill itself with the name you typed in.
14. Click the Formatting tab and change the Row Layout number to 20. This increases the number of rows to make the Global Verify details easier to read.
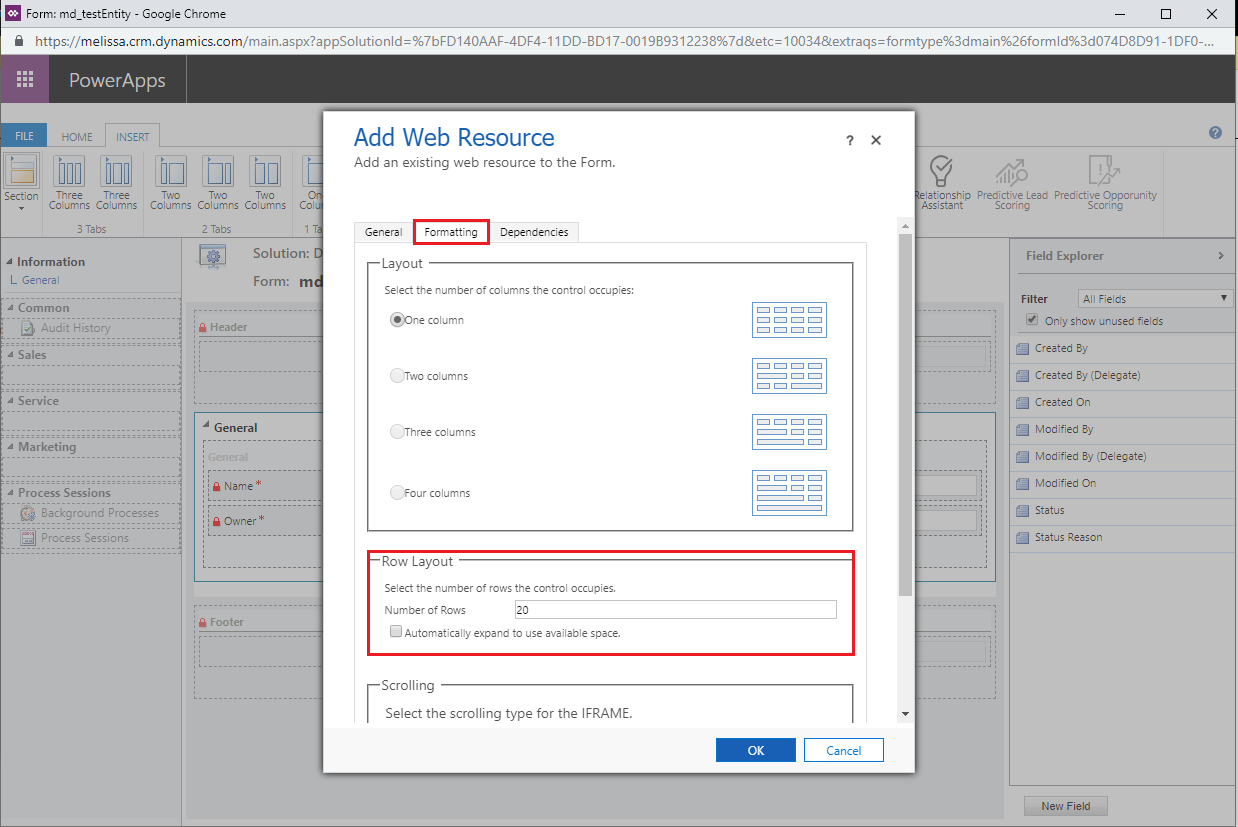
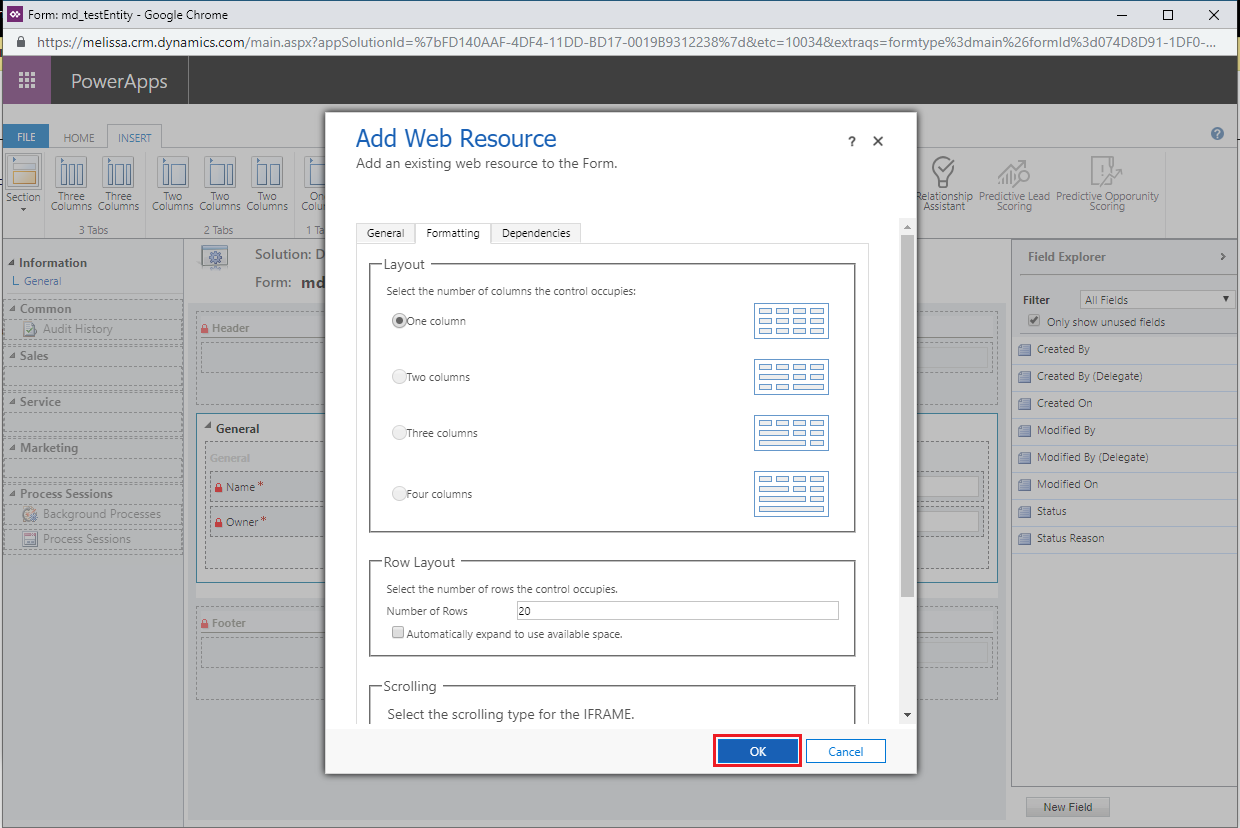
15. Click OK at the bottom of the window.
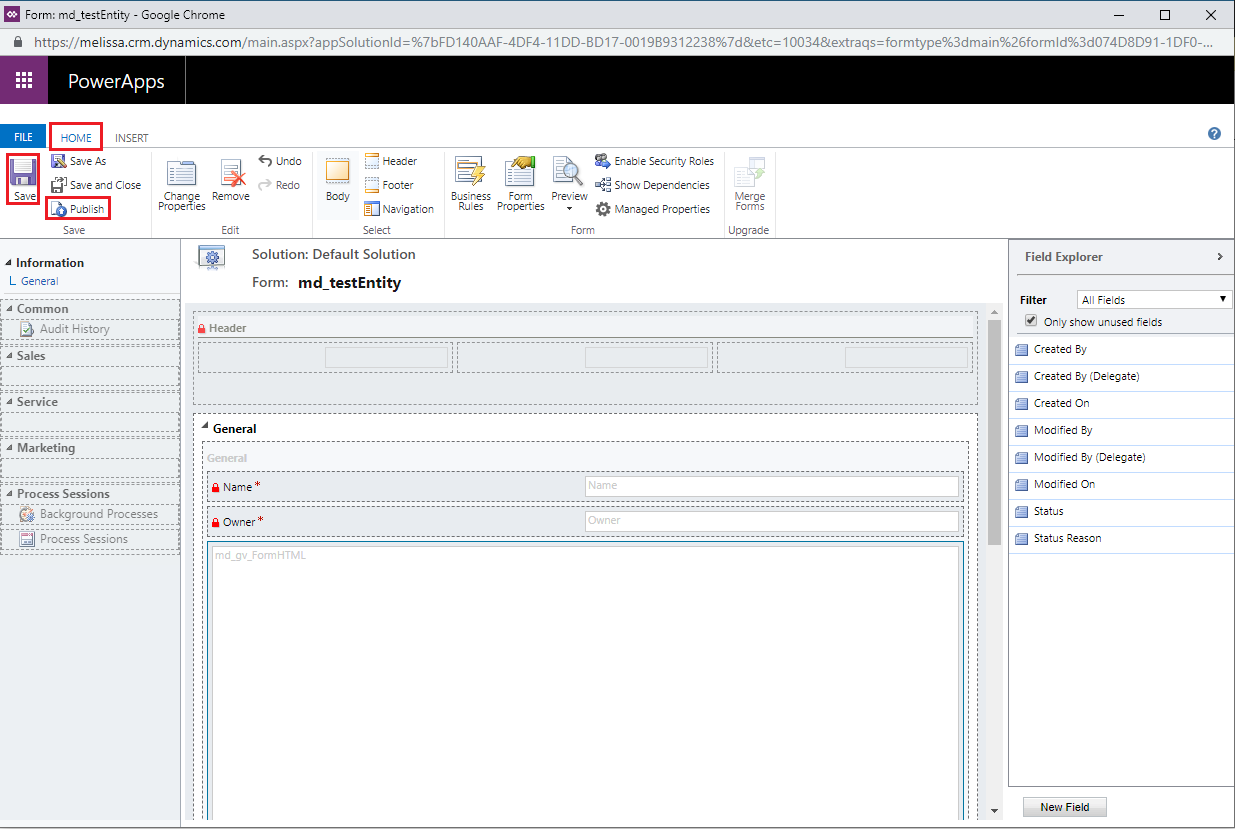
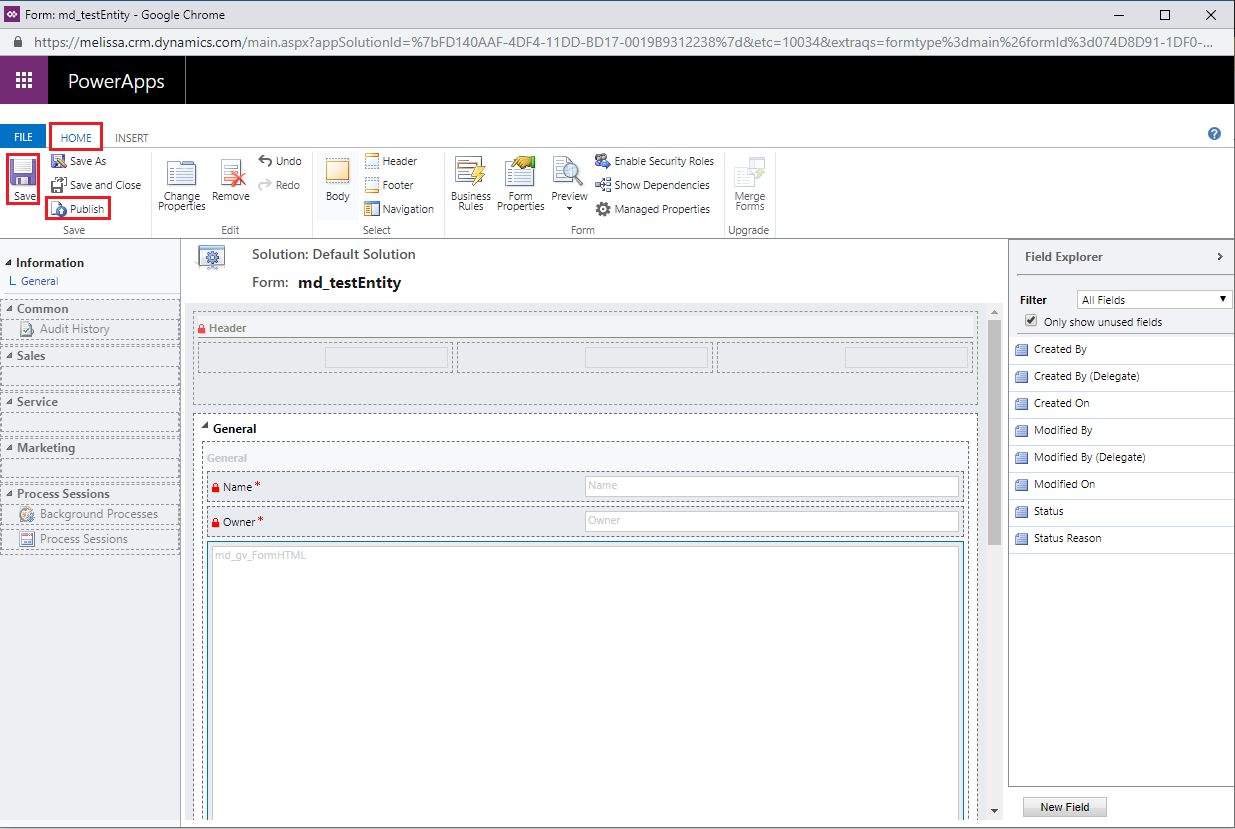
16. From the Home tab click Save. Then click the Publish button to save the modifications made.
After the form is added to the page, there are a handful of fields that need to be added for certain options to work correctly.
Additional Fields
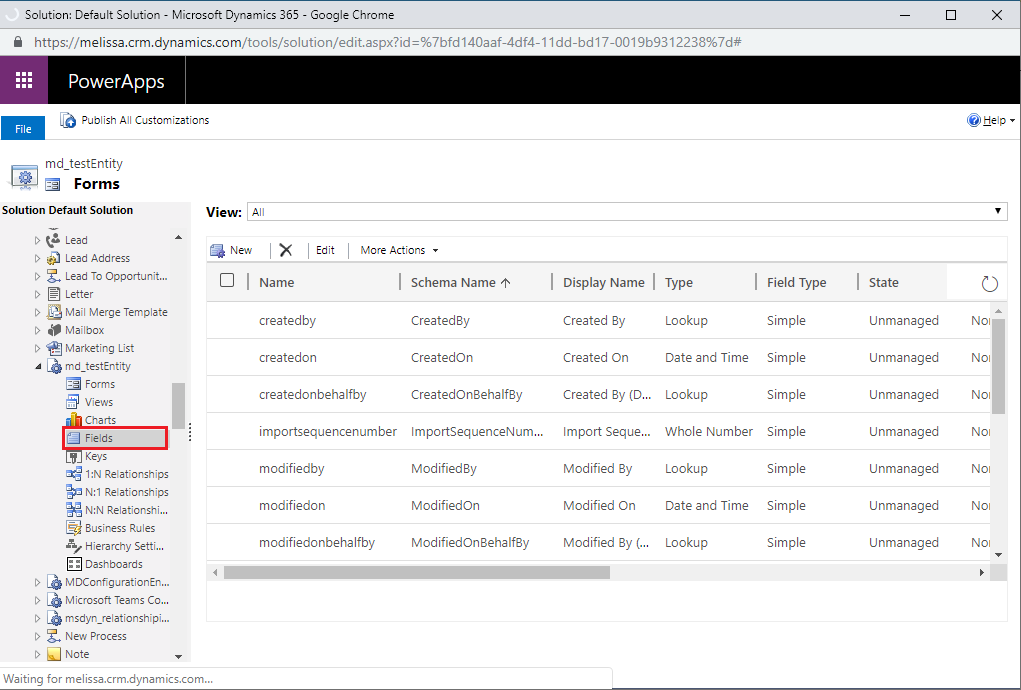
17. To add additional fields, open up the Fields tab for the entity you added md_gv_FormHTML to and click the New button.
There are two different types of fields you should make: Multiple Lines of Text, and Date and Time.
Multiple Lines of Text Field
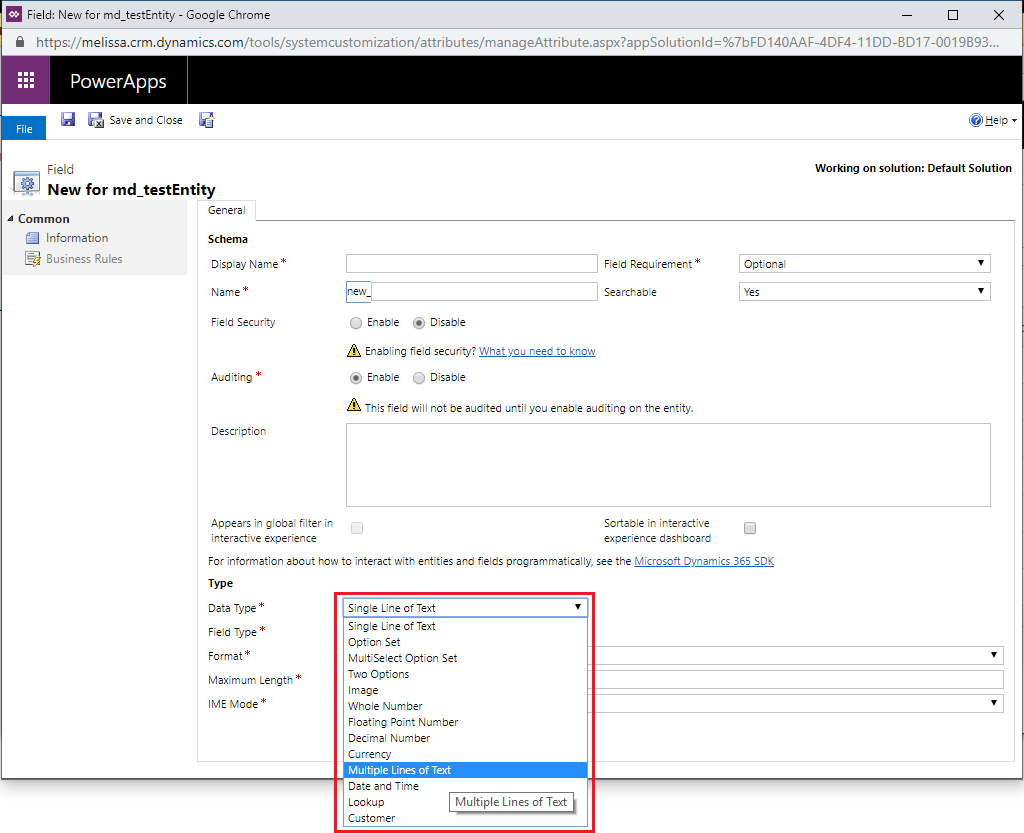
18. Under the Type section, change the Data Type field from Single line of Text to Multiple Lines of Text.
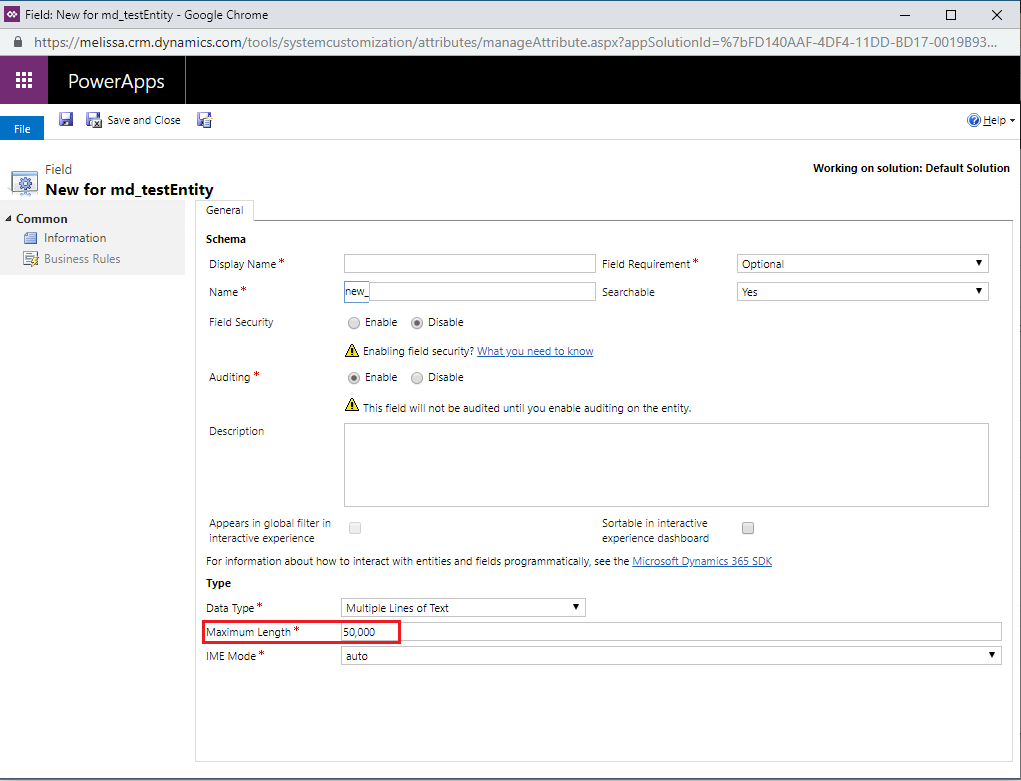
19. Change the Maximum Length value to 50,000.
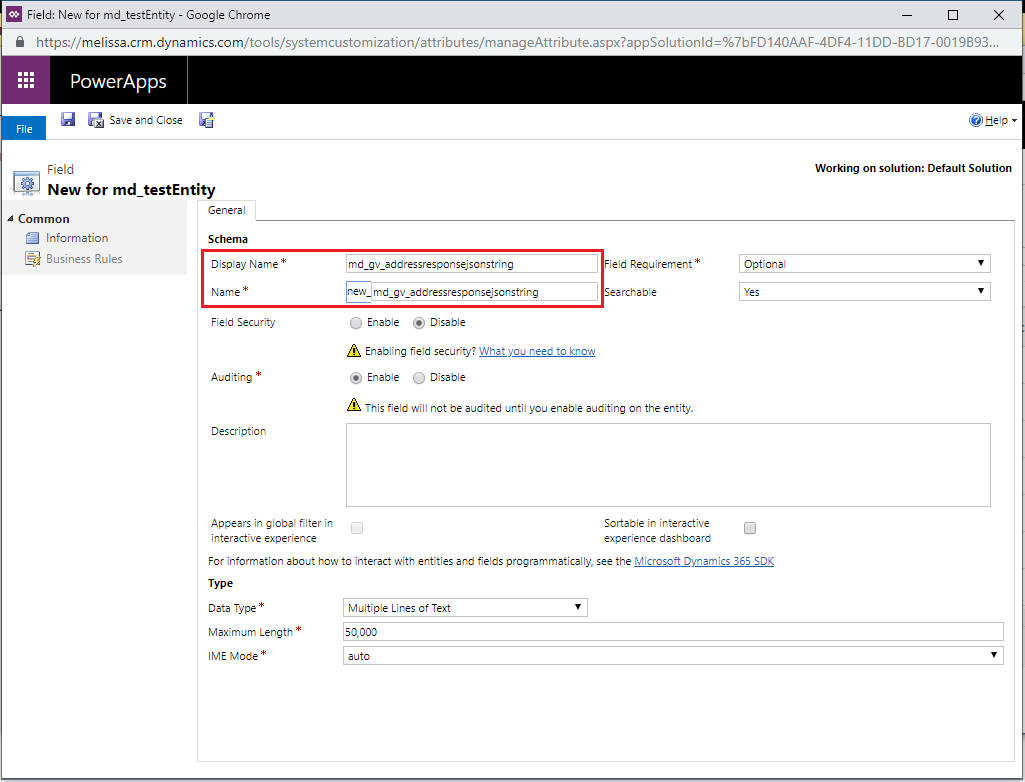
20. Then enter md_gv_adressresponsejsonstring into the Name and Display Name fields.
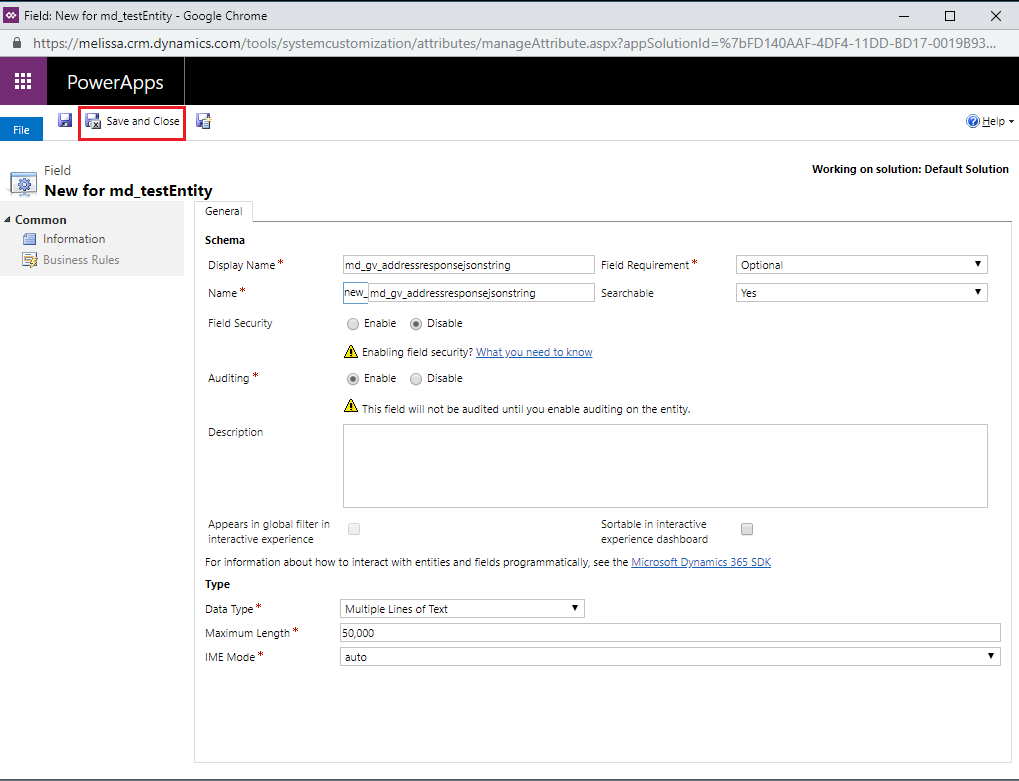
21. Click the Save and Close button.
REPEAT Steps 18-21 for md_gv_address2responsejsonstring, md_gv_emailresponsejsonstring, md_gv_nameresponsejsonstring, and md_gv_phoneresponsejsonstring.
Make sure to change the name for step 20 to the correct name.
Date and Time Field
The next step follows from Step 17.
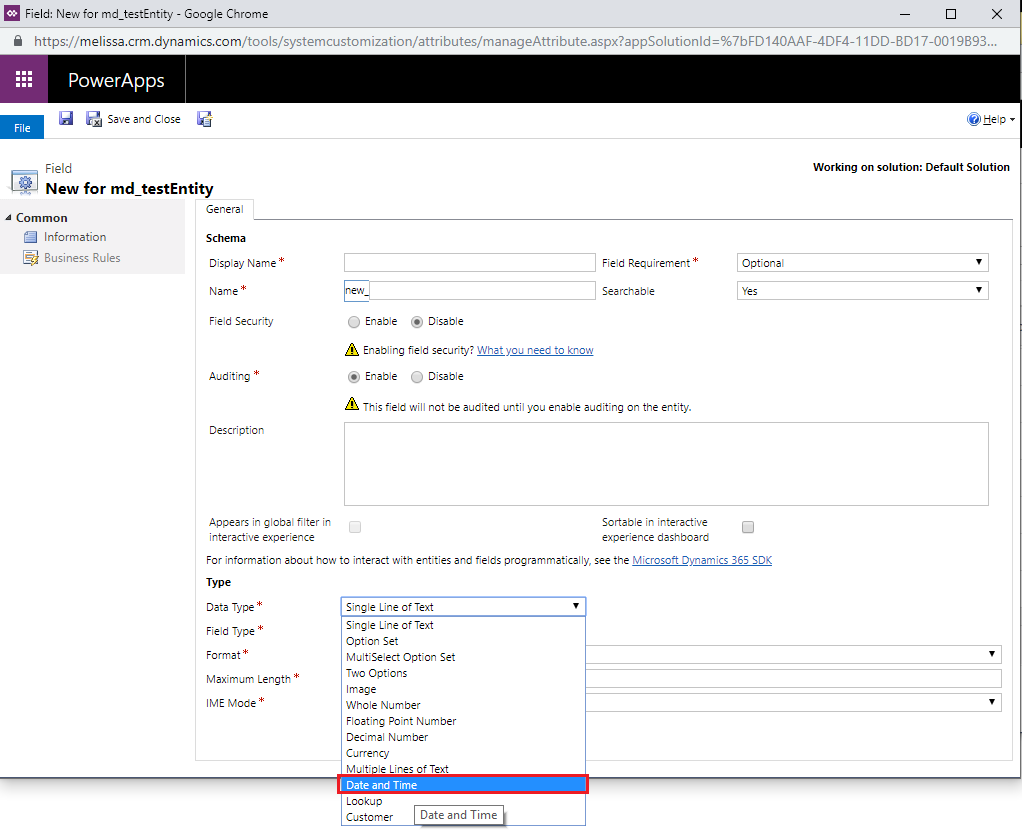
22. Change the Data Type field from Single Line of Text to Date and Time.
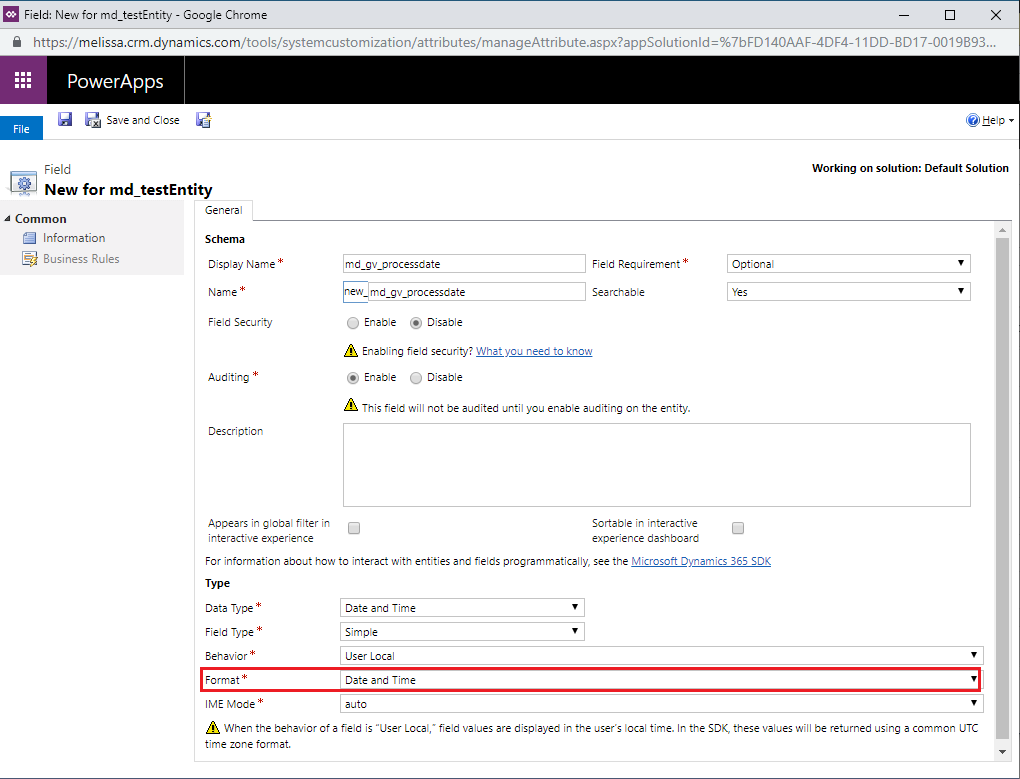
23. Change the Format field to Date and Time.
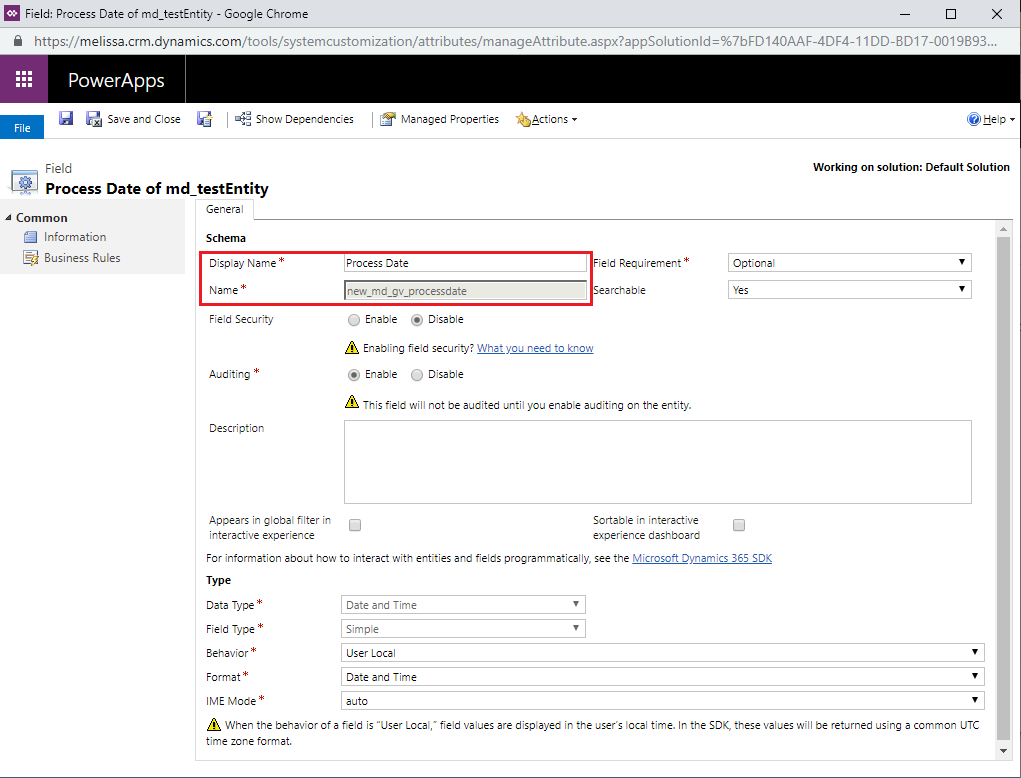
24. Add in md_gv_processdate to the Name field, and Process Date to the Display Name field.
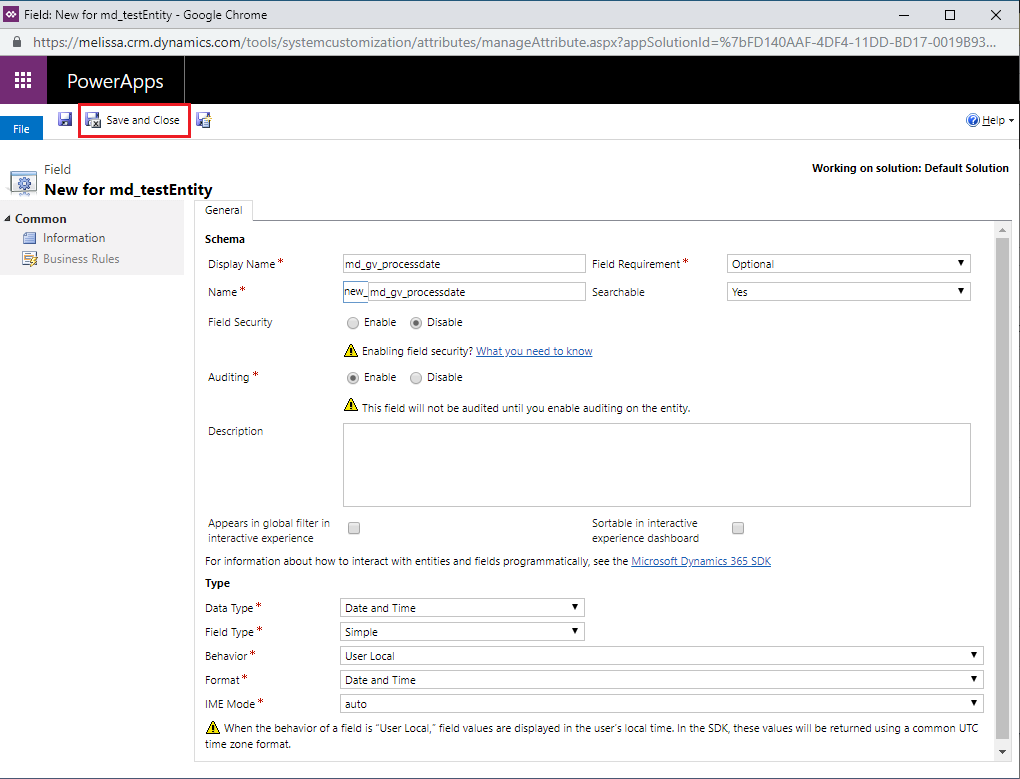
25. Click the Save and Close button.
Add Fields
Next we are going to add the fields we just made to the form of the entity.
26. Open the Main form of the entity.
27. On the left side of the window is a Field Explorer. This contains all of the fields that we just created. Drag them onto the form where ever you would like them to be placed.
28. For the reponsejsonstring fields it is a good idea to change their Visibility to hidden. To do this, double click the field on the form and uncheck the boxes for Display label on the form, and Visible by default. Once those are unchecked, click the OK button.
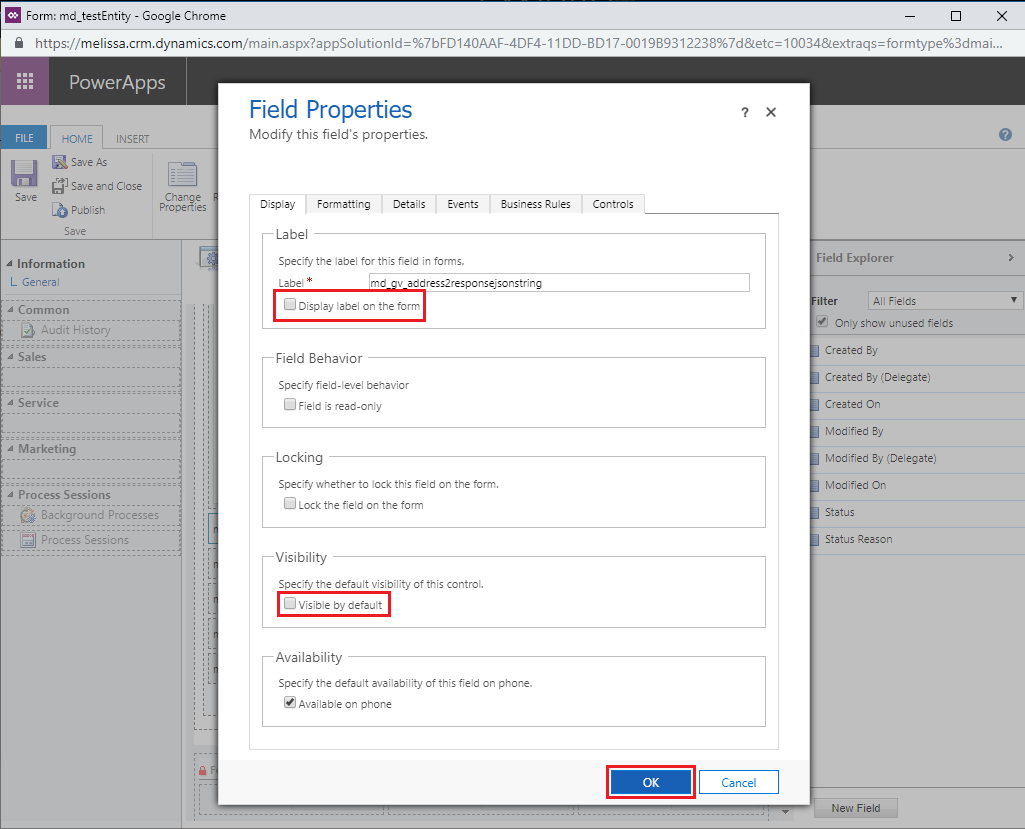
Repeat Step 28 for ALL responsejsonstring fields.
29. Click the Save and then the Publish buttons to save the changes made to the form.
