Difference between revisions of "Pentaho:Profiler Tutorial"
(Created page with "{{PentahoProfilerNav}} {{CustomTOC}} The following steps will guide you in the basic usage of Profiler for Pentaho. ==Add Component== To add Profiler Component to your pro...") |
|||
| Line 9: | Line 9: | ||
To add Profiler Component to your project, drag the component onto the Data Flow screen. This will snap the Profiler Component into your workflow space. | To add Profiler Component to your project, drag the component onto the Data Flow screen. This will snap the Profiler Component into your workflow space. | ||
[[File: | [[File:PENT_Profiler_Tutorial_Component.png|link=]] | ||
| Line 15: | Line 15: | ||
Select a data flow source to be your input data. Many formats can be used as Sources, including Excel files, flat files or Access Input data sources. Connect this data source to the Profiler Component by dragging the arrow from your data flow source to the Profiler Component. | Select a data flow source to be your input data. Many formats can be used as Sources, including Excel files, flat files or Access Input data sources. Connect this data source to the Profiler Component by dragging the arrow from your data flow source to the Profiler Component. | ||
[[File: | [[File:PENT_Profiler_Tutorial_Source.png|link=]] | ||
| Line 24: | Line 24: | ||
Map the input fields. | Map the input fields. | ||
[[File: | [[File:PENT_Profiler_InputField.png|link=]] | ||
===Analysis Options Tab=== | ===Analysis Options Tab=== | ||
[[File: | [[File:PENT_Profiler_AnalysisOptions.png|link=]] | ||
===Output Tab=== | ===Output Tab=== | ||
You can specify which groups or columns you want to be output. | You can specify which groups or columns you want to be output. | ||
[[File: | [[File:PENT_Profiler_Output.png|link=]] | ||
| Line 40: | Line 40: | ||
Add data destinations for downstream output. Connect the respective output filter pin to the output destination. | Add data destinations for downstream output. Connect the respective output filter pin to the output destination. | ||
[[File: | [[File:PENT_Profiler_Tutorial_Output.png|link=]] | ||
| Line 46: | Line 46: | ||
Click File and select Save Selected Items to save the project | Click File and select Save Selected Items to save the project | ||
[[File: | [[File:PENT_Tutorial_Save.png|link=]] | ||
Revision as of 22:02, 16 October 2015
← Data Quality Components for Pentaho
| Profiler Navigation | ||||
|---|---|---|---|---|
| Overview | ||||
| Tutorial | ||||
| Advanced Configuration | ||||
| ||||
| Output Pins | ||||
| Result Codes |
The following steps will guide you in the basic usage of Profiler for Pentaho.
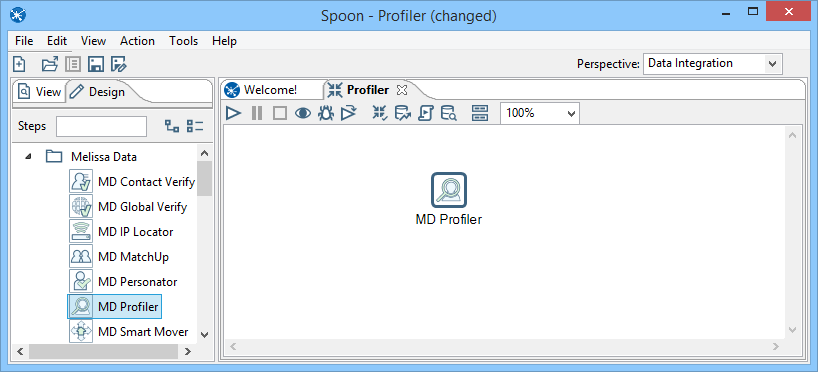
Add Component
To add Profiler Component to your project, drag the component onto the Data Flow screen. This will snap the Profiler Component into your workflow space.
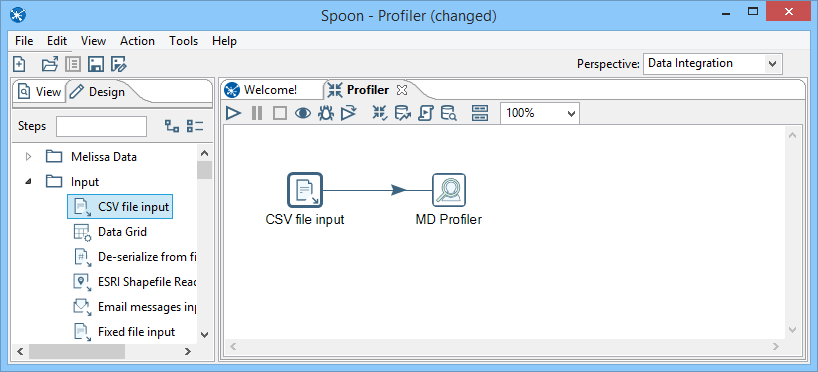
Connect Input
Select a data flow source to be your input data. Many formats can be used as Sources, including Excel files, flat files or Access Input data sources. Connect this data source to the Profiler Component by dragging the arrow from your data flow source to the Profiler Component.
Configure Component
Double click the Profiler Component to bring up the interface.
Input Field Tab
Map the input fields.
File:PENT Profiler InputField.png
Analysis Options Tab

Output Tab
You can specify which groups or columns you want to be output.

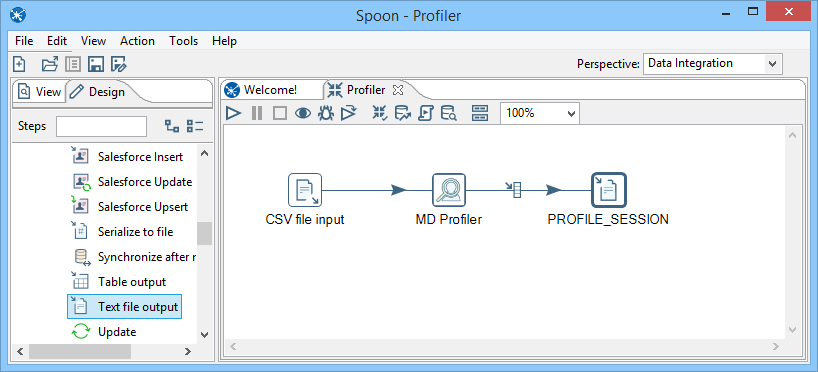
Connect Output
Add data destinations for downstream output. Connect the respective output filter pin to the output destination.
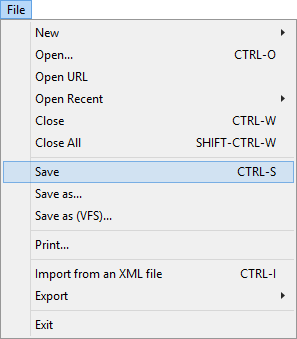
Save Settings
Click File and select Save Selected Items to save the project
Run Project
Now, the project is ready to run.