Difference between revisions of "Salesforce:Express Entry Lightning Action Override"
Jump to navigation
Jump to search
(Created page with "{{ListwareForSalesforceNav |IntroductionCollapse= }} {{CustomTOC}} This page will guide you in enabling Express Entry in your Salesforce Environment: ==Create the base Lightning Component to hold our override code== #Open the Dev Console by clicking the “gear” icon at the top right and clicking “Developer Console”. #In the Dev Console, click “File -> New” and choose “Lightning Component”. #Fill out the New Lightning Component form. The Name field shoul...") |
|||
| Line 1: | Line 1: | ||
{{ListwareForSalesforceNav | {{ListwareForSalesforceNav | ||
| | |CustomCodeCollapse= | ||
}} | }} | ||
{{CustomTOC}} | {{CustomTOC}} | ||
This page will guide you in enabling Express Entry in your Salesforce Environment: | This page will guide you in enabling Express Entry in your Salesforce Environment: | ||
Revision as of 23:54, 7 November 2022
← Clean Suite for CRM:Salesforce
This page will guide you in enabling Express Entry in your Salesforce Environment:
Create the base Lightning Component to hold our override code
- Open the Dev Console by clicking the “gear” icon at the top right and clicking “Developer Console”.
- In the Dev Console, click “File -> New” and choose “Lightning Component”.
- Fill out the New Lightning Component form. The Name field should be descriptive for future reference. In our case we chose to name it “MD_ExpressEntry_Override”. The Description field is optional.
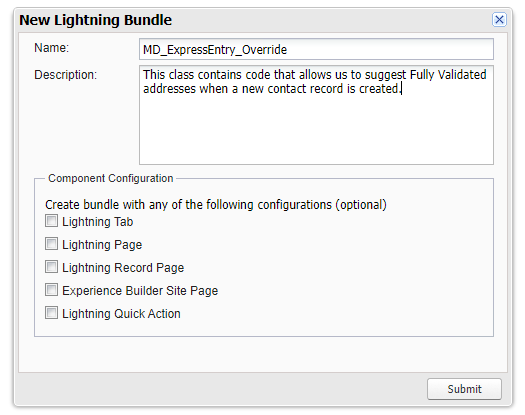 Fill out the New Lightning Component Form

Copy and Paste the Component code into the .cmp file
- Open the “ExpressEntryNew.cmp” file and copy the contents to your clipboard.
- Open the Component file of your new lightning component and paste the content inside, overwriting the existing content. In our case this file is named “
MD_ExpressEntry_Override.cmp”. - Hit Ctrl+S to save the current file.
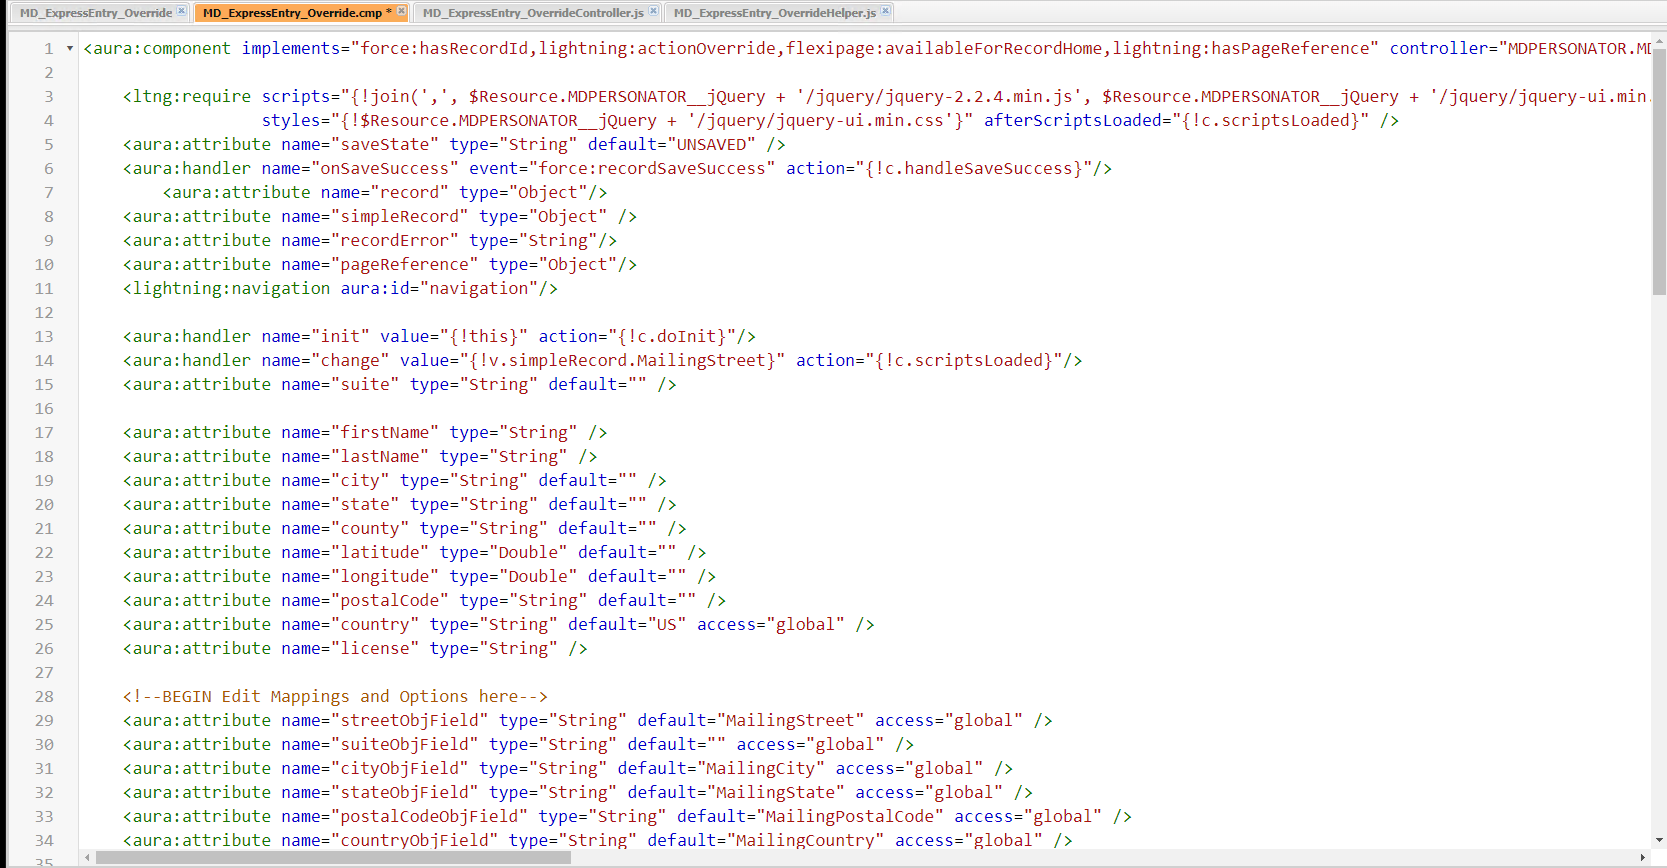 Copy/Paste Component Code

Copy and Paste the Controller code into the Controller .js file
- Open the “ExpressEntryNewController.js” file and copy the contents to your clipboard.
- Open the Controller file of your new lightning component and paste the content inside, overwriting the existing content. In our case this file is named “
MD_ExpressEntry_OverrideController.js”. - Hit Ctrl+S to save the current file.
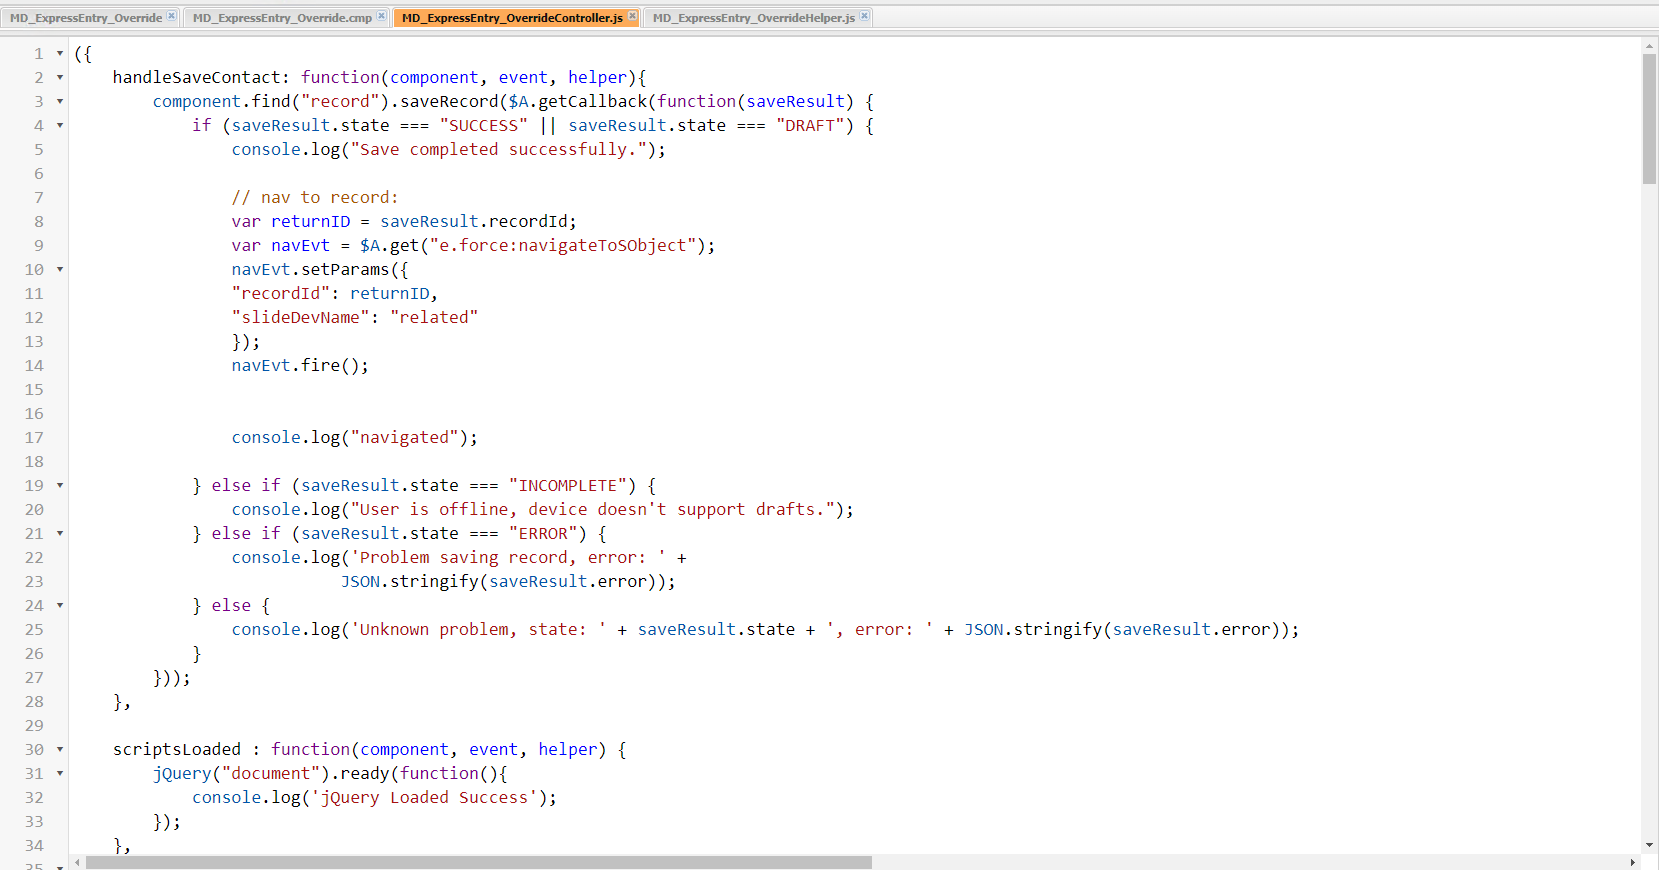 Copy/Paste Controller Code

Copy and Paste the Helper code into the helper .js file
- Open the “ExpressEntryNewHelper.js” file and copy the contents to your clipboard.
- Open the Helper file of your new lightning component and paste the content inside, overwriting the existing content. In our case this file is named “
MD_ExpressEntry_OverrideHelper.js”. - Hit Ctrl+S to save the current file.
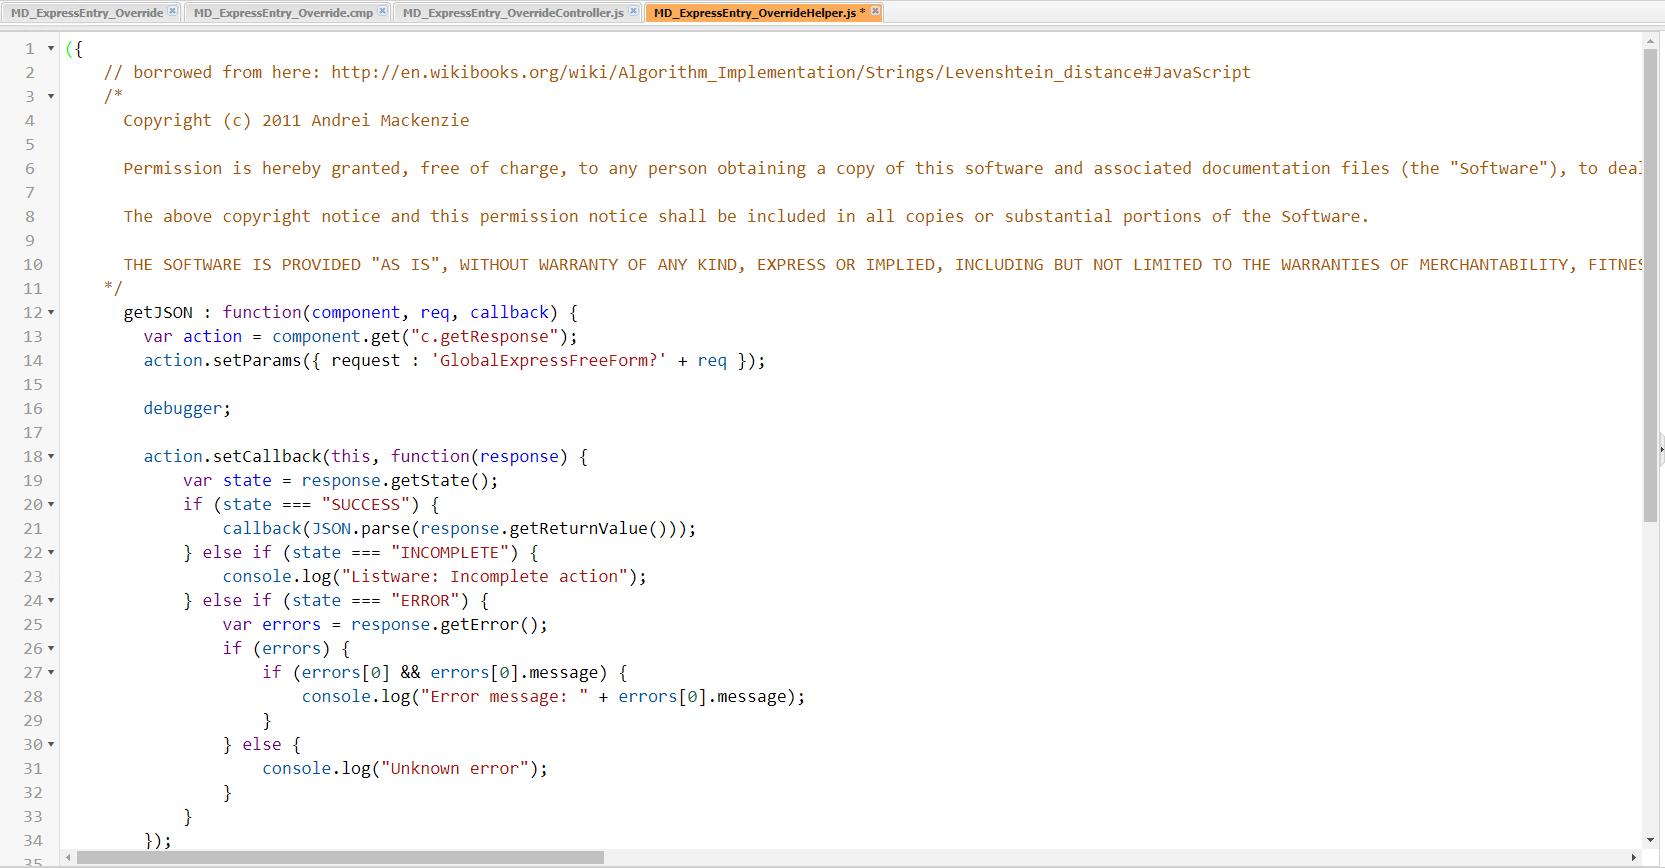 Copy/Paste Helper Code

Override the default “NEW” action with our newly created Lightning Component
- At the top right, click “Setup” and then Select “Object Manager” on the Setup tab.
- Navigate to the Contact object and select “Buttons Links, and Actions” on the left navigation tab.
- Find the “NEW” action and click the drop down on the right and click “Edit”.
 Edit "NEW" Action
- Select the “Lightning Component” radio button on the “Lightning Experience Override” section and chose our newly created component from the drop down list. Then Click Save.
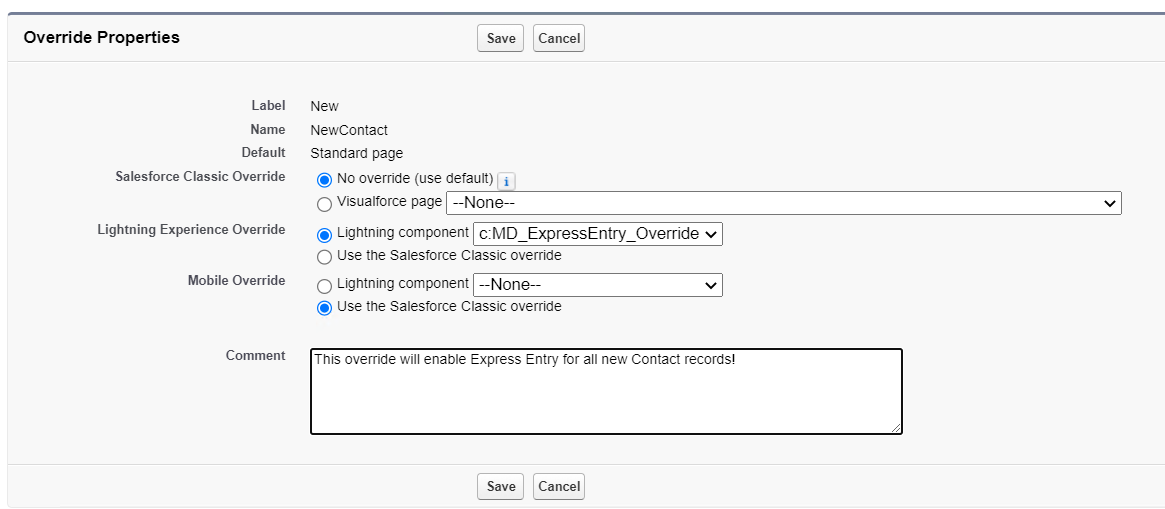 Save the Override


Validate that our component works
- Create a new contact record.
- Being populating the fields.
- Type in an address in the Mailing Street field and after the third keystroke, suggestions should appear.
- Select an address from one of the suggestions and verify it populates the rest of the fields.
- Click “Create New” and validate a new record has been created with your selected address.
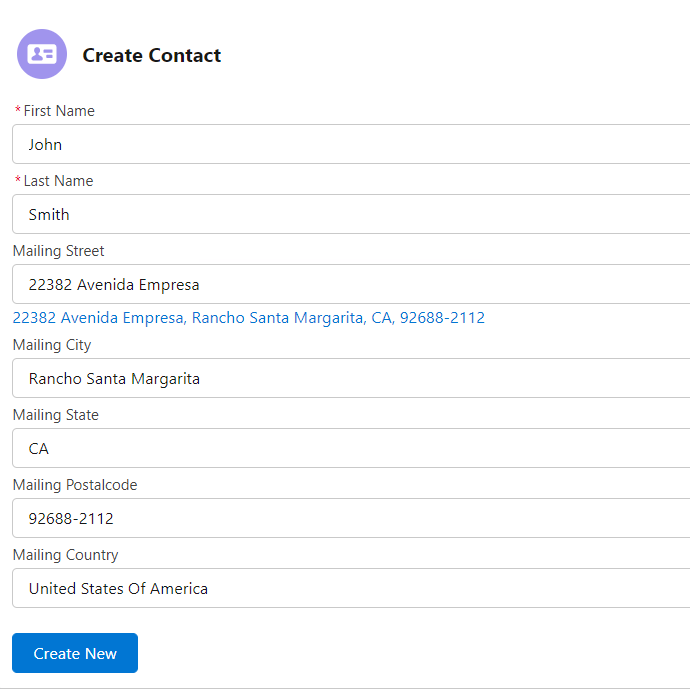 Create New Record
