Difference between revisions of "Unison:Projects"
| (4 intermediate revisions by the same user not shown) | |||
| Line 1: | Line 1: | ||
{{ | {{UnisonNav | ||
|PlatformCollapse= | |PlatformCollapse= | ||
}} | }} | ||
| Line 6: | Line 6: | ||
{{CustomTOC}} | {{CustomTOC}} | ||
The | The Unison by Melissa Projects menu has the option to create a '''New''' project or view your already created projects under '''My Projects'''. | ||
[[File:MDQ_Projects_Menu.png|link=]] | [[File:MDQ_Projects_Menu.png|link=]] | ||
| Line 12: | Line 12: | ||
==New== | ==New== | ||
[[File: | [[File:MDQ_Projects_New.png|link=]] | ||
This section will start the guide for setting up a new project. The steps followed are: | This section will start the guide for setting up a new project. The steps followed are: | ||
| Line 22: | Line 22: | ||
= | <h3 class="productfield">Start A New Project</h3> | ||
The '''Start A New Project''' guide will help you set up your project with a name and select a source. | The '''Start A New Project''' guide will help you set up your project with a name and select a source. | ||
= | <h3 class="productfield">Name Your Project</h3> | ||
[[File:MDQ_Projects_NameProject.png|link=]] | [[File:MDQ_Projects_NameProject.png|link=]] | ||
| Line 42: | Line 42: | ||
If you mouse-over a project name a context menu will slide out, allowing you to: | If you mouse-over a project name a context menu will slide out, allowing you to: | ||
*Rename your project | *Rename your project | ||
*[[Schedule Project Execution|Schedule your project]] | *[[#Schedule Project Execution|Schedule your project]] | ||
*Delete your project | *Delete your project | ||
| Line 49: | Line 49: | ||
==Project Configuration== | ==Project Configuration== | ||
The project configuration screen contains the following sections: | |||
*[[#Inputs|Inputs]] | |||
*[[#Services|Services]] | |||
*[[#Outputs|Outputs]] | |||
*[[#Schedule Project Execution|Schedule Project Execution]] | |||
*[[#Run Now|Run Now]] | |||
==Inputs== | ==Inputs== | ||
This section displays your inputs. If you do not have any, you will be prompted to '''Add an Input'''. | This section displays your inputs. If you do not have any, you will be prompted to '''Add an Input'''. | ||
= | <h3 class="productfield">Select a source</h3> | ||
[[File:MDQ_Projects_SourceSelect.png|link=]] | :[[File:MDQ_Projects_SourceSelect.png|link=]] | ||
Select a source for your project. This can be either a file or a table. | :Select a source for your project. This can be either a file or a table. | ||
Once you select a source, you will be sent to the [[#Input File Preview|Input File Preview]]. | :Once you select a source, you will be sent to the [[#Input File Preview|Input File Preview]]. | ||
= | <h3 class="productfield">Input File Preview</h3> | ||
[[File:MDQ_Projects_InputFilePreview.png|link=]] | :[[File:MDQ_Projects_InputFilePreview.png|link=]] | ||
This section lets you control your input file settings. You can choose the delimiter and enclosure, select which fields to include, and preview the results. When you are done previewing your input file, click '''Save'''. | :This section lets you control your input file settings. You can choose the delimiter and enclosure, select which fields to include, and preview the results. When you are done previewing your input file, click '''Save'''. | ||
| Line 83: | Line 92: | ||
[[File:MDQ_Projects_OutputConfigurationWrite.png|link=]] | [[File:MDQ_Projects_OutputConfigurationWrite.png|link=]] | ||
==Write to File== | |||
Write your output to a file. | Write your output to a file. | ||
==File Settings== | |||
<h3 class="productfield">Filename</h3> | |||
:Select a filename for your output file. | :Select a filename for your output file. | ||
<h3 class="productfield">Enclosure</h3> | |||
:Select the enclosure to use in the output file. | :Select the enclosure to use in the output file. | ||
<h3 class="productfield">Delimiter</h3> | |||
:Select the delimiter to use in the output file. | :Select the delimiter to use in the output file. | ||
<h3 class="productfield">Compression</h3> | |||
:Select the compression to use on the output file. | :Select the compression to use on the output file. | ||
==Filter== | |||
<h3 class="productfield">Filters</h3> | |||
:Select a pre-built filter for the output. Once you select a filter, you may edit the filter string. | :Select a pre-built filter for the output. Once you select a filter, you may edit the filter string. | ||
<h3 class="productfield">Filter String (edit as needed)</h3> | |||
:The filter string generated by the selected filter. You may edit this for more control. | :The filter string generated by the selected filter. You may edit this for more control. | ||
==Write to Table== | |||
Write your output to a table. To do so, you must select a connection under '''Connection Settings'''. If there are no connections, create a new connection. | Write your output to a table. To do so, you must select a connection under '''Connection Settings'''. If there are no connections, create a new connection. | ||
==Create a New Connection== | |||
<h3 class="productfield">Name</h3> | |||
:Name the connection. | :Name the connection. | ||
<h3 class="productfield">Vendor</h3> | |||
:Select a vendor for your connection. | :Select a vendor for your connection. | ||
<h3 class="productfield">Host</h3> | |||
:Enter a host IP. | :Enter a host IP. | ||
<h3 class="productfield">Port</h3> | |||
:Enter a port for your host. | :Enter a port for your host. | ||
<h3 class="productfield">Database</h3> | |||
:Enter the name of your database. | :Enter the name of your database. | ||
<h3 class="productfield">Username</h3> | |||
:Enter the username. | :Enter the username. | ||
<h3 class="productfield">Password</h3> | |||
:Enter the password. | :Enter the password. | ||
==Output Fields== | |||
[[File:MDQ_Projects_OutputFields.png|link=]] | [[File:MDQ_Projects_OutputFields.png|link=]] | ||
| Line 143: | Line 165: | ||
You can choose to schedule your project to run on a specified date, time, and frequency. | You can choose to schedule your project to run on a specified date, time, and frequency. | ||
<h3 class="productfield">Description</h3> | |||
:Enter a description of your scheduled project execution. | :Enter a description of your scheduled project execution. | ||
<h3 class="productfield">Frequency</h3> | |||
:Set a frequency for your scheduled project execution. | :Set a frequency for your scheduled project execution. | ||
| Line 154: | Line 178: | ||
[[Category: | [[Category:Unison by Melissa]] | ||
Revision as of 21:07, 29 June 2018
The Unison by Melissa Projects menu has the option to create a New project or view your already created projects under My Projects.

New
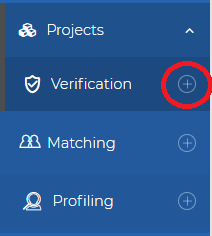
This section will start the guide for setting up a new project. The steps followed are:
Start A New Project
The Start A New Project guide will help you set up your project with a name and select a source.
Name Your Project
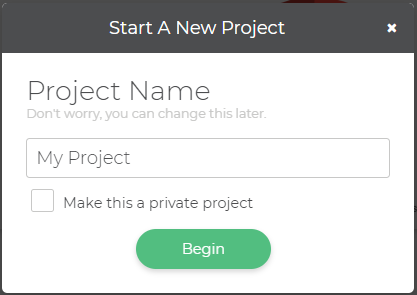
Give your project a name and click Next. This will then go to the Select a source step.
My Projects
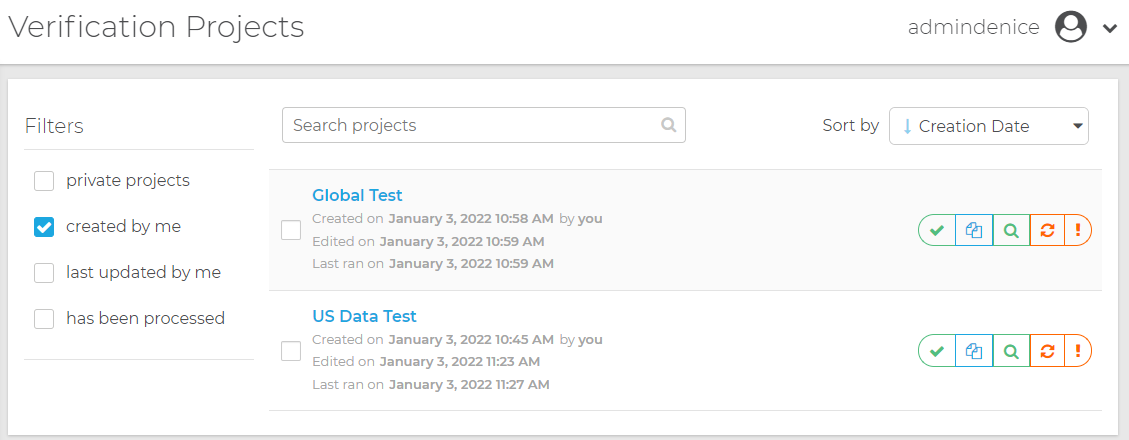
This section displays your already created projects, listing their name, date created, date updated, and date last executed. You can search through your projects by using the text fields under each heading and sort them with the arrows next to each heading.

If you mouse-over a project name a context menu will slide out, allowing you to:
- Rename your project
- Schedule your project
- Delete your project
If you click on a project name, it will take you to the Project Configuration section.
Project Configuration
The project configuration screen contains the following sections:
Inputs
This section displays your inputs. If you do not have any, you will be prompted to Add an Input.
Select a source
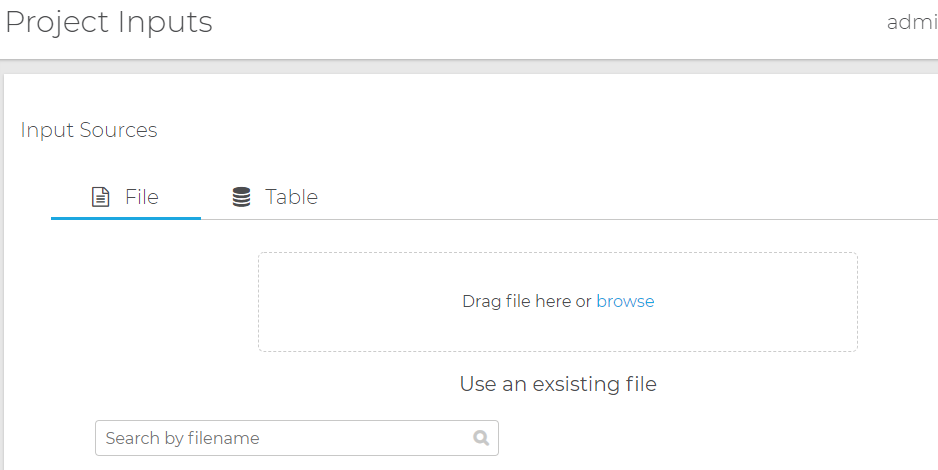
- Select a source for your project. This can be either a file or a table.
- Once you select a source, you will be sent to the Input File Preview.
Input File Preview
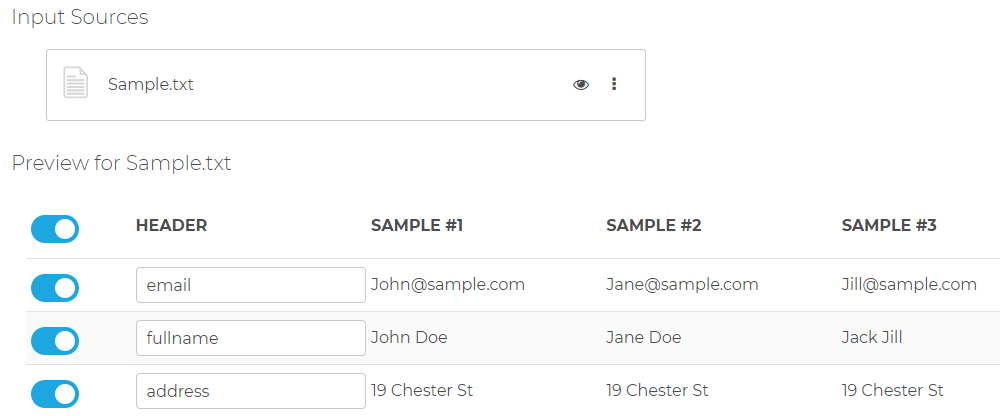
- This section lets you control your input file settings. You can choose the delimiter and enclosure, select which fields to include, and preview the results. When you are done previewing your input file, click Save.
Services
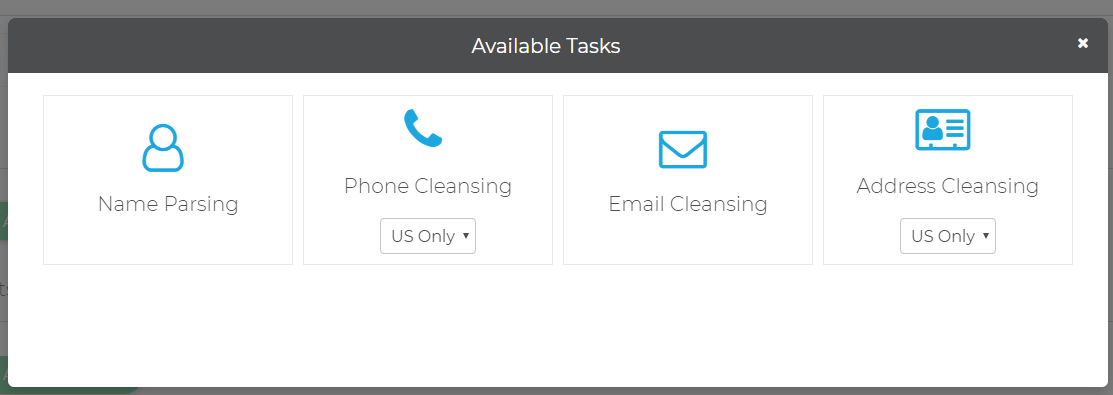
While configuring the project, you select the service(s) you want to use. For more details on a specific service, see the links below.
Outputs
Select what kind of output you want.
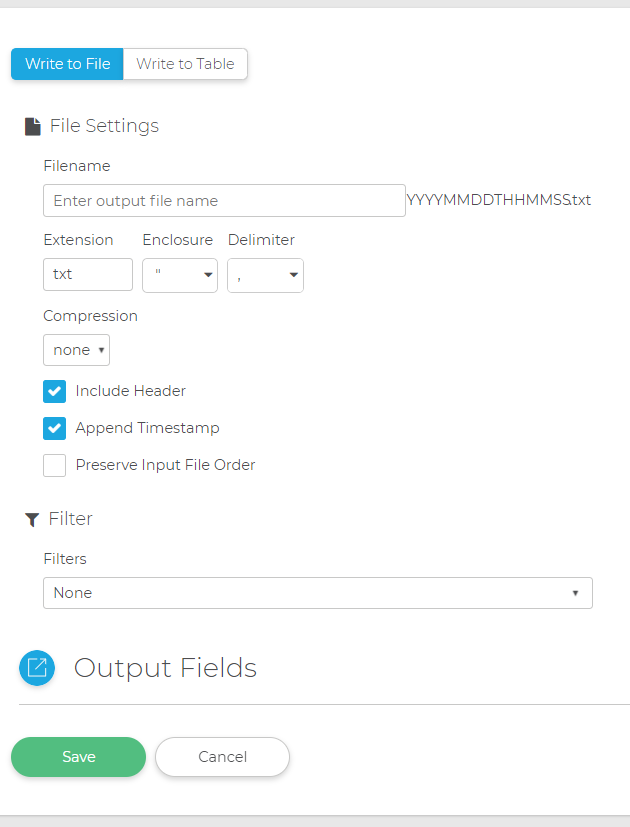
Write to File
Write your output to a file.
File Settings
Filename
- Select a filename for your output file.
Enclosure
- Select the enclosure to use in the output file.
Delimiter
- Select the delimiter to use in the output file.
Compression
- Select the compression to use on the output file.
Filter
Filters
- Select a pre-built filter for the output. Once you select a filter, you may edit the filter string.
Filter String (edit as needed)
- The filter string generated by the selected filter. You may edit this for more control.
Write to Table
Write your output to a table. To do so, you must select a connection under Connection Settings. If there are no connections, create a new connection.
Create a New Connection
Name
- Name the connection.
Vendor
- Select a vendor for your connection.
Host
- Enter a host IP.
Port
- Enter a port for your host.
Database
- Enter the name of your database.
Username
- Enter the username.
Password
- Enter the password.
Output Fields

Select which fields and what order you want them to output. Click the trashcan icon to remove a field, and drag-and-drop to reorder the fields.
Schedule Project Execution
You can choose to schedule your project to run on a specified date, time, and frequency.
Description
- Enter a description of your scheduled project execution.
Frequency
- Set a frequency for your scheduled project execution.
Run Now
Run your project now.