This wiki is no longer being updated as of December 10, 2025.
|
Salesforce:Lightning Global Express Entry: Difference between revisions
Jump to navigation
Jump to search
Created page with "← Clean Suite for CRM:Salesforce {{CustomTOC}} This is the Clean Suite for Salesforce Express Entry Lightning Component Installation G..." |
No edit summary |
||
| (One intermediate revision by the same user not shown) | |||
| Line 1: | Line 1: | ||
{{ListwareForSalesforceNav | |||
|LightningCollapse= | |||
}} | |||
{{CustomTOC}} | {{CustomTOC}} | ||
| Line 9: | Line 12: | ||
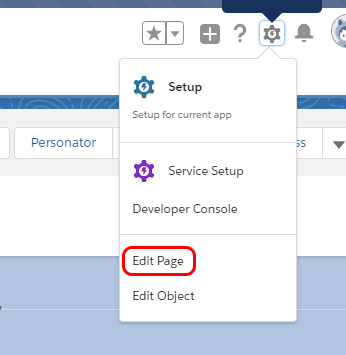
<li>Click the ''gear'' icon at the top and select '''Edit Page'''.</li> | <li>Click the ''gear'' icon at the top and select '''Edit Page'''.</li> | ||
[[File:Salesforce_Lightning-EE_Install_01.png|frame|none|Select '''Edit Page''']] | [[File:Salesforce_Lightning-EE_Install_01.png|frame|none|alt=Salesforce Lightning-EE Install 01 - Melissa Wiki|Select '''Edit Page''']] | ||
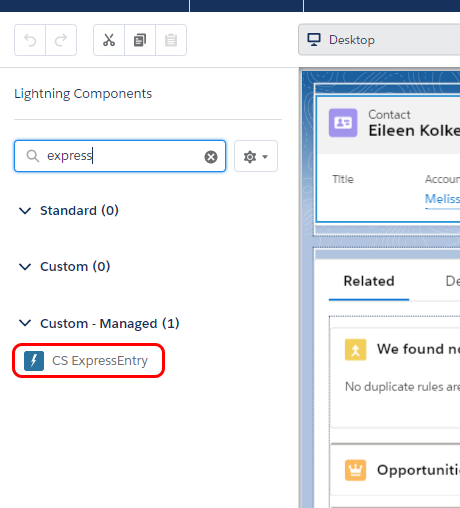
<li>Find the '''CS ExpressEntry''' Lightning Component on the left hand pane and drag it anywhere you like on your page.</li> | <li>Find the '''CS ExpressEntry''' Lightning Component on the left hand pane and drag it anywhere you like on your page.</li> | ||
[[File:Salesforce_Lightning-EE_Install_02.png|frame|none|Drag and Drop '''CS ExpressEntry''']] | [[File:Salesforce_Lightning-EE_Install_02.png|frame|none|alt=Salesforce Lightning-EE Install 02 - Melissa Wiki|Drag and Drop '''CS ExpressEntry''']] | ||
[[File:Salesforce_Lightning-EE_Install_03.png|frame|none|]] | [[File:Salesforce_Lightning-EE_Install_03.png|frame|none|alt=Salesforce Lightning-EE Install 03 - Melissa Wiki|]] | ||
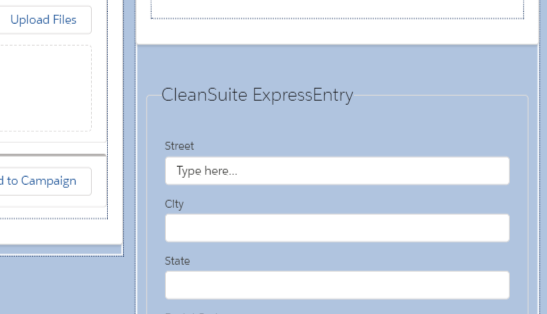
<li>Click the '''CleanSuite ExpressEntry''' lightning component you just added to the page. This will open up the configuration panel on the right.</li> | <li>Click the '''CleanSuite ExpressEntry''' lightning component you just added to the page. This will open up the configuration panel on the right.</li> | ||
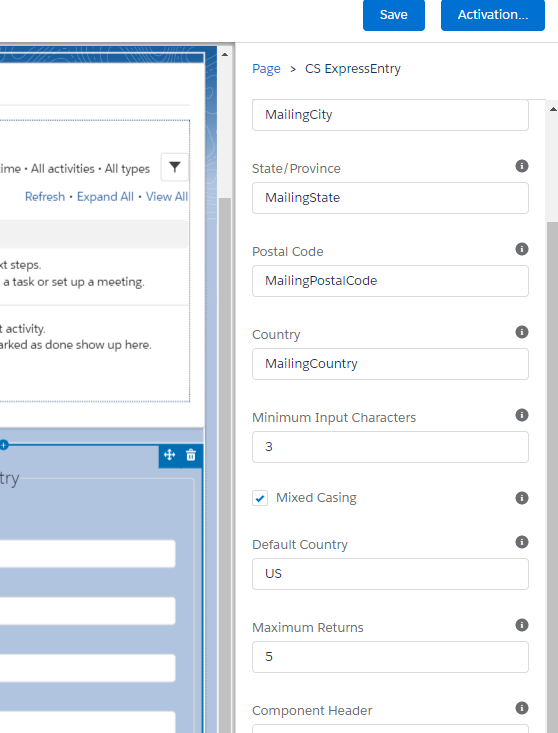
<li>Fill out the name of the fields you want to bind the output to. You can also change other settings at this point to fit your usage.</li> | <li>Fill out the name of the fields you want to bind the output to. You can also change other settings at this point to fit your usage.</li> | ||
[[File:Salesforce_Lightning-EE_Install_04.png|frame|none|Fill in Fields]] | [[File:Salesforce_Lightning-EE_Install_04.png|frame|none|alt=Salesforce Lightning-EE Install 04 - Melissa Wiki|Fill in Fields]] | ||
<li>Once you finish configuring the component, click '''Save''' at the top to confirm your changes.</li> | <li>Once you finish configuring the component, click '''Save''' at the top to confirm your changes.</li> | ||
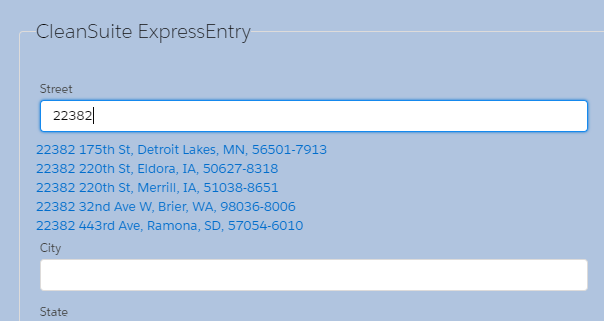
<li>Click the '''Back''' button at the top to navigate back to the object. We can now confirm that ExpressEntry works by typing in the '''Street''' field.</li> | <li>Click the '''Back''' button at the top to navigate back to the object. We can now confirm that ExpressEntry works by typing in the '''Street''' field.</li> | ||
[[File:Salesforce_Lightning-EE_Install_05.png|frame|none|Type in the '''Street''' field to test.]] | [[File:Salesforce_Lightning-EE_Install_05.png|frame|none|alt=Salesforce Lightning-EE Install 05 - Melissa Wiki|Type in the '''Street''' field to test.]] | ||
</ol> | </ol> | ||
[[Category:Clean Suite for CRM:Salesforce]] | [[Category:Clean Suite for CRM:Salesforce]] | ||
Latest revision as of 18:18, 18 January 2022
← Clean Suite for CRM:Salesforce
This is the Clean Suite for Salesforce Express Entry Lightning Component Installation Guide.
Installation Guide
- Navigate to an object record of the type you want to add express entry to. In this example we'll use the Contact object and begin by navigating to a random contact.
- Click the gear icon at the top and select Edit Page.
- Find the CS ExpressEntry Lightning Component on the left hand pane and drag it anywhere you like on your page.
- Click the CleanSuite ExpressEntry lightning component you just added to the page. This will open up the configuration panel on the right.
- Fill out the name of the fields you want to bind the output to. You can also change other settings at this point to fit your usage.
- Once you finish configuring the component, click Save at the top to confirm your changes.
- Click the Back button at the top to navigate back to the object. We can now confirm that ExpressEntry works by typing in the Street field.
