This wiki is no longer being updated as of December 10, 2025.
|
Dynamics CRM:Workflow Tutorial: Difference between revisions
No edit summary |
No edit summary |
||
| Line 64: | Line 64: | ||
[[Category:Dynamics | [[Category:Clean Suite for CRM:Dynamics]] | ||
Revision as of 14:57, 27 September 2018
← Clean Suite for CRM:Dynamics
| Dynamics Navigation | |||
|---|---|---|---|
| Introduction | |||
| License | |||
| System Requirements | |||
|
This tutorial will show you how to use an efficient workflow. We will be using the Personator solution and its workflows in this tutorial.
Note: You must first complete the configuration of the Personator solution to use this tutorial. The workflows you learn here will also only be present in the Dynamics CRM 2016 version of our solutions.
Access Default Solution
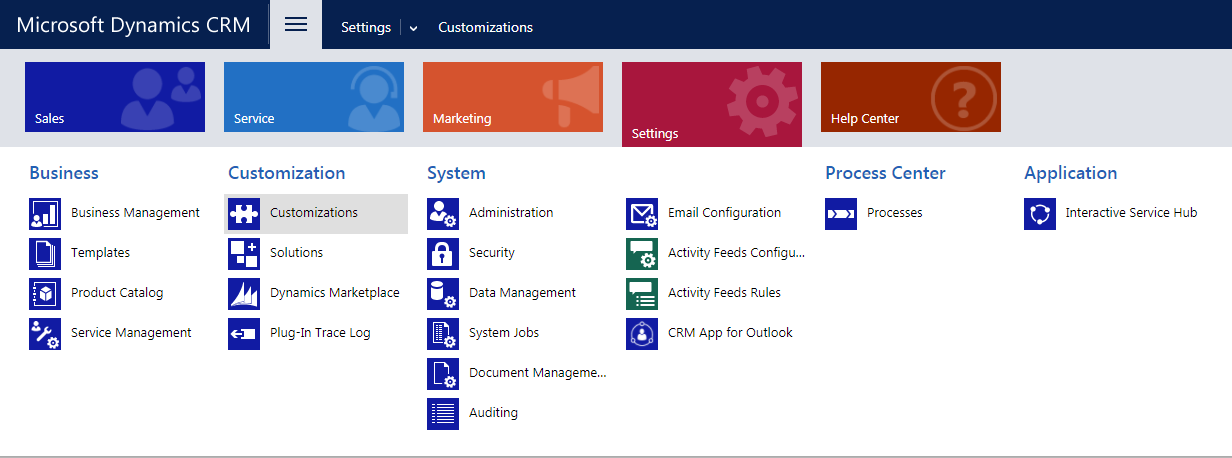
Begin by accessing the default solution of the Dynamics CRM or Dynamics 365 instance. Open the Dynamics CRM menu, click the Settings button, then Customizations.
Customize the Solution
In the Customizations area click Customize the System. This will open a new window that contains the solution explorer for your default solution.

Processes
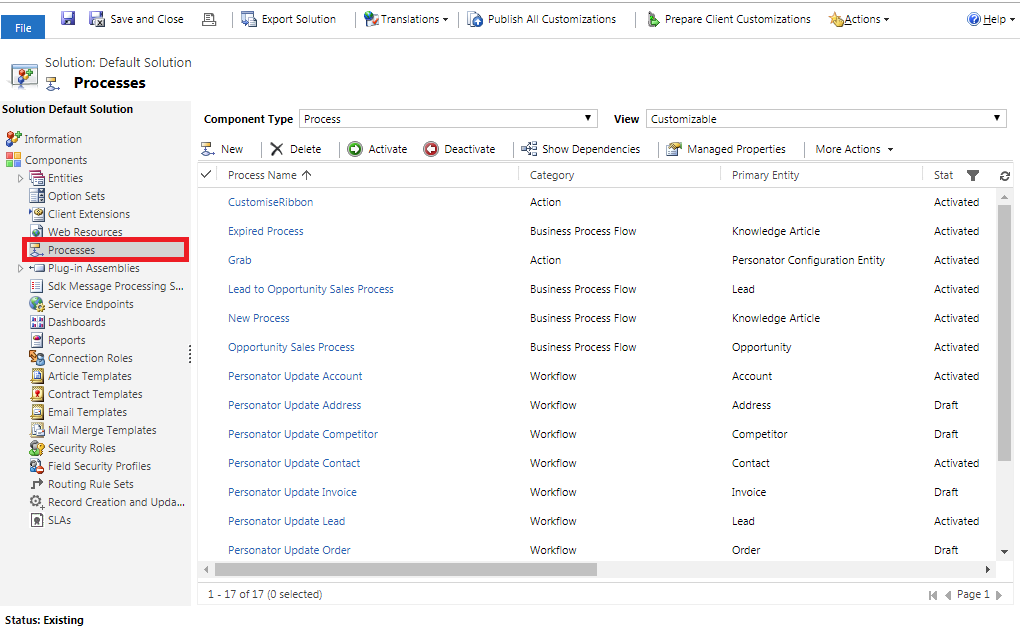
In the solution explorer, click Processes in the left navigation pane.
Select Workflow
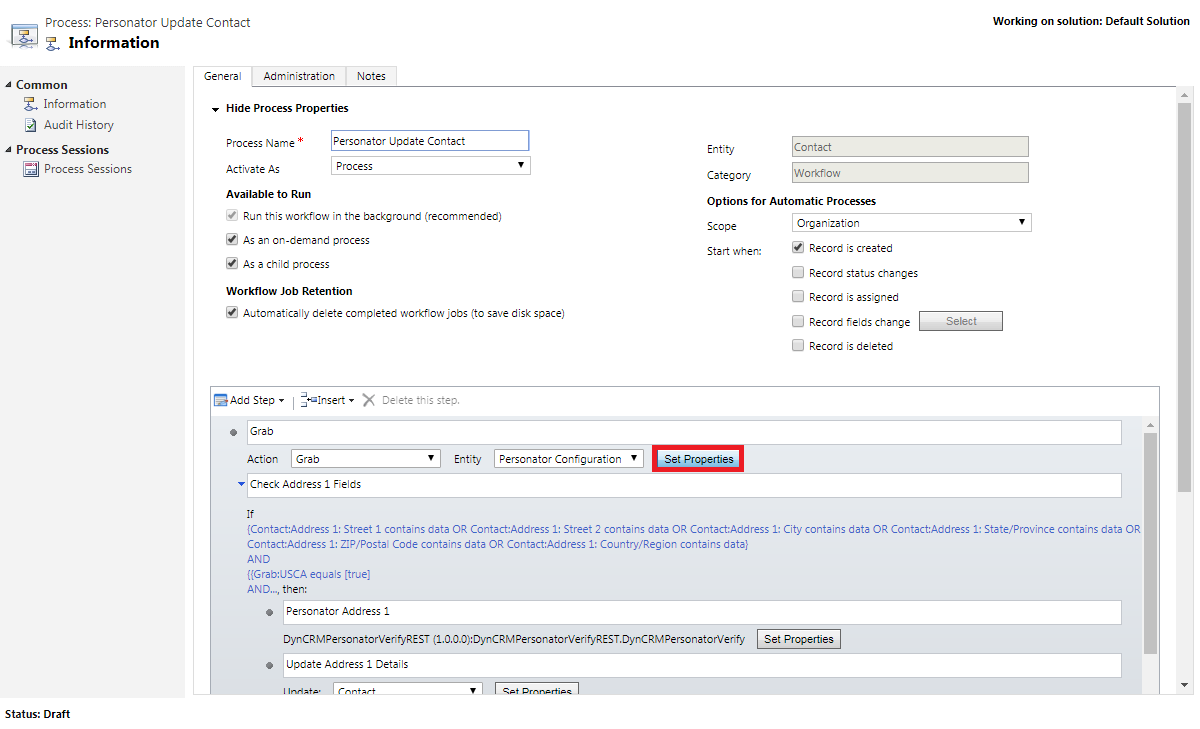
Select the workflow that begins with Personator (this may be different depending on the solution) and corresponds with the entity you are using. For this tutorial we are using the Personator Update Contact workflow to update the Contact entity.
Double-click to open the workflow.
Set Properties
Now we need to set the configuration entity for this workflow.
If you have not set the configuration for the solution, follow the Dynamics Personator Configuration tutorial from step 4.
Once this window has opened, click the Set Properties button under the Grab step. This will grab the instance of the configuration entity to set the options for the workflow.
Configuration Entity
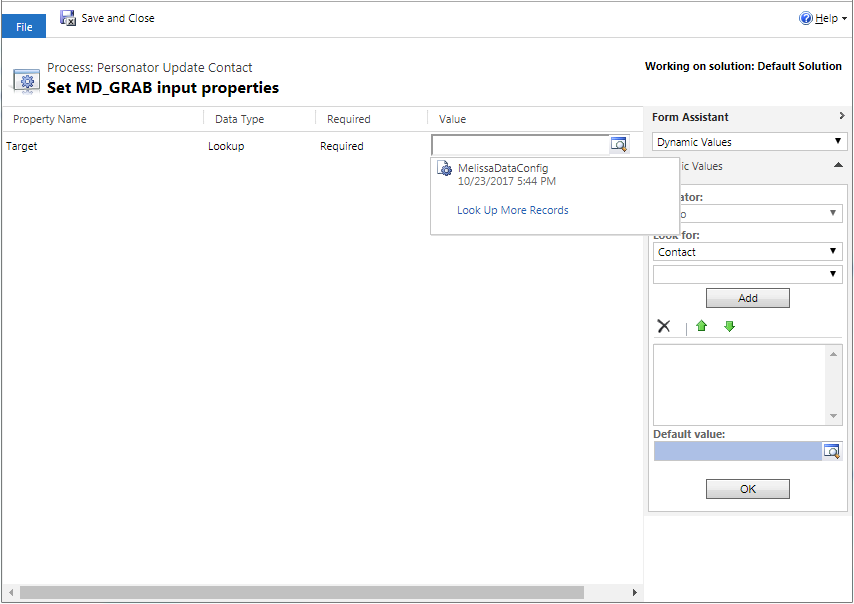
In this window, please click the magnifying glass in order to search for the instance of your configuration entity. Once the record is found, please click the record in order to fill the value column. Please click Save and Close once you have selected the configuration entity record.
Activate Workflow
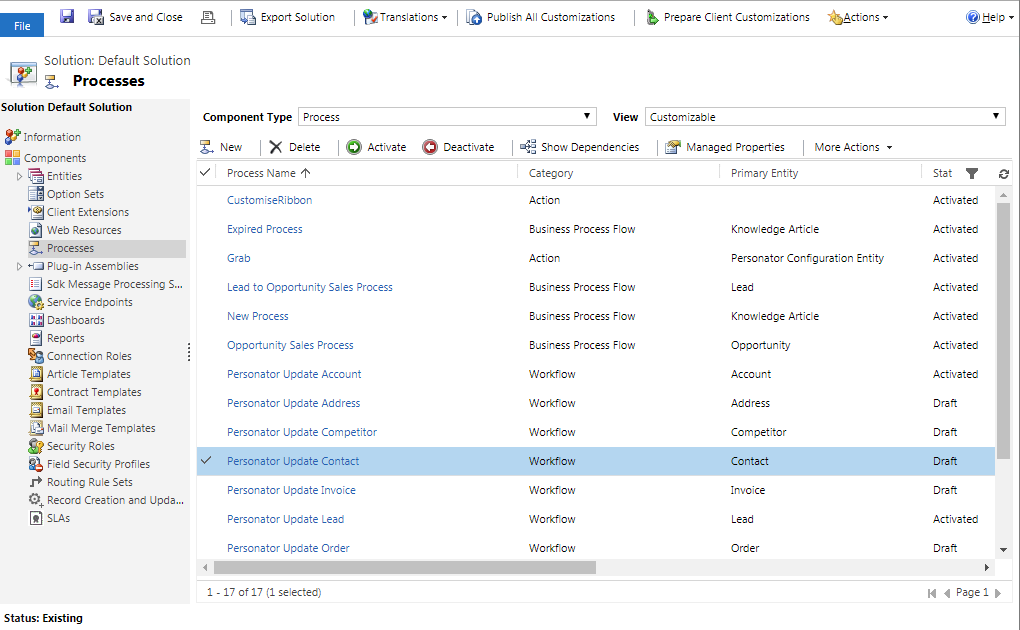
Ensure the workflow is available to run as an on-demand process to use this workflow on the form. If you want to have this workflow run on different triggers, such as running this workflow whenever a record is created, you can set that here.
Once you have finished selecting your settings, save the workflow and click Activate.
Note: You can set the returned fields to populate specific fields on the form in the workflow by accessing the Update Address 1 Details by clicking Set Properties. This requires some development knowledge. If you want to customize this workflow, note that future updates of the solutions may undo your customizations.
The workflow should be active now and can be used to utilize the Personator service on the respective entity.
