This wiki is no longer being updated as of December 10, 2025.
|
Salesforce:Getting Started with Lightning Components
← Clean Suite for CRM:Salesforce
License Keys and Administration
The license key and settings set up in Listware for Salesforce carry over to Clean Suite for Salesforce. Switch into the Listware app and head into the Listware Administration tab and insert in the appropriate license key. After that, switch back into the Clean Suite app.
Configuring Mappings
A new major feature in Clean Suite is the ability to create multiple custom input & output mappings per object type. These mappings are used by the Personator, Property V4 and BusinessCoder components. If you're using the ExpressEntry component (international address auto-completion), take a look at Lightning Global Express Entry. Otherwise, follow these instructions to create a new mapping:
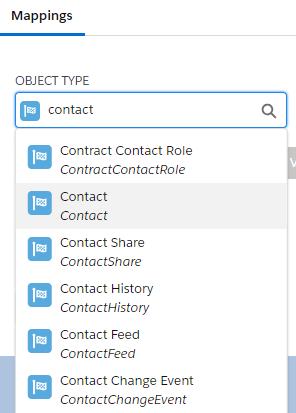
- Head into the Clean Suite Advanced Mappings tab. Under Object Type, type in the name of the object and select it from the drop down:
- Once Object Type has been selected, click on one of the blue buttons with a service name to create a mapping for the corresponding service:
- Enter a new name for the mapping and click Save:
- Select the mapping you created under Mappings on the left side and then map in the input and output fields. Some things to note:
- a. In the output fields there's the option to map in a lookup field. With this lookup field, all the fields/results returned by the service can be stored in a custom object referenced by this lookup. This is useful for those who would like to see all the possible fields returned without mapping the fields individually into your Salesforce object. You will need to create the appropriate custom lookup field in Salesforce's Object Manager.
- After mapping in the input and output fields, click on the blue Save All button on the left to save the mapping/changes.


