Difference between revisions of "Contact Zone:Presort Tutorial"
| (2 intermediate revisions by the same user not shown) | |||
| Line 1: | Line 1: | ||
{{ContactZonePresortNav}} | |||
{ | |||
{ | |||
{{CustomTOC}} | {{CustomTOC}} | ||
| Line 73: | Line 28: | ||
Double click the Presort Component to bring up the interface. | Double click the Presort Component to bring up the interface. | ||
=== | ===Mail Type Tab=== | ||
Set the following: | Set the following: | ||
; | ;Post Office of Mailing | ||
: | :Location of the the post office you will mail from. | ||
;Mail Class | |||
:Choose whether First Class or Standard. | |||
; | ;Sample Size Weight | ||
: | :Input the number of pieces, their thickness, and weight. | ||
; | ;Piece Dimensions | ||
: | :Dimensions (in inches) of your mail. | ||
[[File: | [[File:CZ_PS_MailType.png|link=]] | ||
=== | ===Mailer Tab=== | ||
Set the following: | Set the following: | ||
;Permit Holder | |||
:Here you input all of the mailers personal information. | |||
;Mailing Agent | ;Mailing Agent | ||
:If needed, | :If needed, input the mailer agent information. | ||
;Prepared For | ;Prepared For | ||
:Here you input all of the mailers personal information. | :Here you input all of the mailers personal information. | ||
[[File: | [[File:CZ_PS_Mailer.png|link=]] | ||
=== | ===Reports Tab=== | ||
Set the following: | Set the following: | ||
; | ;Move Method | ||
: | :Select which move method you will use, and input your CASS date. | ||
[[File:CZ_PS_Reports.png|link=]] | |||
[[File: | |||
===Select Fields Tab=== | ===Select Fields Tab=== | ||
| Line 143: | Line 95: | ||
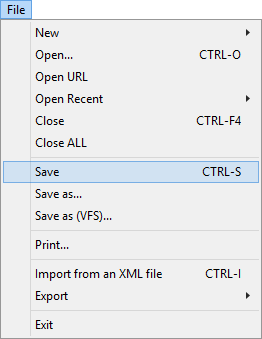
Click File and select Save as to save the project. | Click File and select Save as to save the project. | ||
[[File: | [[File:CZ_Tutorial_Save.png|link=]] | ||
Latest revision as of 20:23, 5 January 2017
| Presort Navigation | ||||||
|---|---|---|---|---|---|---|
| Overview | ||||||
| Tutorial | ||||||
| ||||||
| ||||||
| Result Codes |
The following steps will guide you in the basic usage of Presort for Contact Zone.
Component Settings
Navigate to Tools > Melissa Data Settings > Components > Presort
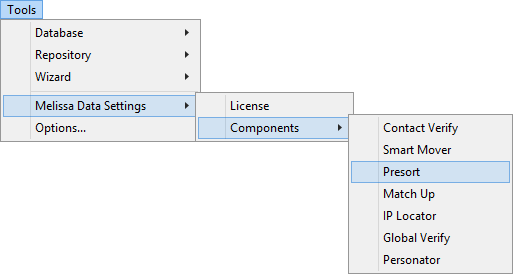
Set up the Presort Component Settings. See Component Settings.
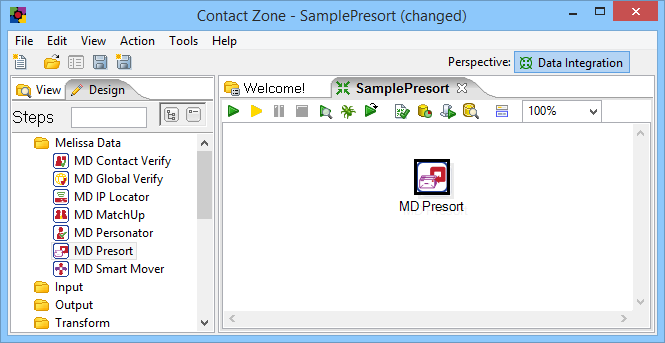
Add Component
To add Presort to your project, drag the component onto the Data Flow screen. This will snap the Presort Component into your workflow space.
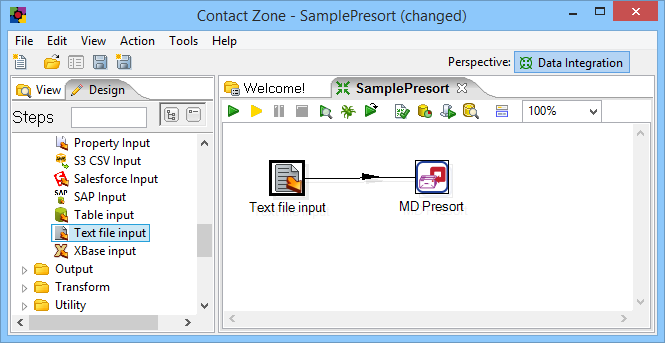
Connect Input
Select a data flow source to be your input data. Many formats can be used as Sources, including Excel files, flat files or Access Input data sources. Connect this data source to the Presort Component by dragging the arrow from your data flow source to the Presort Component.
Configure Component
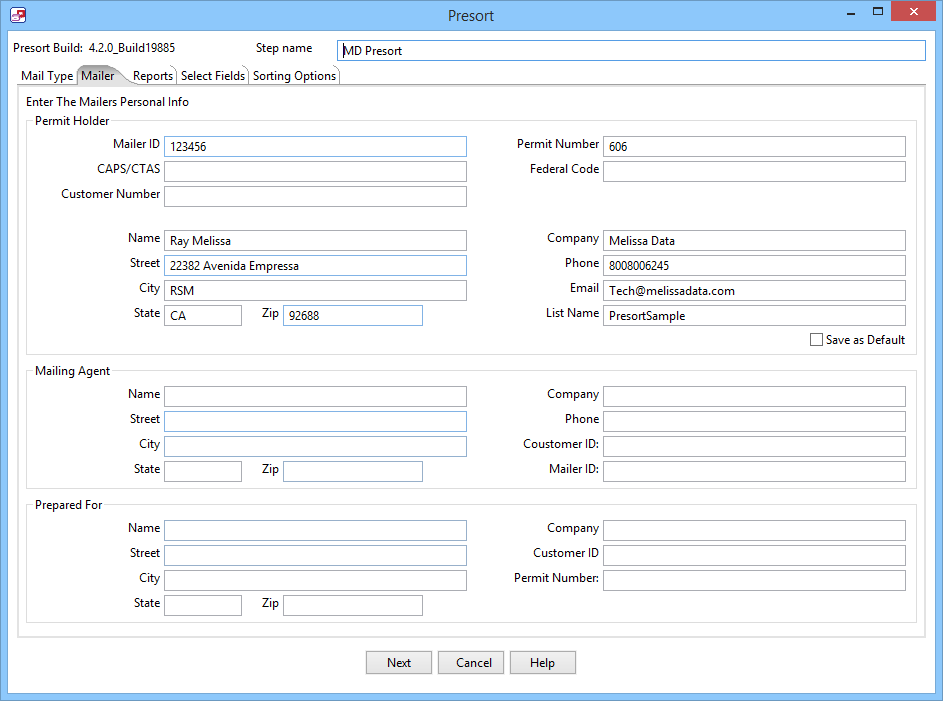
Double click the Presort Component to bring up the interface.
Mail Type Tab
Set the following:
- Post Office of Mailing
- Location of the the post office you will mail from.
- Mail Class
- Choose whether First Class or Standard.
- Sample Size Weight
- Input the number of pieces, their thickness, and weight.
- Piece Dimensions
- Dimensions (in inches) of your mail.

Mailer Tab
Set the following:
- Permit Holder
- Here you input all of the mailers personal information.
- Mailing Agent
- If needed, input the mailer agent information.
- Prepared For
- Here you input all of the mailers personal information.
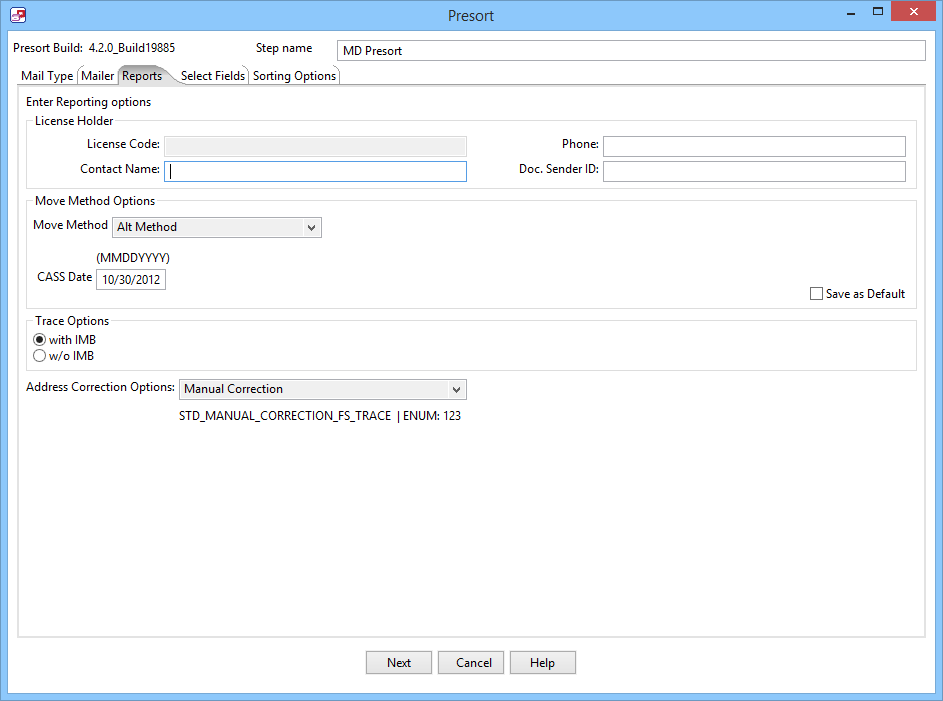
Reports Tab
Set the following:
- Move Method
- Select which move method you will use, and input your CASS date.
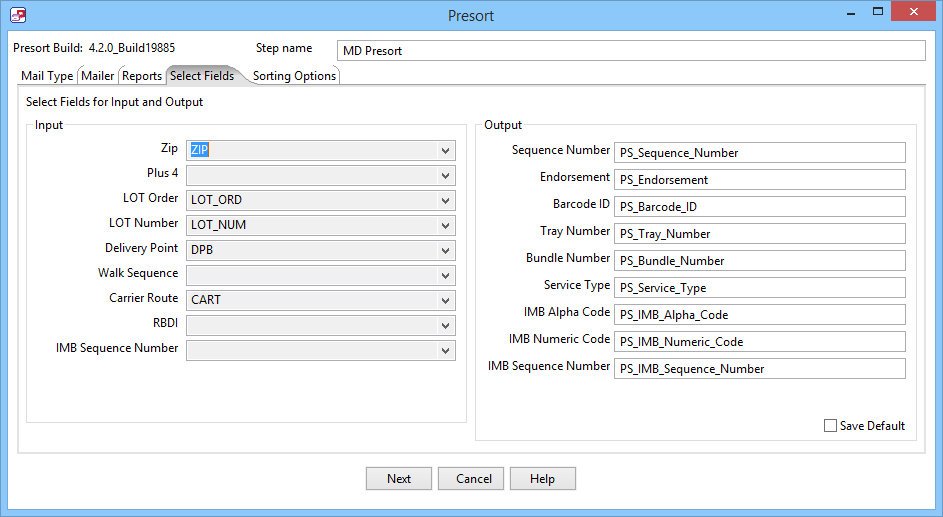
Select Fields Tab
From the drop-down menus for each field, choose what is passed through from the input step.
Sorting Options
Set the following:
- Sortation Options
- Choose what type of sortation that will be used.
- Postage Type
- Choose which postage type will be used on the mailing.
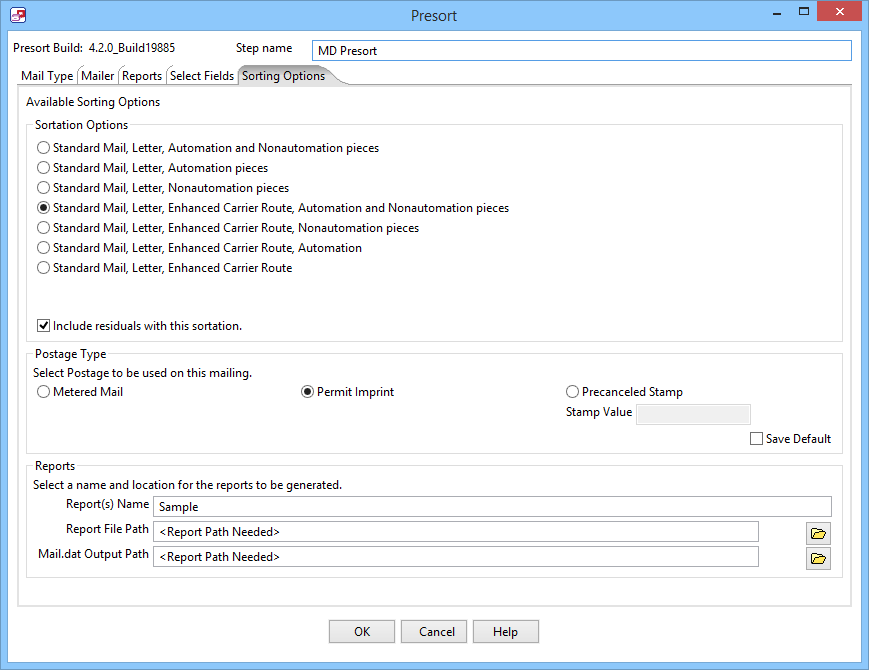
Click OK to finish defining the Presort Component Step.
Connect Output
Add data destinations for the downstream output. Connect the respective output filter pin to the output destination.
Save Settings
Click File and select Save as to save the project.
Run Project
Now, the project is ready to run. It is possible to observe in real time as records flow from your input source through the Presort Component and pipe output source depending on the filtering options.