This wiki is no longer being updated as of December 10, 2025.
|
Salesforce:Clean Suite Express Entry Screen Flow Component
Jump to navigation
Jump to search
← Clean Suite for CRM:Salesforce
Background
By popular demand, we have integrated our popular Melissa Express Entry webservice to add Address Autocompletion into Salesforce Screen Flows. Clean Suite Express Entry Screen Flow Component (EESFC) allows users to quickly and easily suggest fully validated and standardized addresses to their users at the point of entry.
Getting Started
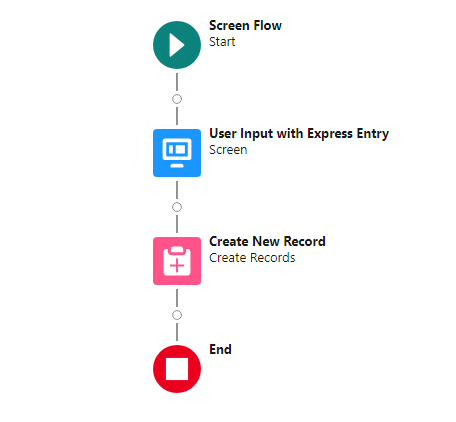
- To get started with EESFC, first create a screen flow and add a screen and create record component to the flow.
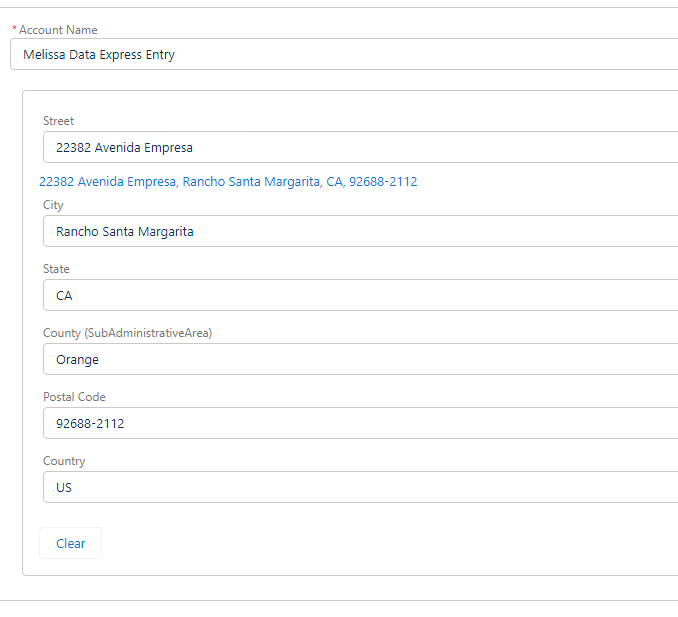
- Enter the Screen component and add any fields you wish to include. In this example, we are creating an account object, so we include the account name. On the left hand find the “MD Express Entry Flow” component and add it to our flow screen.
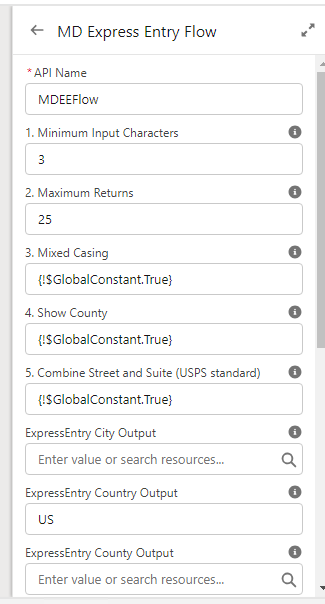
- Click on the component itself on the screen flow, this will bring up the edit menu on the right and let us set our options.
- We can now configure these options to our desire. Leave the fields marked “output” blank.
- Now lets set up our outputs. Close the screen we are currently editing by clicking “Done”.
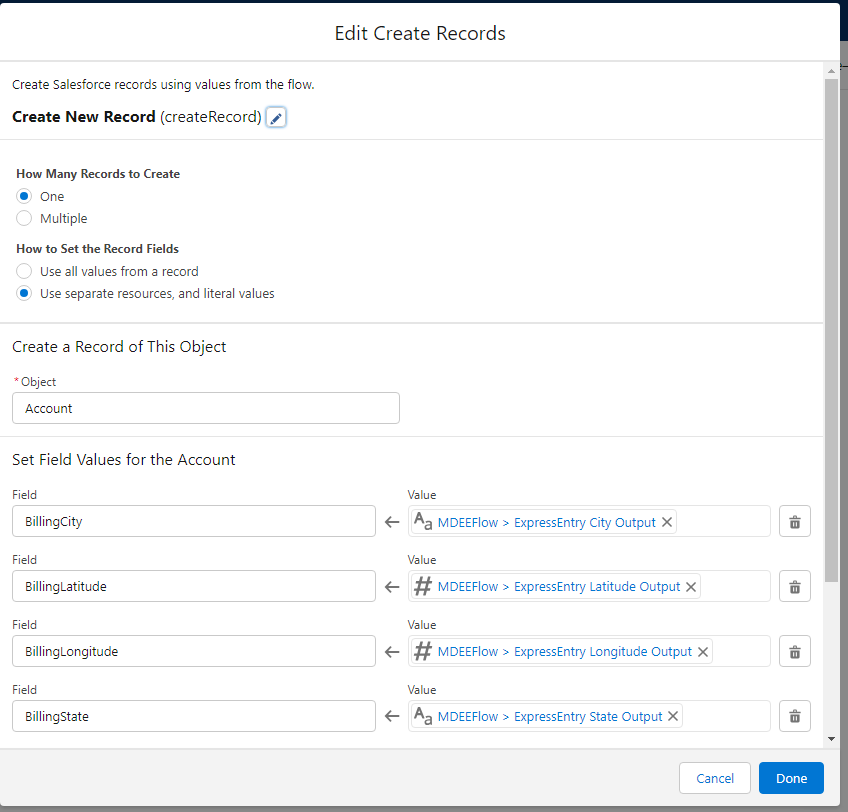
- On the screen flow main window, we can now edit the “Create Record” element. In our example, we are creating a single record, using separate resources.
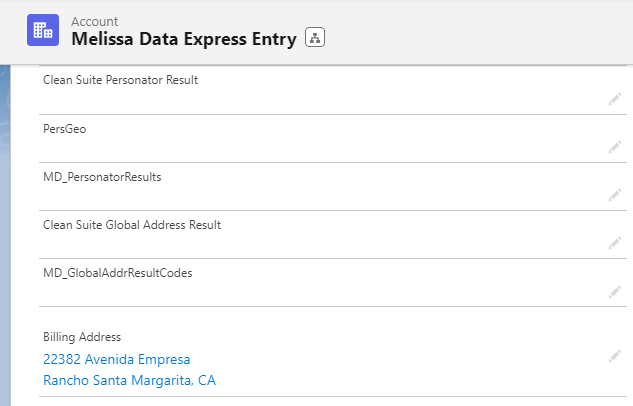
- Map the fields as you see fit, below we are mapping the Express Entry outputs into the “Billing Address” fields.
- When done click done and run the flow. You should now be able to create records with flows and save the results into a new record.
