This wiki is no longer being updated as of December 10, 2025.
|
Unison:Address Object Tutorial: Difference between revisions
No edit summary |
No edit summary |
||
| (One intermediate revision by the same user not shown) | |||
| Line 6: | Line 6: | ||
{{CustomTOC}} | {{CustomTOC}} | ||
The following steps will guide you in the basic usage of Address | The following steps will guide you in the basic usage of an Address Cleansing task in Unison by Melissa. | ||
==Login== | ==Login== | ||
You must first enter your login credentials at the login page. | You must first enter your login credentials at the login page. | ||
[[File: | [[File:UNI_Login.jpg|link=|300px]] | ||
==New Project== | ==New Project== | ||
To start a new project, first click '''Projects''', then click ''' | To start a new project, first click '''Projects''', then click the '''+''' next to '''Data Enrichment'''. Enter a name for your project here. This name can be changed later. | ||
[[File: | [[File:UNI_Sidebar_DataEnrichment_Highlight.jpg|link=|200px]] | ||
[[File: | [[File:UNI_Projects_StartNew.jpg|link=|400px]] | ||
| Line 25: | Line 25: | ||
Then select a source for your new project. In this instance I'll use a file as a source. | Then select a source for your new project. In this instance I'll use a file as a source. | ||
[[File: | [[File:UNI_Projects_Step2_AddInputFile.jpg|link=|800px]] | ||
After clicking '''File''', navigate to your desired file to upload it. | After clicking '''File''', navigate to your desired file to upload it. | ||
| Line 32: | Line 32: | ||
Once the file is uploaded, the '''Input File Preview''' window will open. Here you can preview how your file will be used. You can change the delimiter, enclosure, select if your file includes a header row, and specify which fields to use. | Once the file is uploaded, the '''Input File Preview''' window will open. Here you can preview how your file will be used. You can change the delimiter, enclosure, select if your file includes a header row, and specify which fields to use. | ||
[[File: | [[File:UNI_Projects_Step2_PreviewInput.jpg|link=|800px]] | ||
Once you save your choices from the preview, you'll be sent to the '''Project Configuration''' screen. | Once you save your choices from the preview, you'll be sent to the '''Project Configuration''' screen. | ||
[[File:UNI_Projects_DataEnrichment_ProjectConfiguration.jpg|link=|800px]] | |||
==Select Service== | ==Select Service== | ||
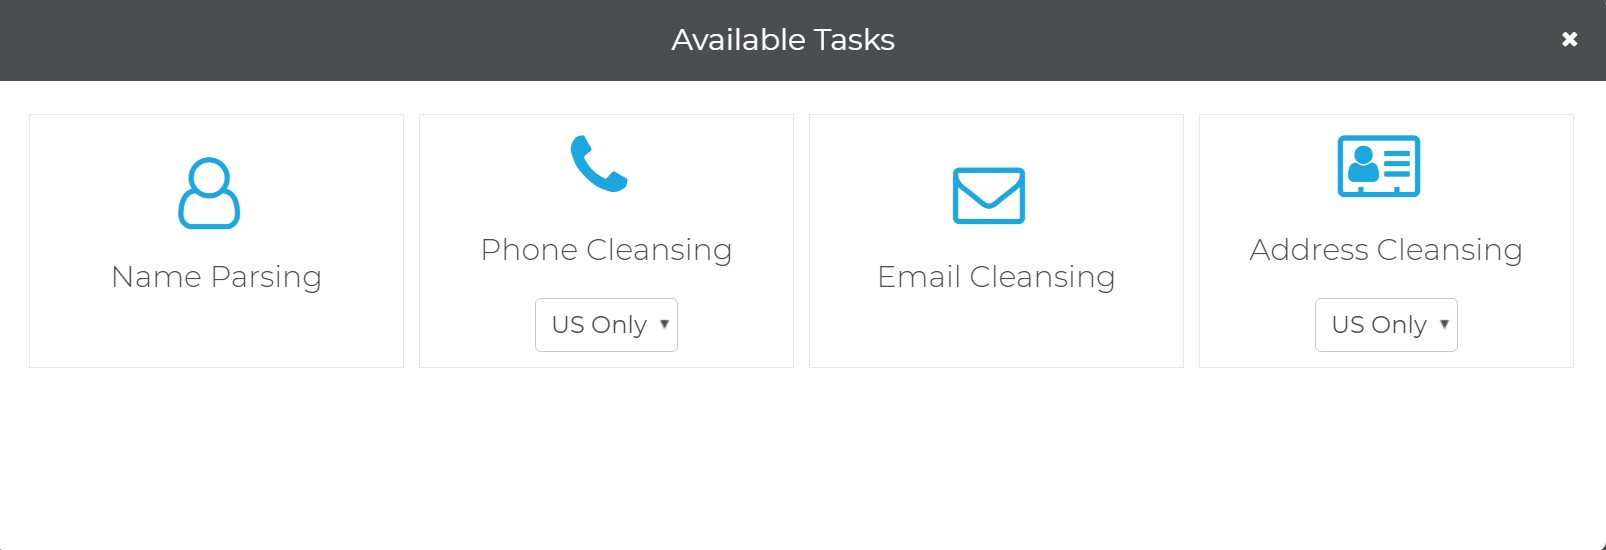
Then select which service you want to use on your data. Here we'll use '''Address | Then select which service you want to use on your data. Here we'll use '''Address Cleansing''' (US Only). | ||
[[File: | [[File:UNI_Projects_DataEnrichment_Tasks_List.jpg|link=|900px]] | ||
==Address Cleansing== | |||
==Address | |||
===Input Fields=== | ===Input Fields=== | ||
Select which fields to use as input and how they map. Clicking on a field will open a drop-down menu with a list of available fields from your input file. | Select which fields to use as input and how they map. Clicking on a field will open a drop-down menu with a list of available fields from your input file. | ||
[[File: | [[File:UNI_Projects_AddressUS_InputFields.jpg|link=|900px]] | ||
| Line 53: | Line 54: | ||
You can also control your output fields. Clicking the rollout arrow will show the default output fields. Here you can choose which fields to output, and optionally rename the fields. | You can also control your output fields. Clicking the rollout arrow will show the default output fields. Here you can choose which fields to output, and optionally rename the fields. | ||
[[File: | [[File:UNI_Projects_AddressUS_OutputFields.jpg|link=|900px]] | ||
If you click the '''Settings''' cog icon next to the output fields this will open the '''Address Task Settings''' dialog. Here you can set service-specific settings. | |||
[[File:UNI_Projects_AddressUS_TaskSettings.jpg|link=|400px]] | |||
Once you save your choices from the output fields, you'll be sent back to the '''Project Configuration''' screen. | |||
[[File:UNI_Projects_DataEnrichment_ProjectConfiguration.jpg|link=|900px]] | |||
| Line 66: | Line 69: | ||
Now click '''Add an Output''' to select your '''Outputs'''. Here you can choose to write to file or to table. Here we'll write to a file. Enter a file name and then select your enclosure and delimiter. You can also choose your compression method, to append a timestamp, or include the header. | Now click '''Add an Output''' to select your '''Outputs'''. Here you can choose to write to file or to table. Here we'll write to a file. Enter a file name and then select your enclosure and delimiter. You can also choose your compression method, to append a timestamp, or include the header. | ||
[[File: | [[File:UNI_Projects_DataEnrichment_OutputConfiguration.jpg|link=|900px]] | ||
===Filter=== | ===Filter=== | ||
To get specific data from your file you can use a filter. This will filter your resulting data, using the result codes of the records to limit your results. For example, selecting the '''Full Address Matches (USPS)''' filter shows that any records with an '''AS01''' result code will be output. | To get specific data from your file you can use a filter by selecting one from the drop-down menu. This will filter your resulting data, using the result codes of the records to limit your results. For example, selecting the '''Full Address Matches (USPS)''' filter shows that any records with an '''AS01''' result code will be output. | ||
[[File:MDQ_Projects_OutputFilter.png|link=]] | [[File:MDQ_Projects_OutputFilter.png|link=]] | ||
| Line 83: | Line 86: | ||
===Run Now=== | ===Run Now=== | ||
[[File: | [[File:UNI_Projects_DataEnrichment_Buttons_RunNow.jpg|link=|226px]] | ||
If you click the '''Run Now''' button on the top right corner of the '''Project Configuration''' window, your project will begin processing immediately. | If you click the '''Run Now''' button on the top right corner of the '''Project Configuration''' window, your project will begin processing immediately. | ||
===Schedule=== | ===Schedule=== | ||
[[File: | [[File:UNI_Projects_DataEnrichment_Buttons_Schedule.jpg|link=|160px]] | ||
To schedule your project, click the '''Schedule''' button on the top right corner of the '''Project Configuration''' window. | To schedule your project, click the '''Schedule''' button on the top right corner of the '''Project Configuration''' window. | ||
[[File: | [[File:UNI_Projects_DataEnrichment_ScheduleProjectExecution.jpg|link=|800px]] | ||
In the '''Schedule Project Execution''' window, enter a description of your scheduled project, a frequency of execution, a start date, and a start time. | In the '''Schedule Project Execution''' window, enter a description of your scheduled project, a frequency of execution, a start date, and a start time. | ||
| Line 100: | Line 103: | ||
Once a job has started, you can check the job status to view it's state, number of rows processed, time elapsed, date started, and date completed. | Once a job has started, you can check the job status to view it's state, number of rows processed, time elapsed, date started, and date completed. | ||
[[File: | [[File:UNI_Sidebar_JobsStatus_Highlight.jpg|link=|200px]] | ||
[[File: | [[File:UNI_Jobs_Status.jpg|link=|900px]] | ||
===Output Files=== | ===Output Files=== | ||
When the job has completed, you can also view any output files generated. | When the job has completed, you can also view any output files generated. After clicking the job name you may view the output file by clicking either the view or download button. | ||
[[File: | [[File:UNI_Jobs_Status_ViewOutput_Highlight.jpg|link=|900px]] | ||
==Detailed Reports== | ==Detailed Reports== | ||
A completed job will also have detailed reports. These will depend on which service you use and display generated result codes. These codes will detail the overall status of your project, changes made to the data, and any errors encountered. | A completed job will also have detailed reports. You can access these by clicking the '''View Detailed Reports''' button under '''Reports'''. | ||
[[File:UNI_Jobs_Status_Button_Reports_Highlight.jpg|link=|450px]] | |||
These reports will depend on which service you use and display generated result codes. These codes will detail the overall status of your project, changes made to the data, and any errors encountered. | |||
[[File: | [[File:UNI_Jobs_Status_Reports.jpg|link=|1000px]] | ||
[[Category:Unison]] | [[Category:Unison by Melissa]] | ||
Latest revision as of 19:37, 15 March 2024
The following steps will guide you in the basic usage of an Address Cleansing task in Unison by Melissa.
Login
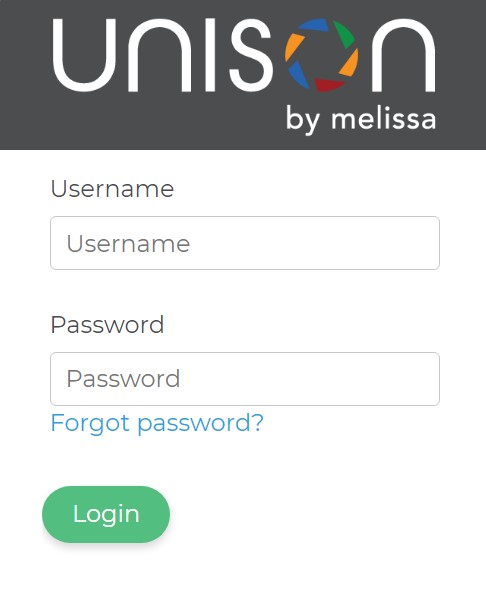
You must first enter your login credentials at the login page.
New Project
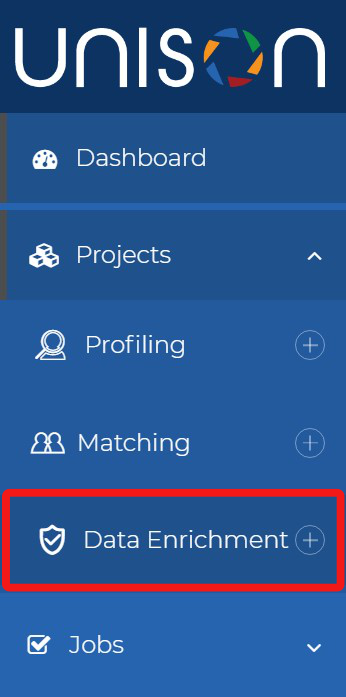
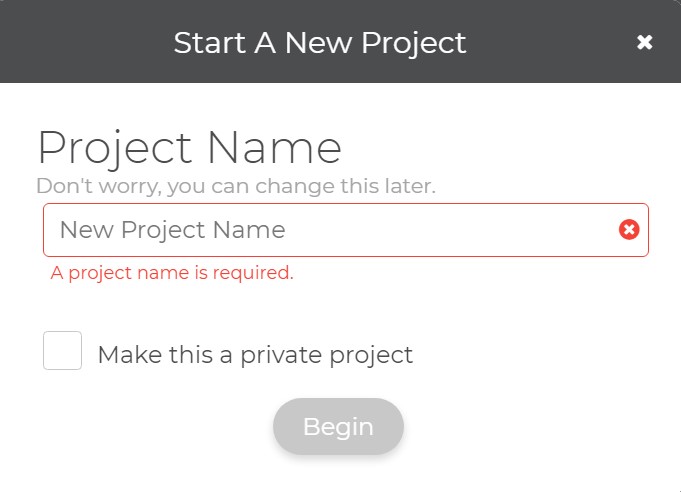
To start a new project, first click Projects, then click the + next to Data Enrichment. Enter a name for your project here. This name can be changed later.
Add Source
Then select a source for your new project. In this instance I'll use a file as a source.
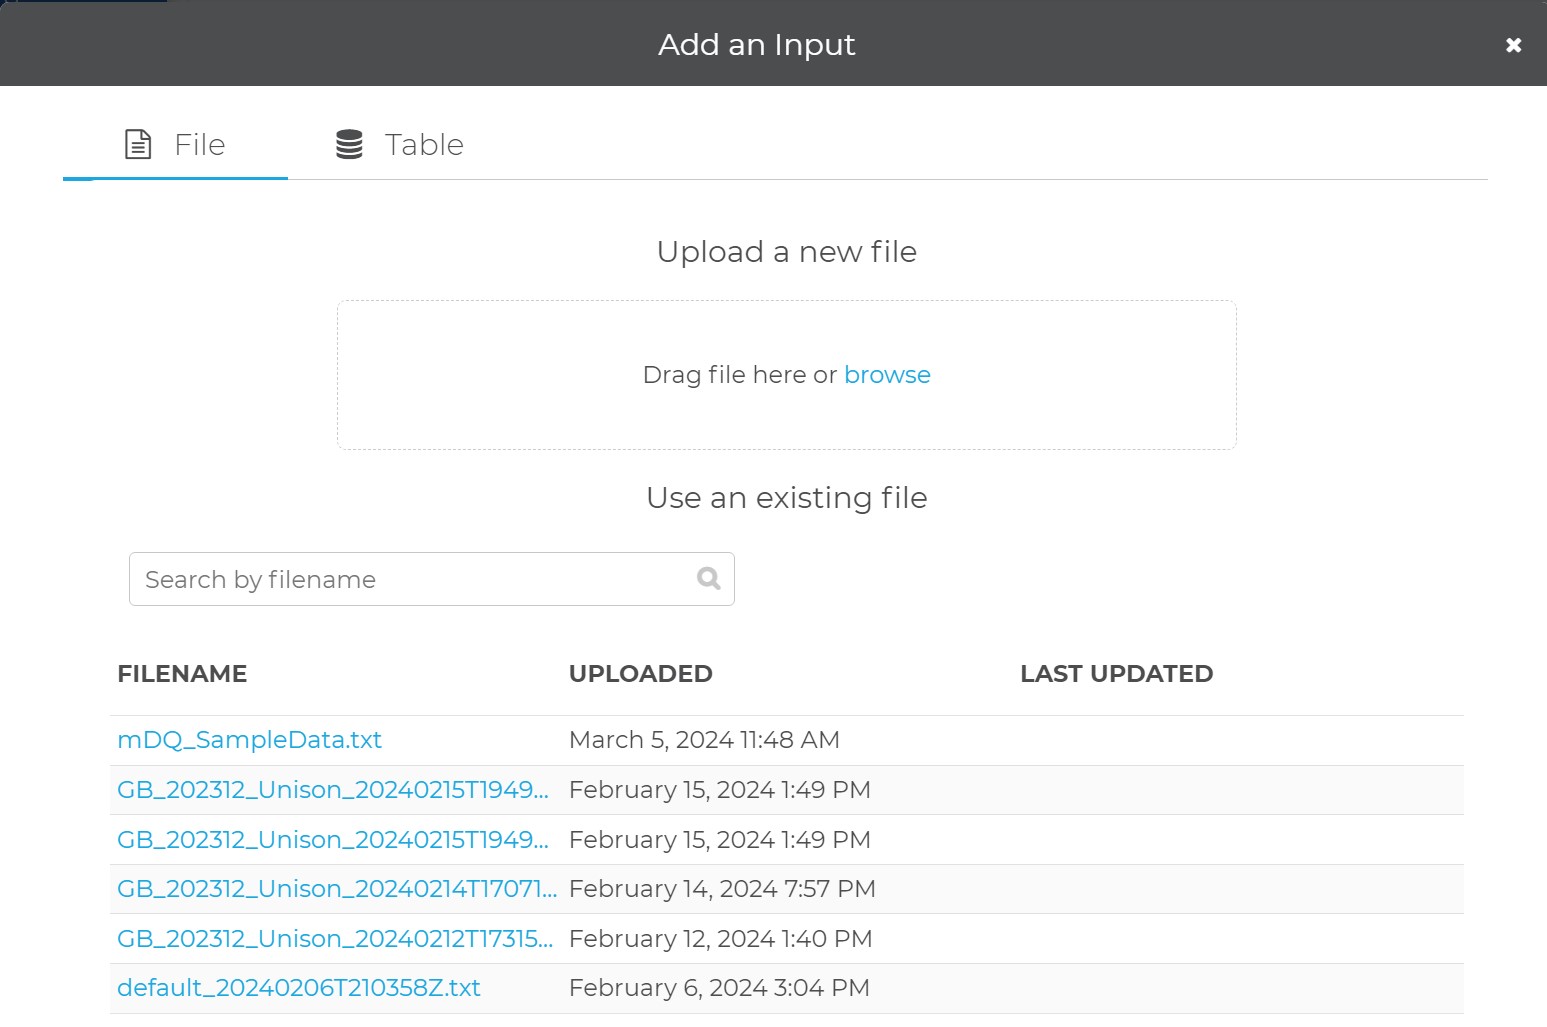
After clicking File, navigate to your desired file to upload it.
Input File Preview
Once the file is uploaded, the Input File Preview window will open. Here you can preview how your file will be used. You can change the delimiter, enclosure, select if your file includes a header row, and specify which fields to use.
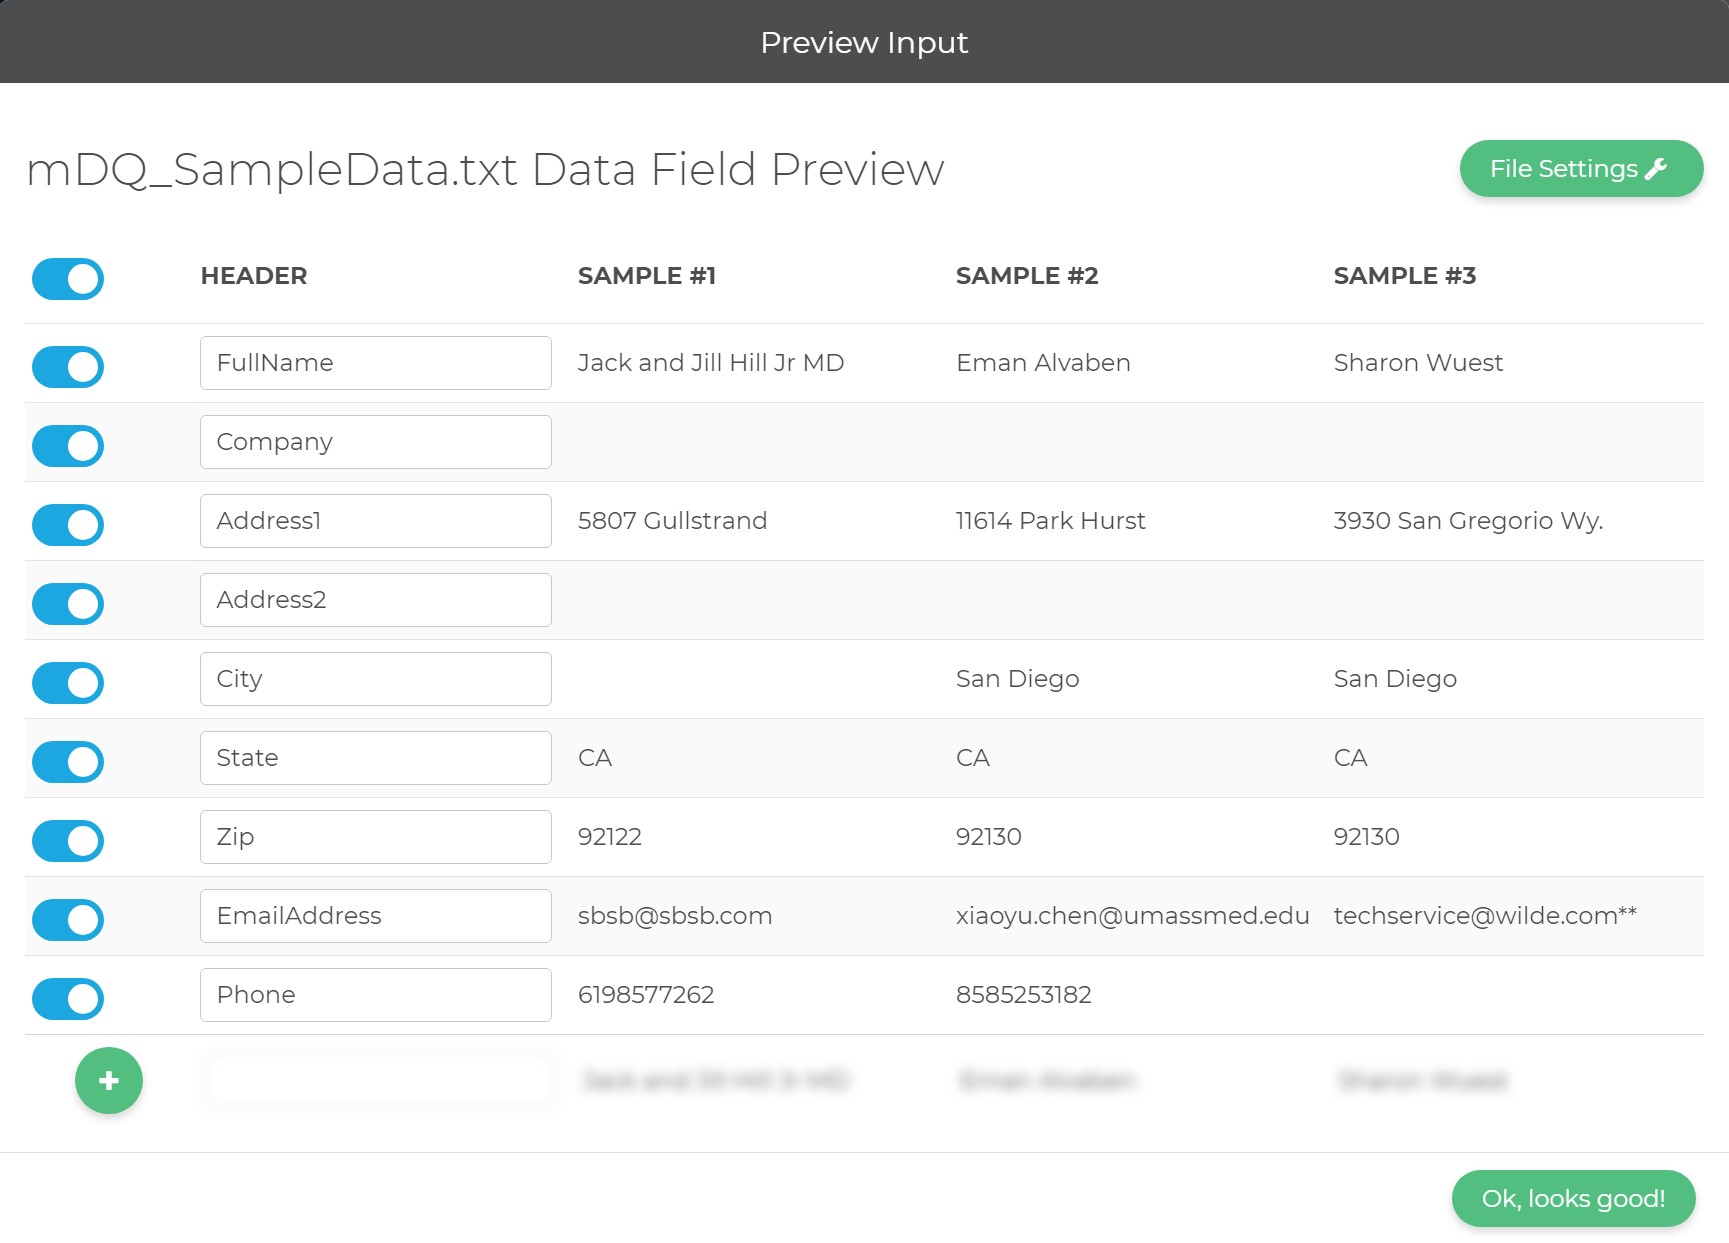
Once you save your choices from the preview, you'll be sent to the Project Configuration screen.
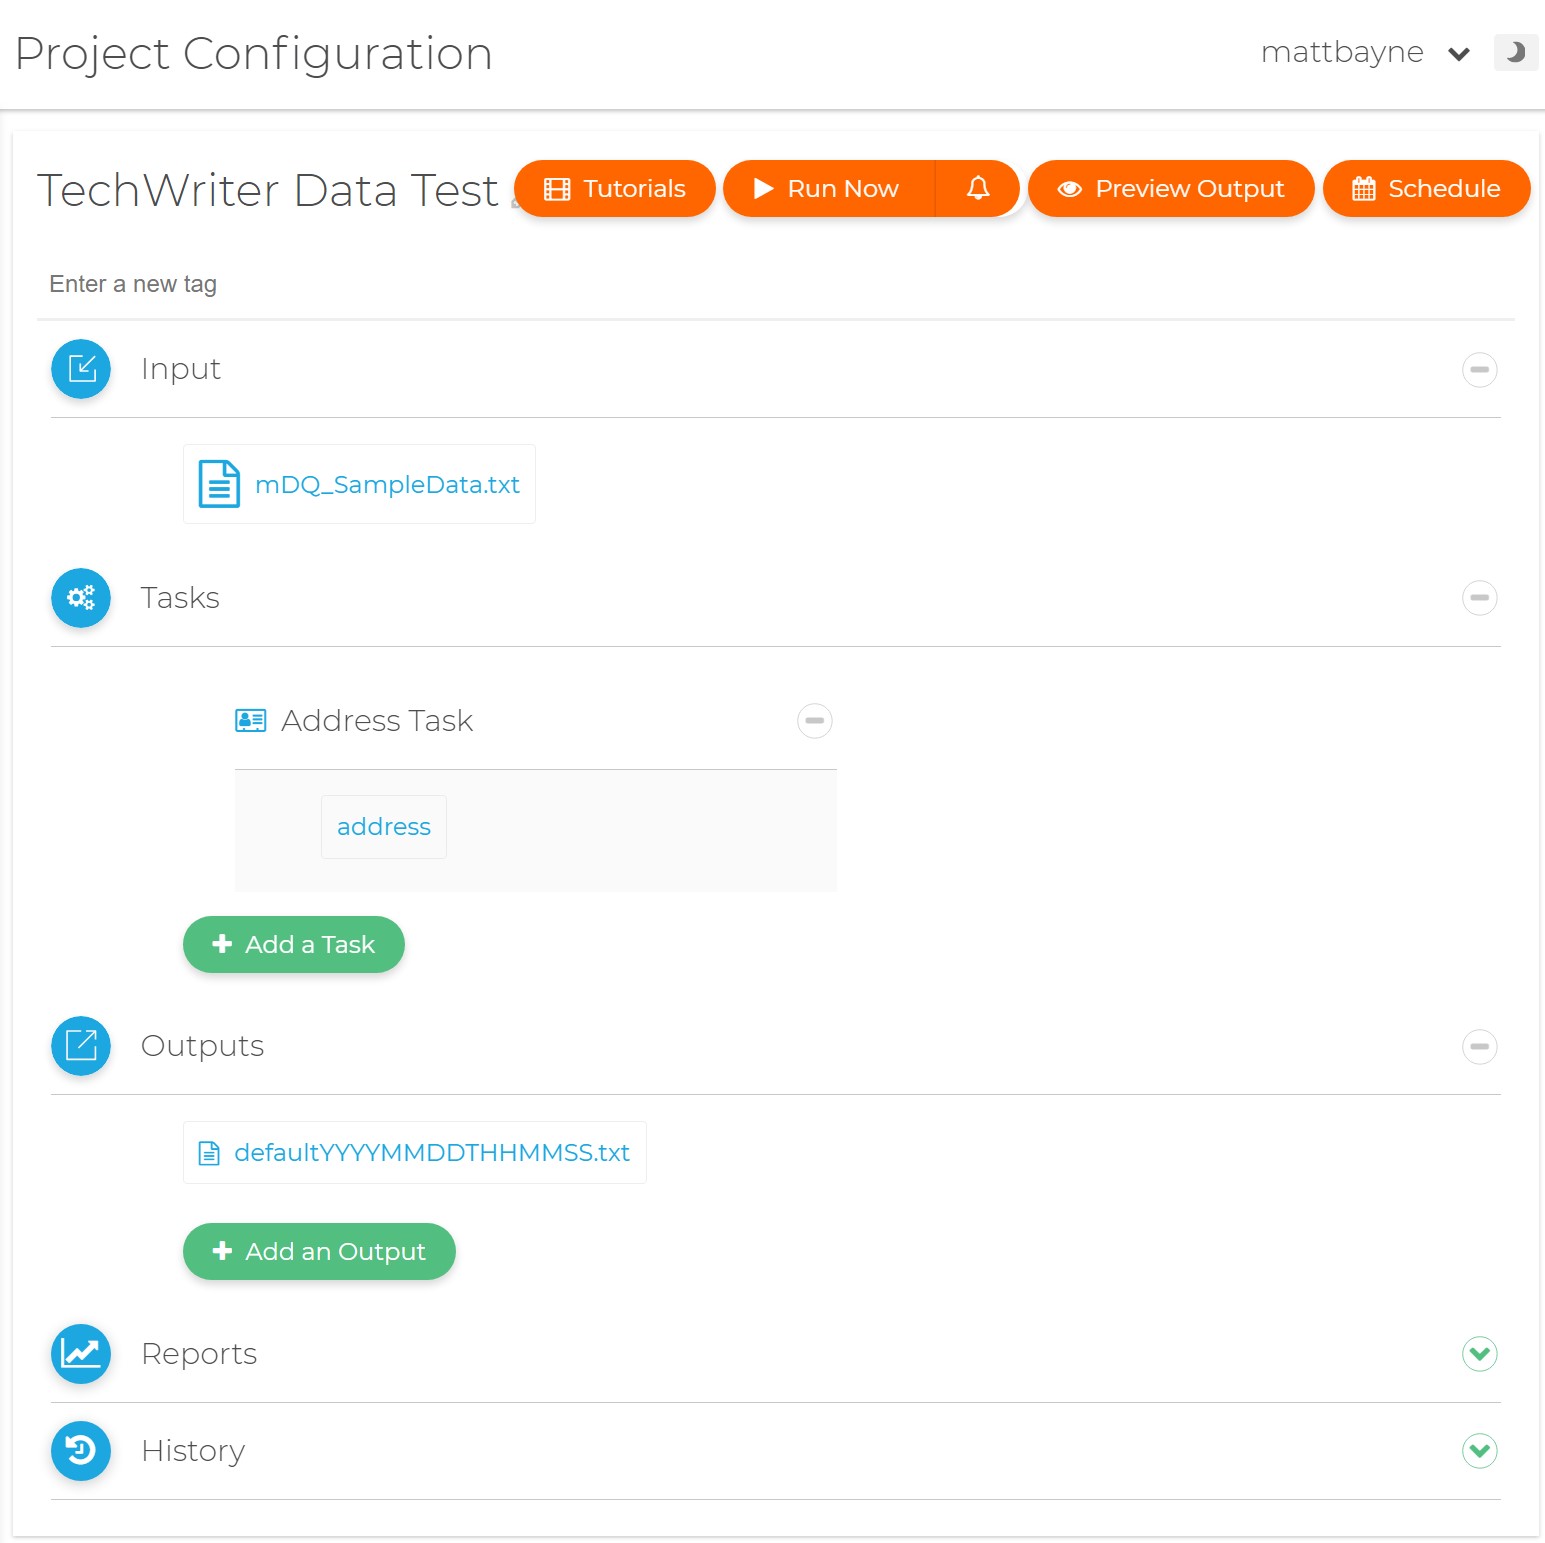
Select Service
Then select which service you want to use on your data. Here we'll use Address Cleansing (US Only).
Address Cleansing
Input Fields
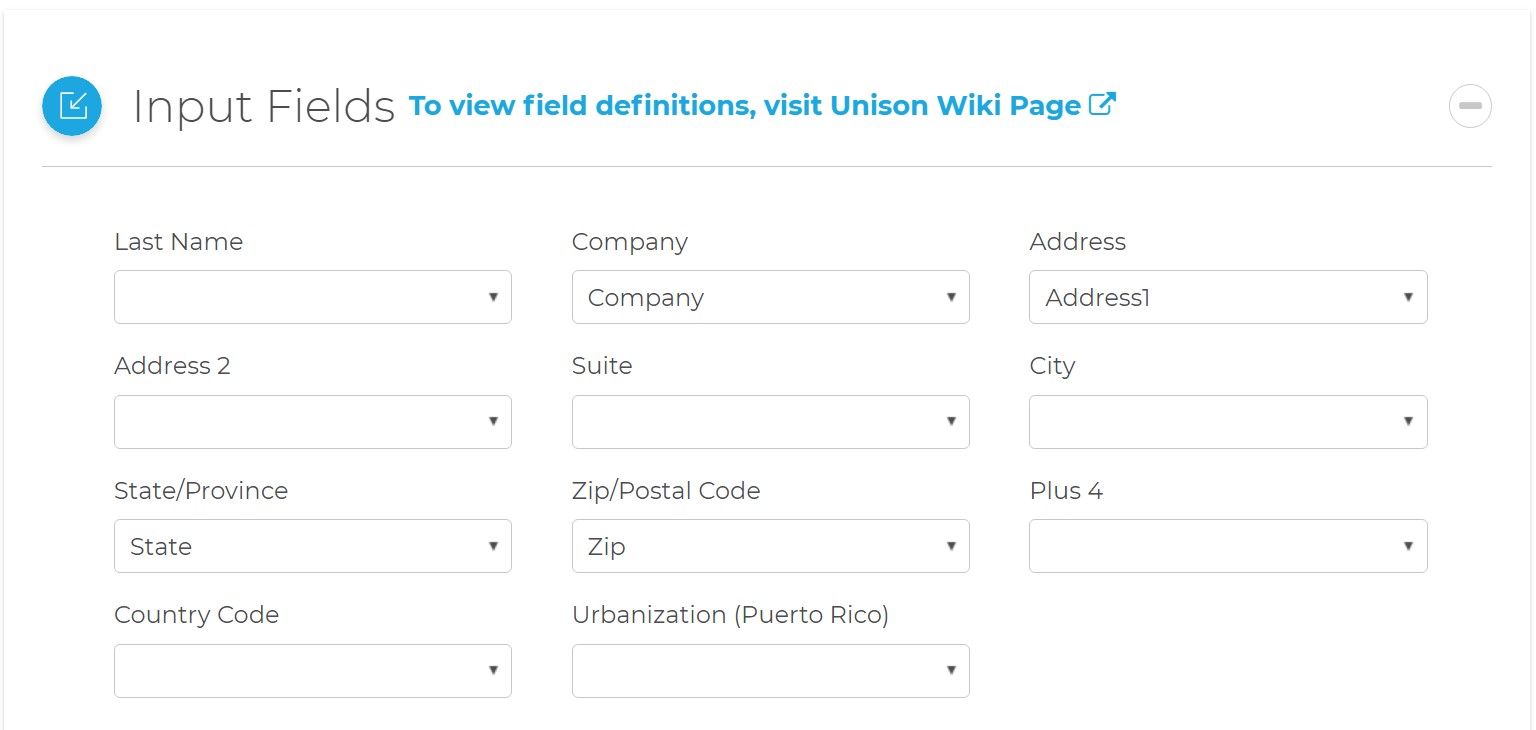
Select which fields to use as input and how they map. Clicking on a field will open a drop-down menu with a list of available fields from your input file.
Output Fields
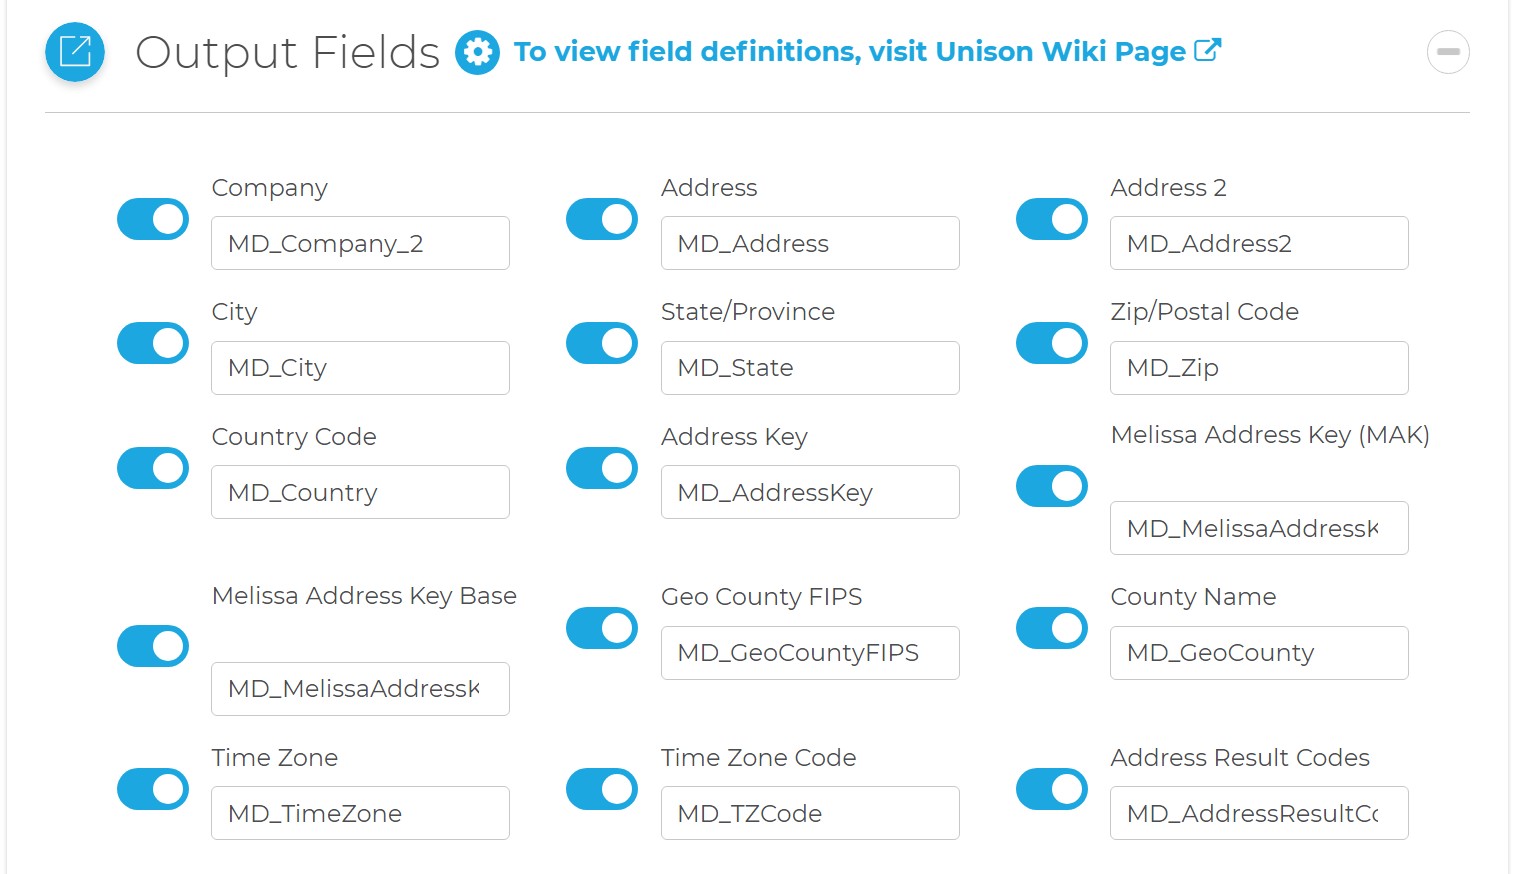
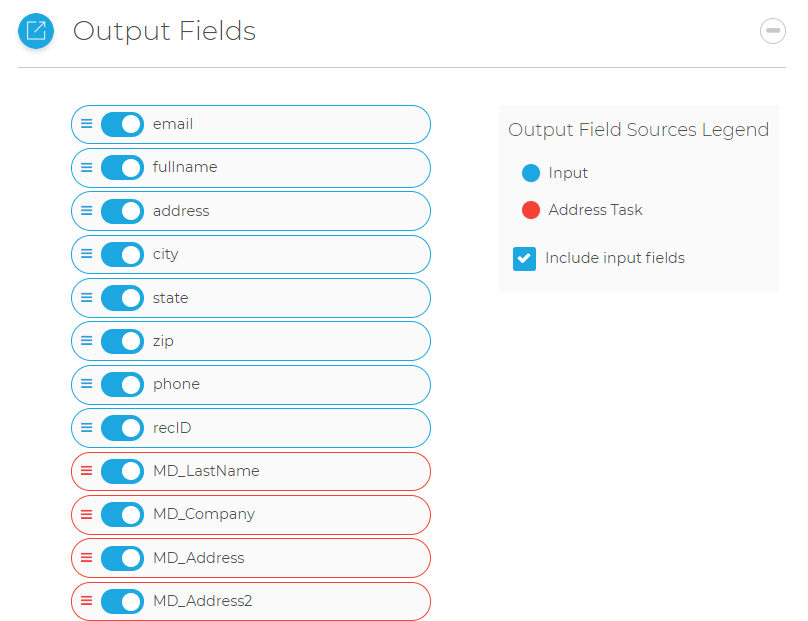
You can also control your output fields. Clicking the rollout arrow will show the default output fields. Here you can choose which fields to output, and optionally rename the fields.
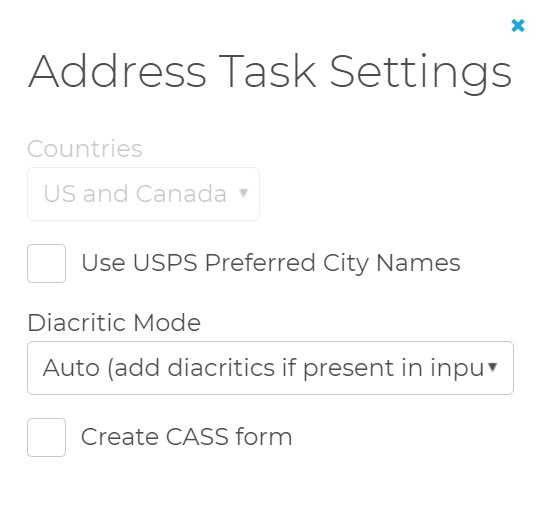
If you click the Settings cog icon next to the output fields this will open the Address Task Settings dialog. Here you can set service-specific settings.
Once you save your choices from the output fields, you'll be sent back to the Project Configuration screen.

Outputs
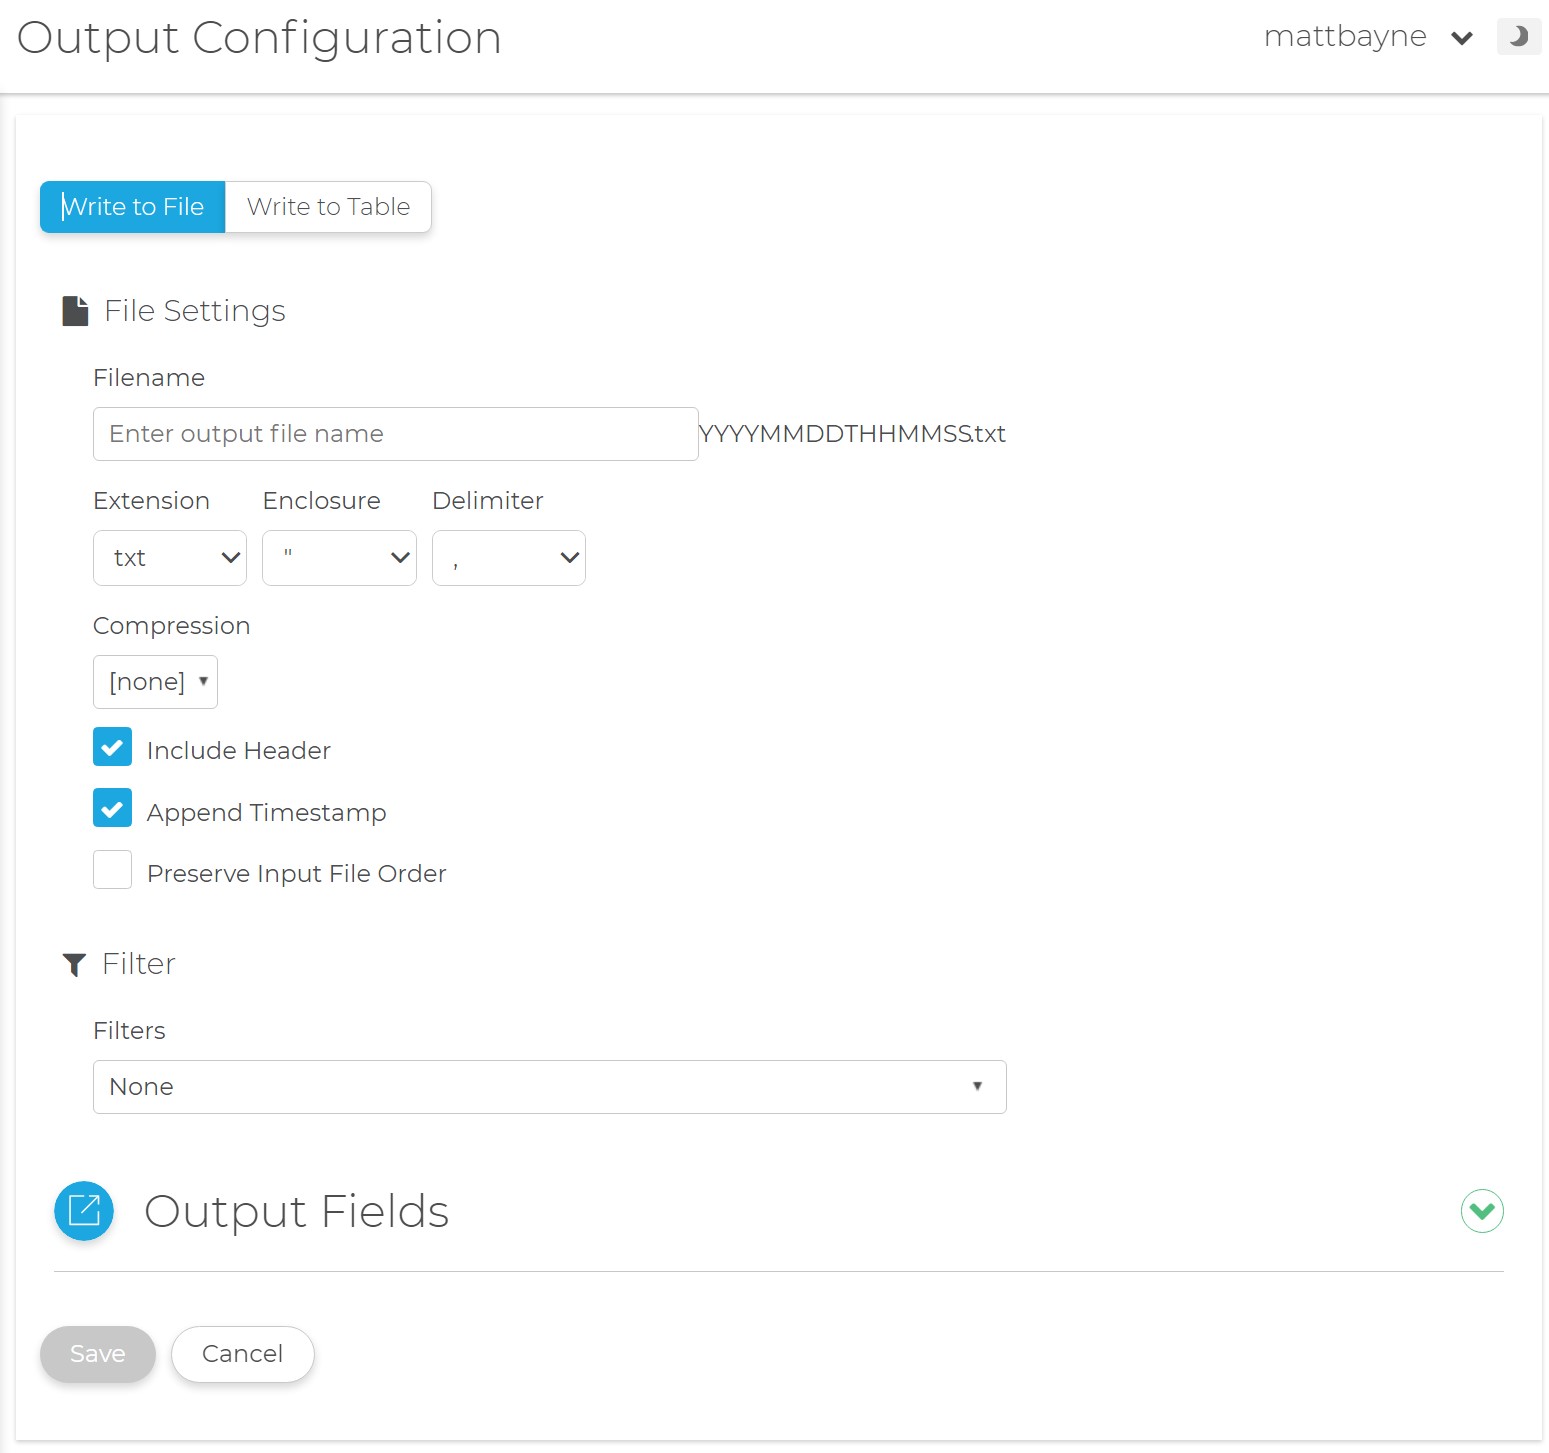
Now click Add an Output to select your Outputs. Here you can choose to write to file or to table. Here we'll write to a file. Enter a file name and then select your enclosure and delimiter. You can also choose your compression method, to append a timestamp, or include the header.
Filter
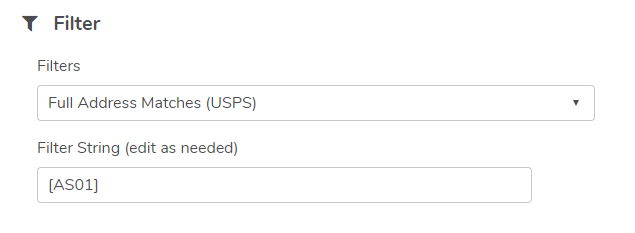
To get specific data from your file you can use a filter by selecting one from the drop-down menu. This will filter your resulting data, using the result codes of the records to limit your results. For example, selecting the Full Address Matches (USPS) filter shows that any records with an AS01 result code will be output.
Output Fields
Clicking the rollout arrow next to Output Fields will show the default output fields and their order. You can delete unwanted fields from your output by clicking the trashcan icon next to each field. You can also re-order your fields by drag and drop.
Run/Schedule Project
The project is now ready to be run or scheduled.
Run Now

If you click the Run Now button on the top right corner of the Project Configuration window, your project will begin processing immediately.
Schedule

To schedule your project, click the Schedule button on the top right corner of the Project Configuration window.
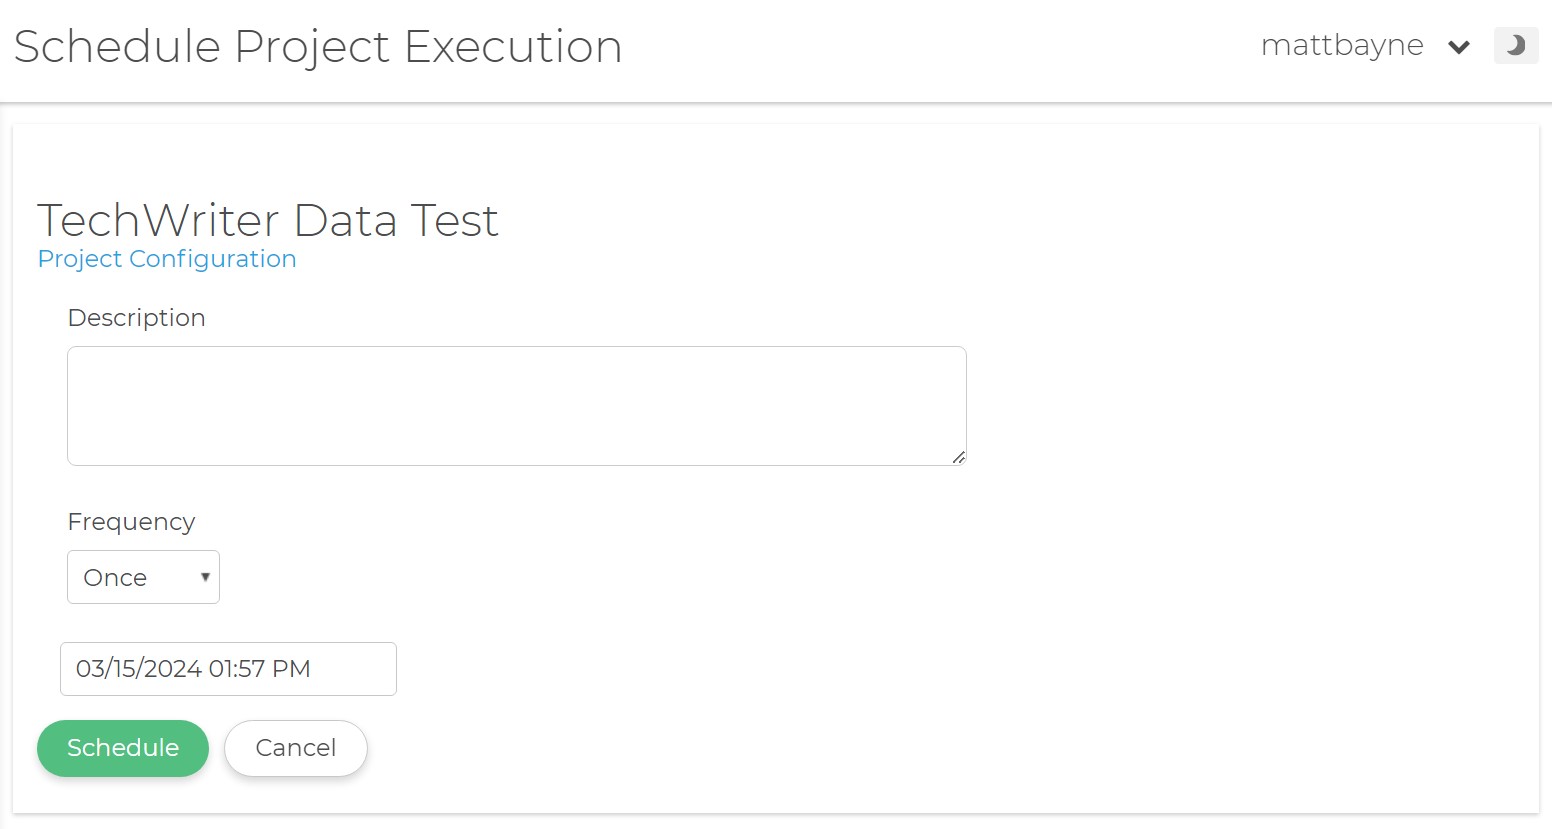
In the Schedule Project Execution window, enter a description of your scheduled project, a frequency of execution, a start date, and a start time.
Job Status
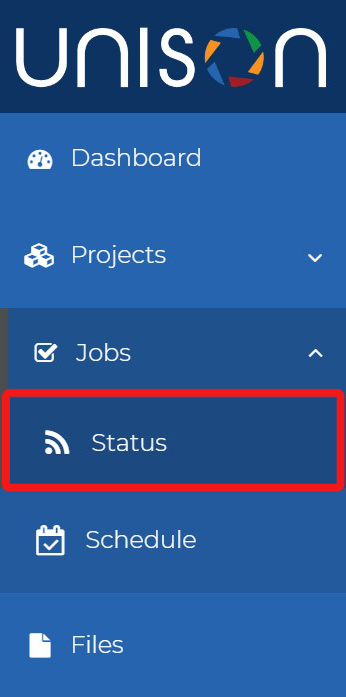
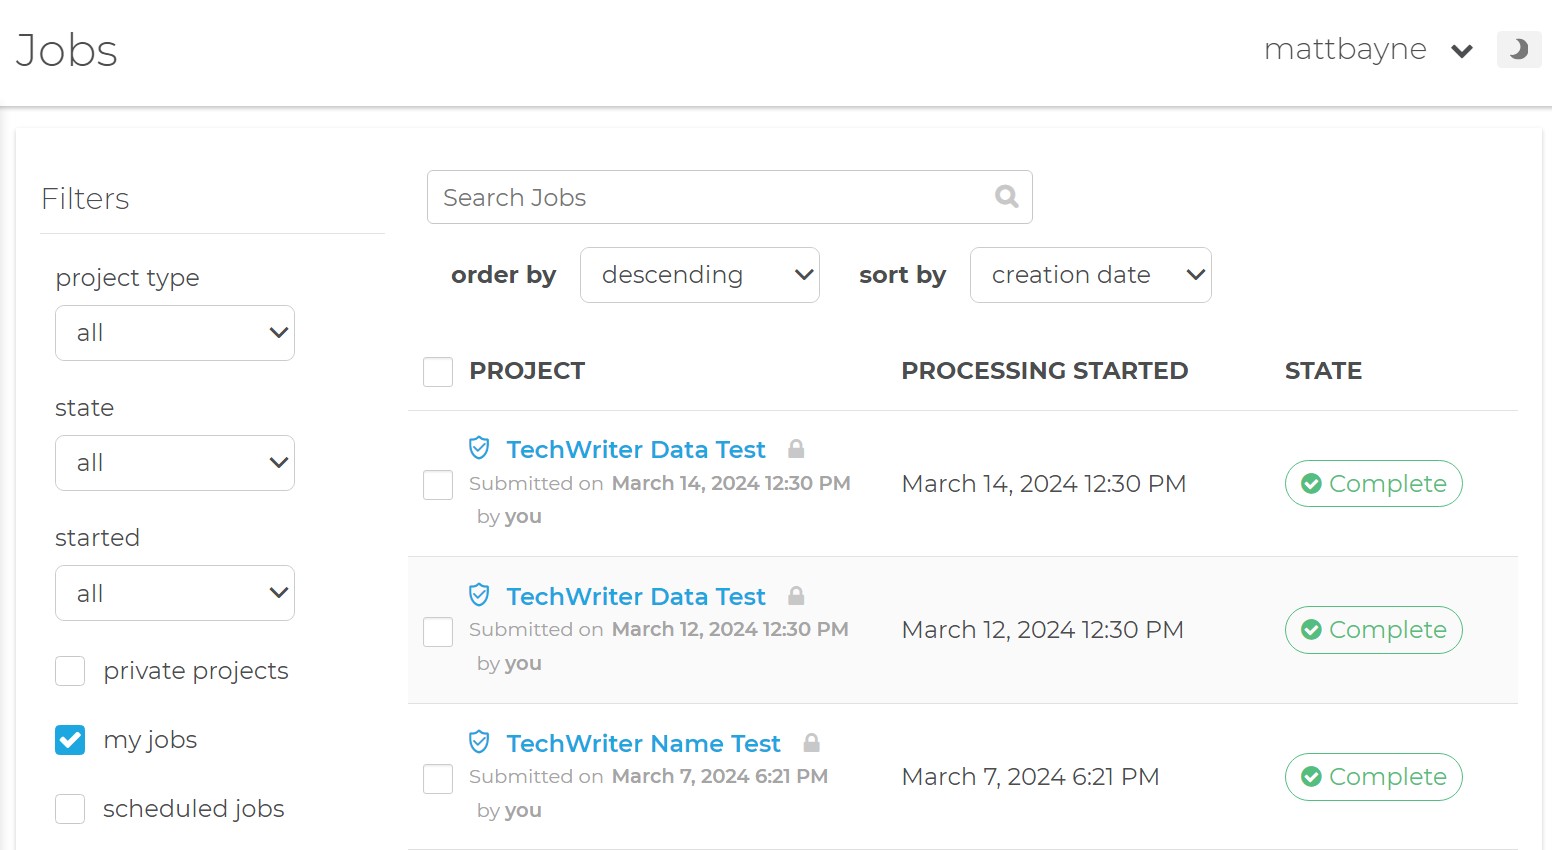
Once a job has started, you can check the job status to view it's state, number of rows processed, time elapsed, date started, and date completed.
Output Files
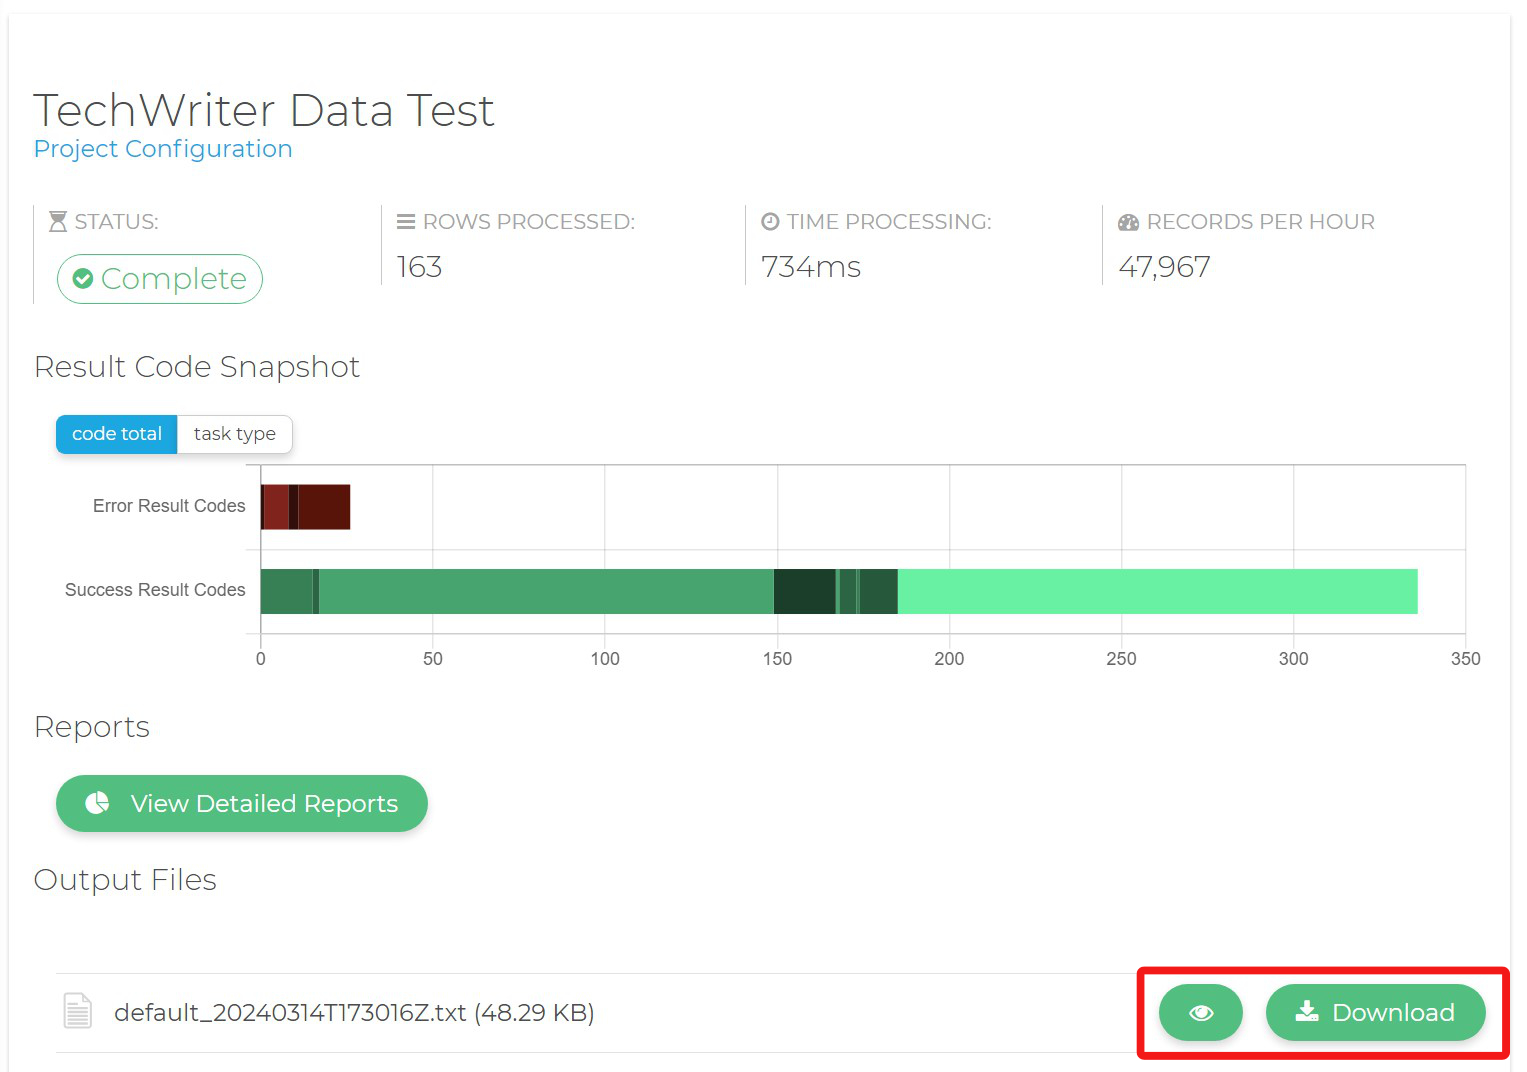
When the job has completed, you can also view any output files generated. After clicking the job name you may view the output file by clicking either the view or download button.
Detailed Reports
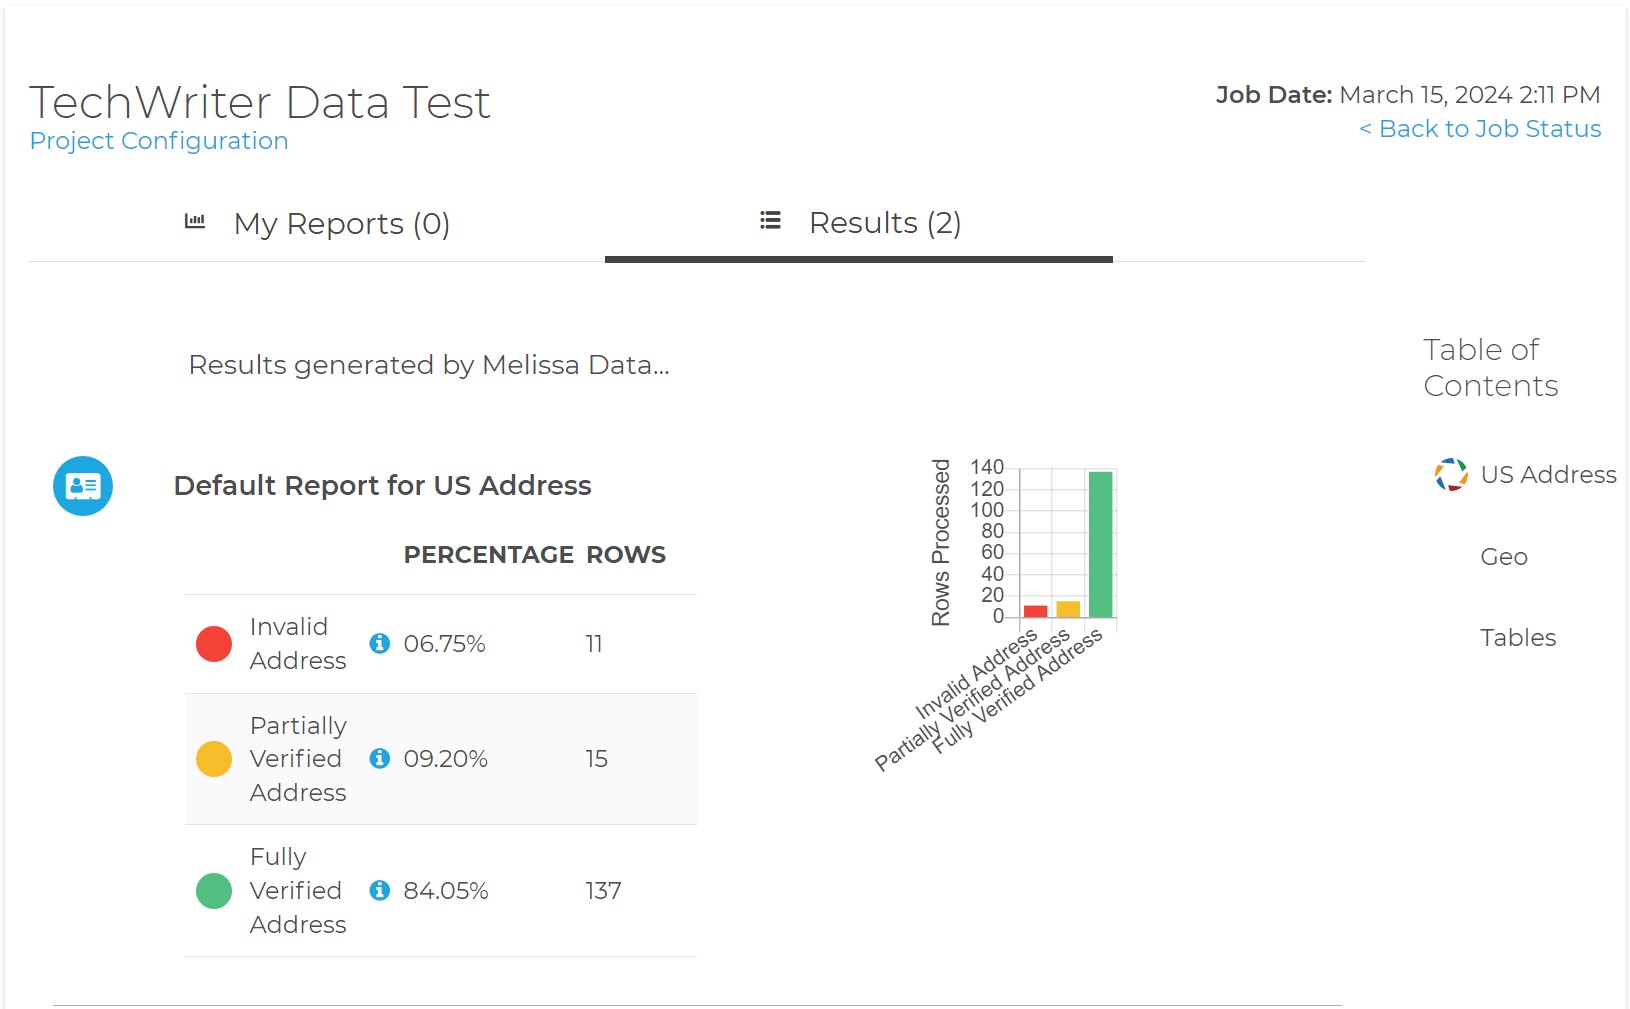
A completed job will also have detailed reports. You can access these by clicking the View Detailed Reports button under Reports.

These reports will depend on which service you use and display generated result codes. These codes will detail the overall status of your project, changes made to the data, and any errors encountered.
